I have had a longtime obsession with these Burger Buns. Be warned: once you make these you’ll never want store-bought buns again.
They’re the perfect way to elevate your burger game. Your summer cookouts will never be the same.
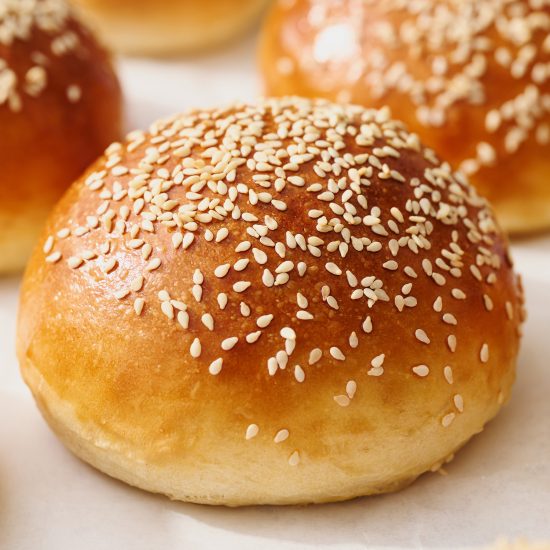
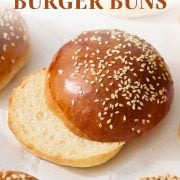
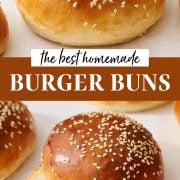
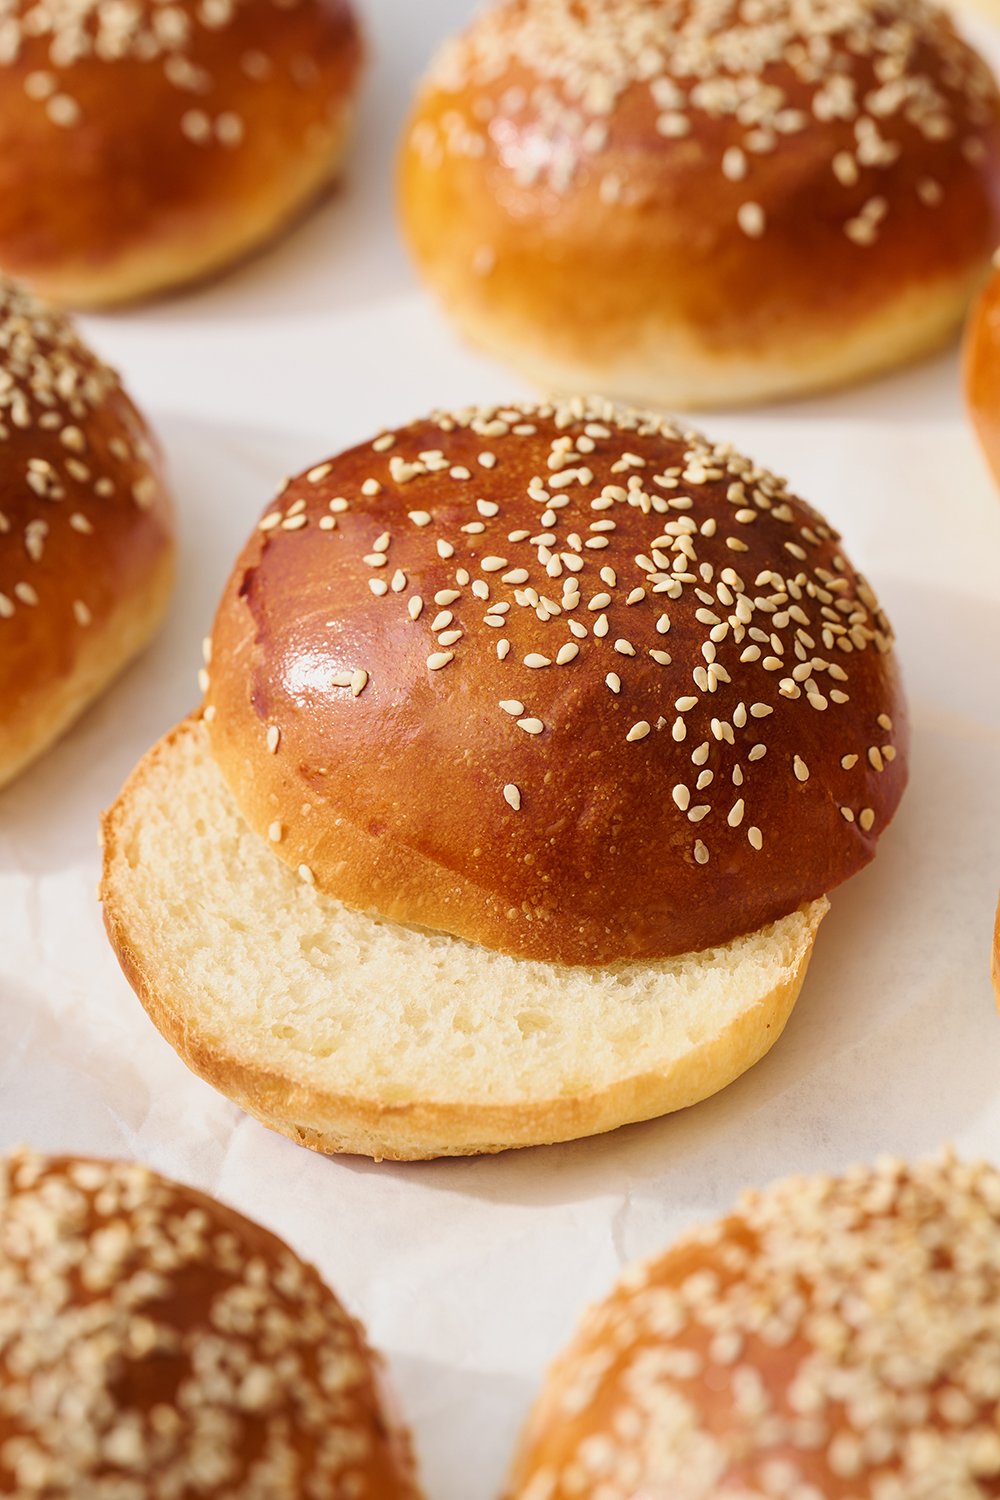
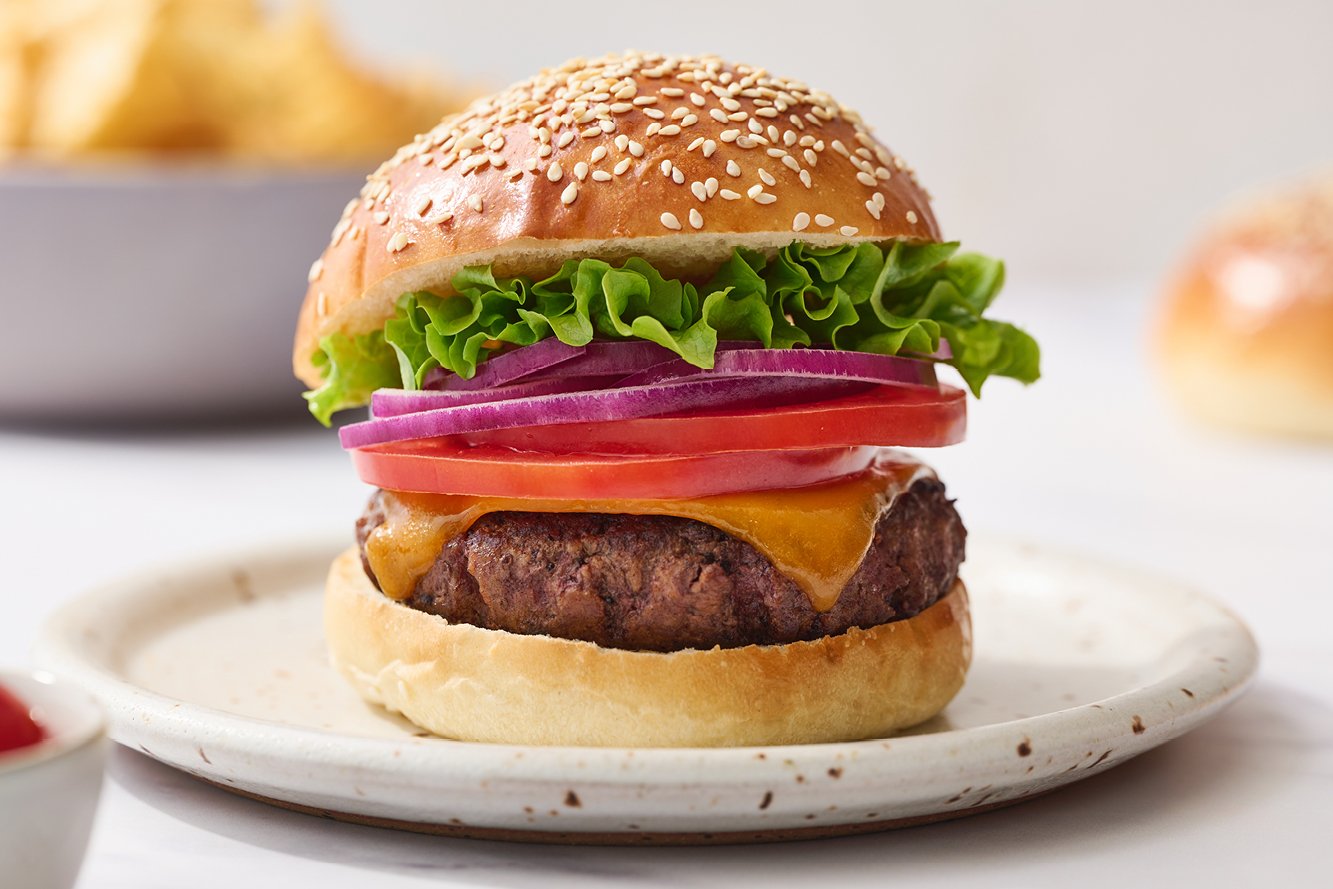
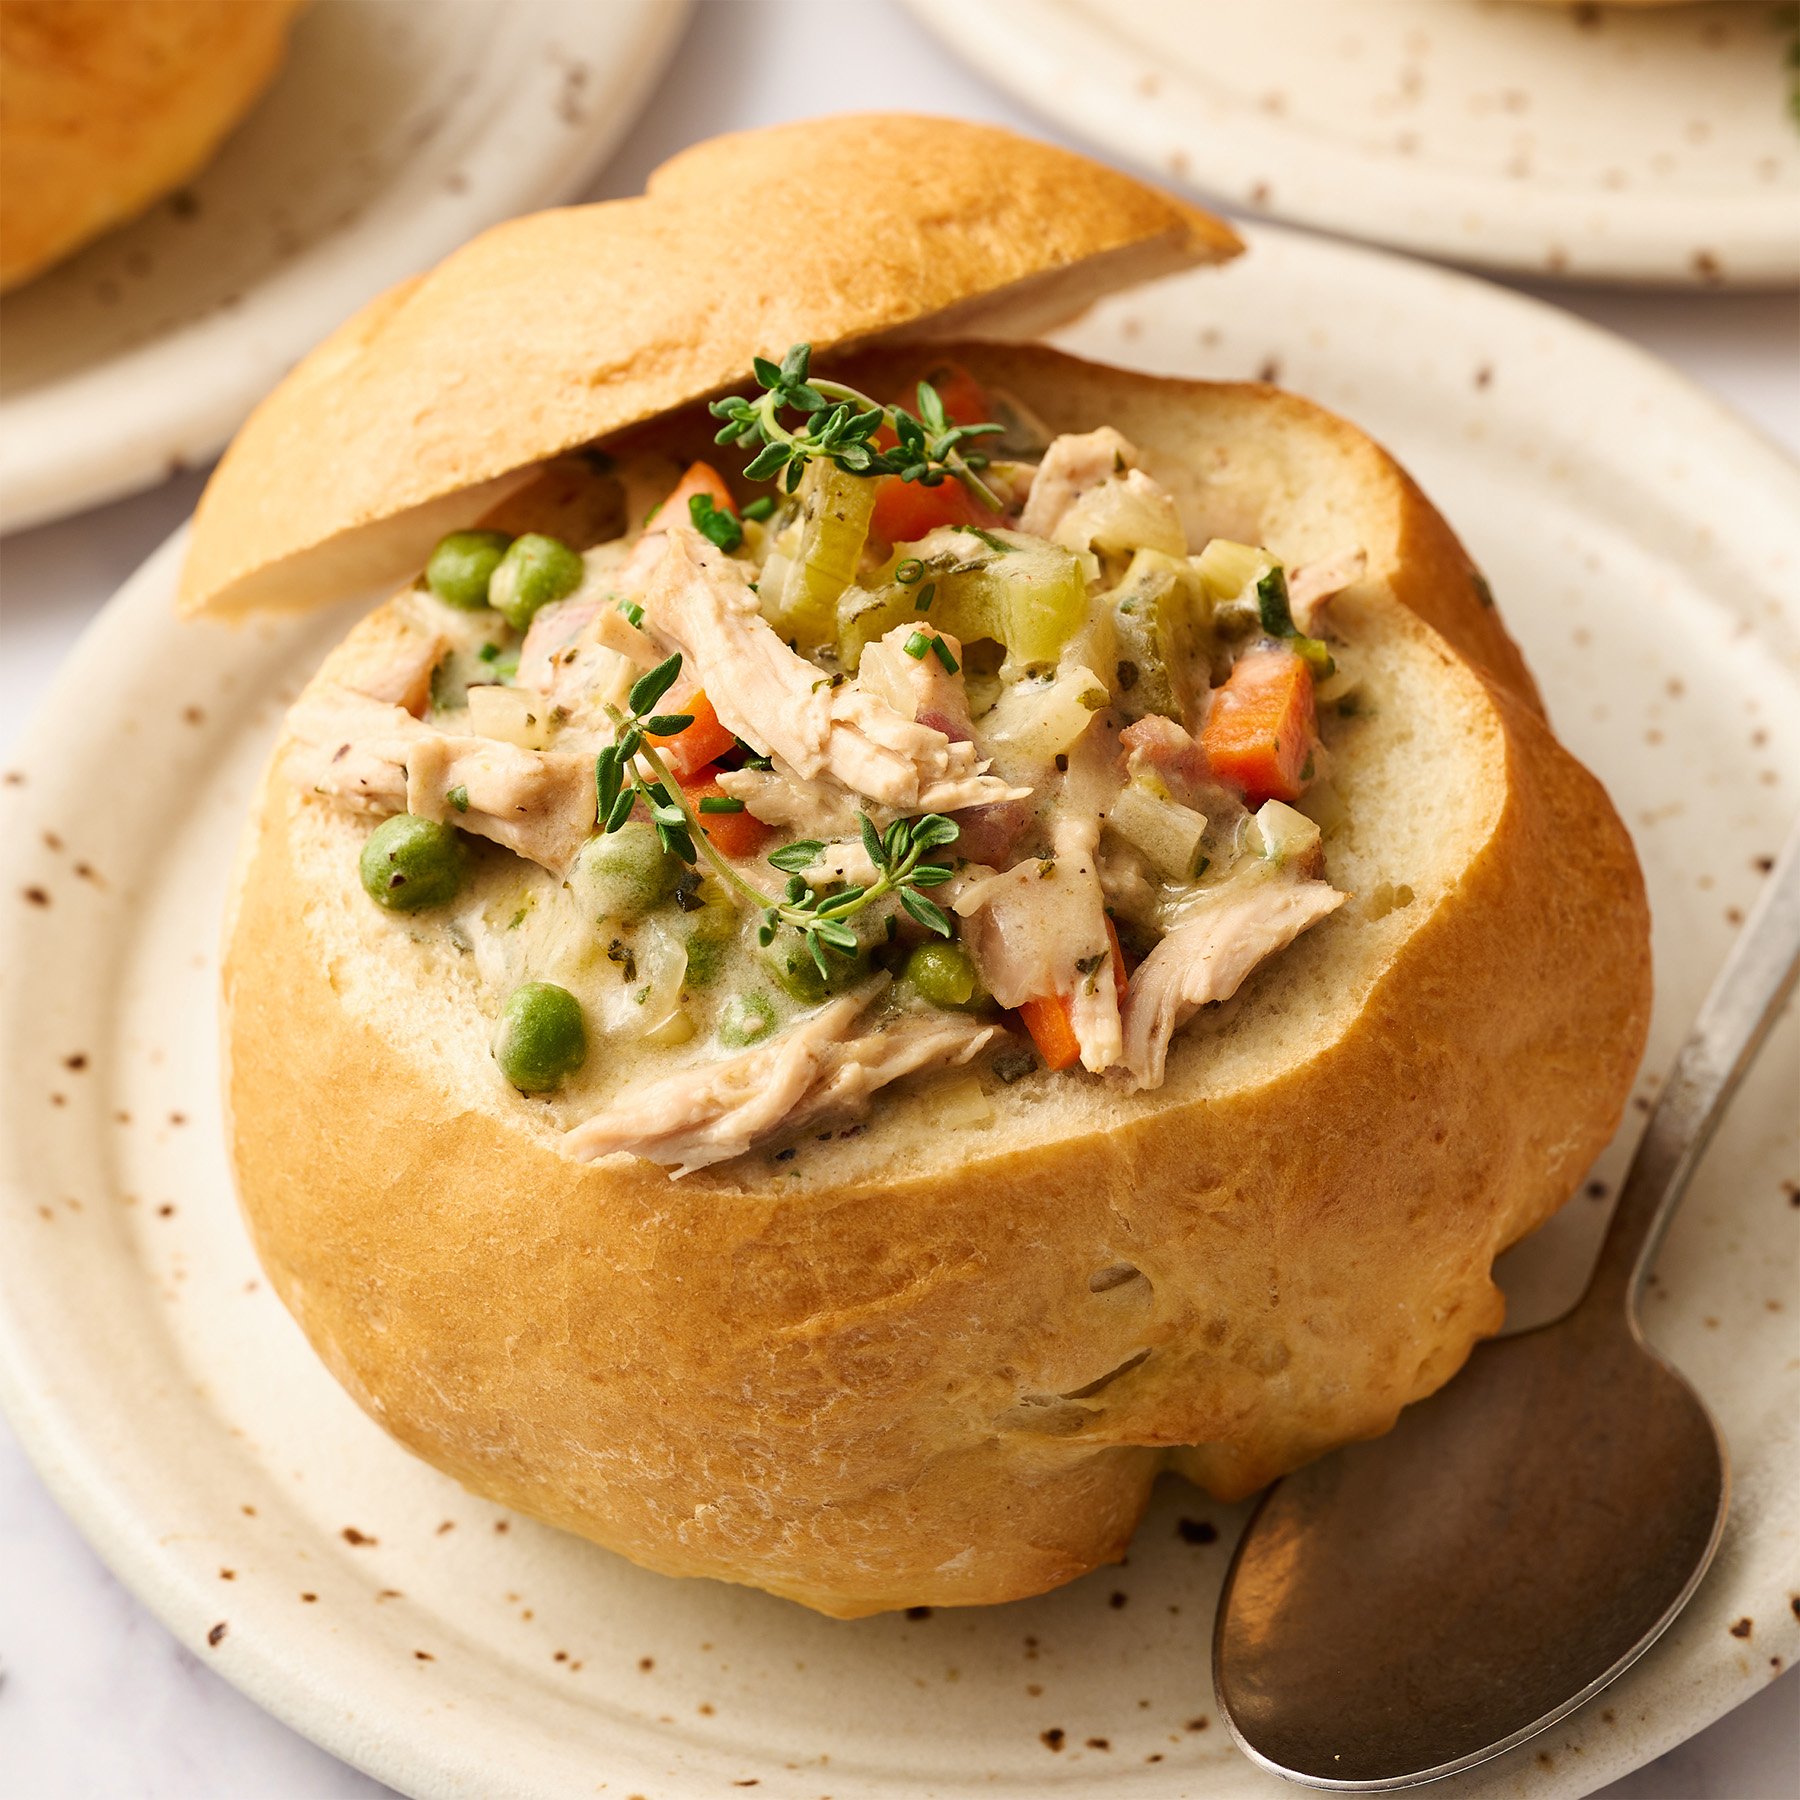
These homemade hamburger buns feature a light brioche base, which makes them incredibly fluffy yet rich, and a little crusty on the outside. They’re soft yet sturdy enough to contain even the juiciest burger or any sandwich.
Below, I’m sharing all my tips and tricks for how to make my homemade hamburger bun recipe, which will seriously wow anyone who comes to your next summer BBQ.
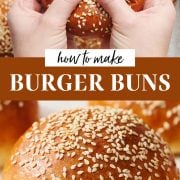
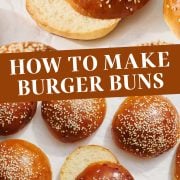
How to Make Homemade Burger Buns from Scratch
Ingredients for Hamburger Buns
- Warm milk – Whole milk, for best results. Between 105° and 120°F is perfect. The milk enriches this dough for a softer, fluffier texture.
- Warm water – Also at around 105° and 120°F. Too hot and it will kill the yeast; too cold and it will take forever to rise.
- Instant yeast – I prefer to use instant yeast, but active dry yeast will work too. More on this below.
- Sugar – Just a little, to bring some moisture to the buns and to help with browning, so please don’t skip the sugar.
- Egg – One large egg, about 56 grams in shell, at room temperature. Like the milk, the egg enriches the dough to make the buns rich, tender, and soft. You will need an additional egg for the egg wash.
- Bread flour + All-purpose flour– Measured correctly, preferably using a digital scale. It’s important to use bread flour and all-purpose flour for this recipe. More on this below.
- Salt – I prefer to use fine sea salt because I prefer the flavor, but table salt works just fine. The amount of salt used doesn’t make this bread salty, it instead lifts all the other flavors, making for a well-rounded flavor profile. Learn more about the differences between types of salt here.
- Butter – Used to add moisture and flavor, resulting in a slightly buttery and rich yet light and fluffy texture. Always use unsalted butter in baking.
- Sesame seeds – To top the rolls with. Optional, but I love them! You can use poppy seeds, everything bagel seasoning, or leave them plain – totally up to you.
Overview of Instructions – How to Make Homemade Hamburger Buns
- Combine the first few ingredients. In the bowl of a stand mixer fitted with the dough hook, combine the milk, water, yeast, sugar, and egg.
- Add the flour. Mix until incorporated.
- Mix in the salt and butter. Knead on medium-low speed for about 10 minutes, or until the dough comes together into a soft yet tacky dough (should not be unbearably sticky). Avoid adding too much extra flour because it will create tough buns. It’s better to be sticky at this step, I promise!
- Allow to rise. Transfer the dough to a lightly oiled bowl. Cover with plastic wrap and let rise in a warm place until doubled in size, about 1 to 2 hours. Note that enriched dough will take a little longer to rise than dough made without butter, milk, or eggs.
- Prepare the pans. Line two baking sheets with parchment paper or silicone baking mats.
- Divide the dough and shape the buns. Divide the dough into 8 equal parts. Gently roll each portion of dough into a ball and place on a parchment paper-lined baking sheet, 2 to 3 inches apart.
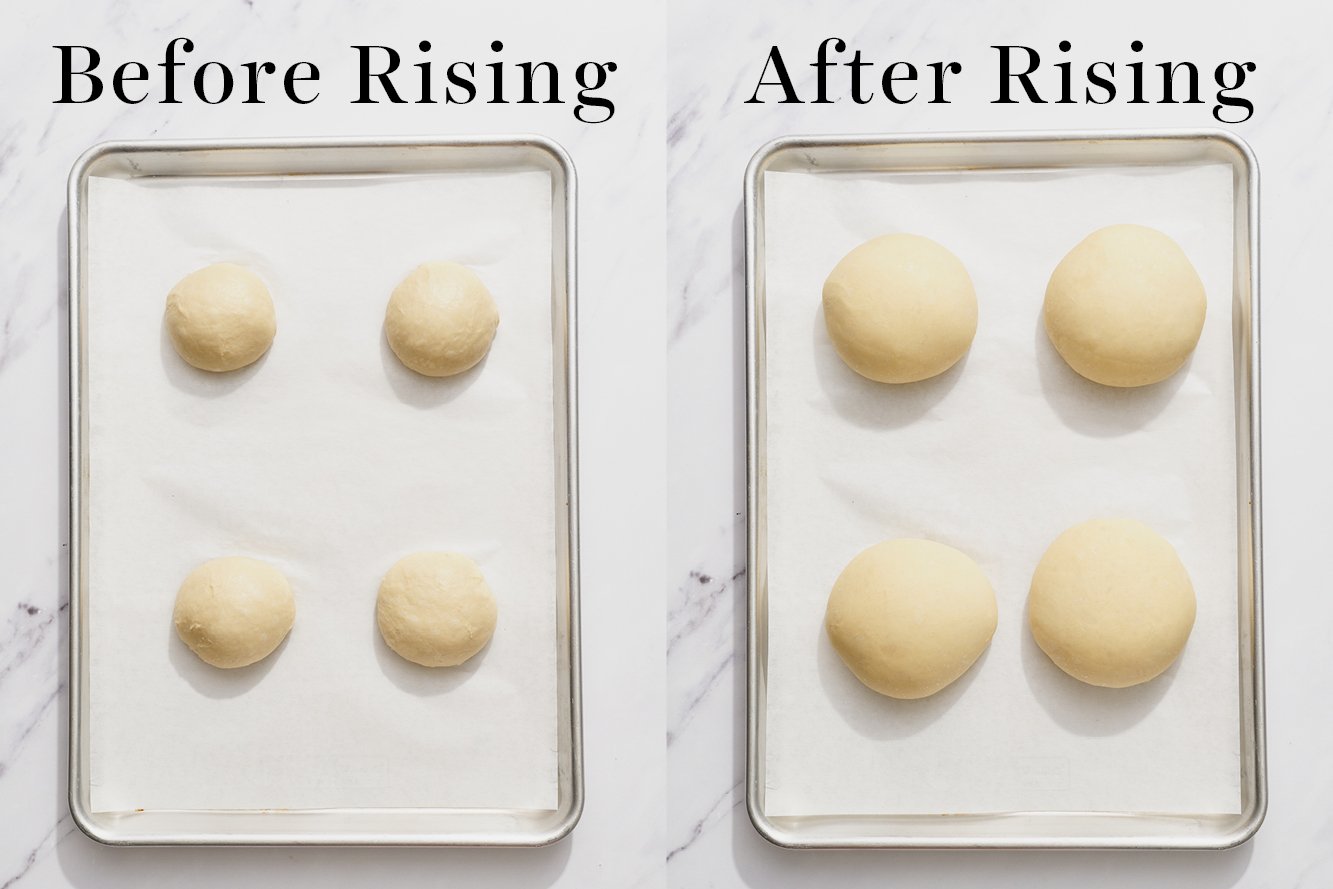
- Allow to rise again. Cover with a clean towel and let rise again until puffy and almost doubled, 1 to 1 1/2 hours.
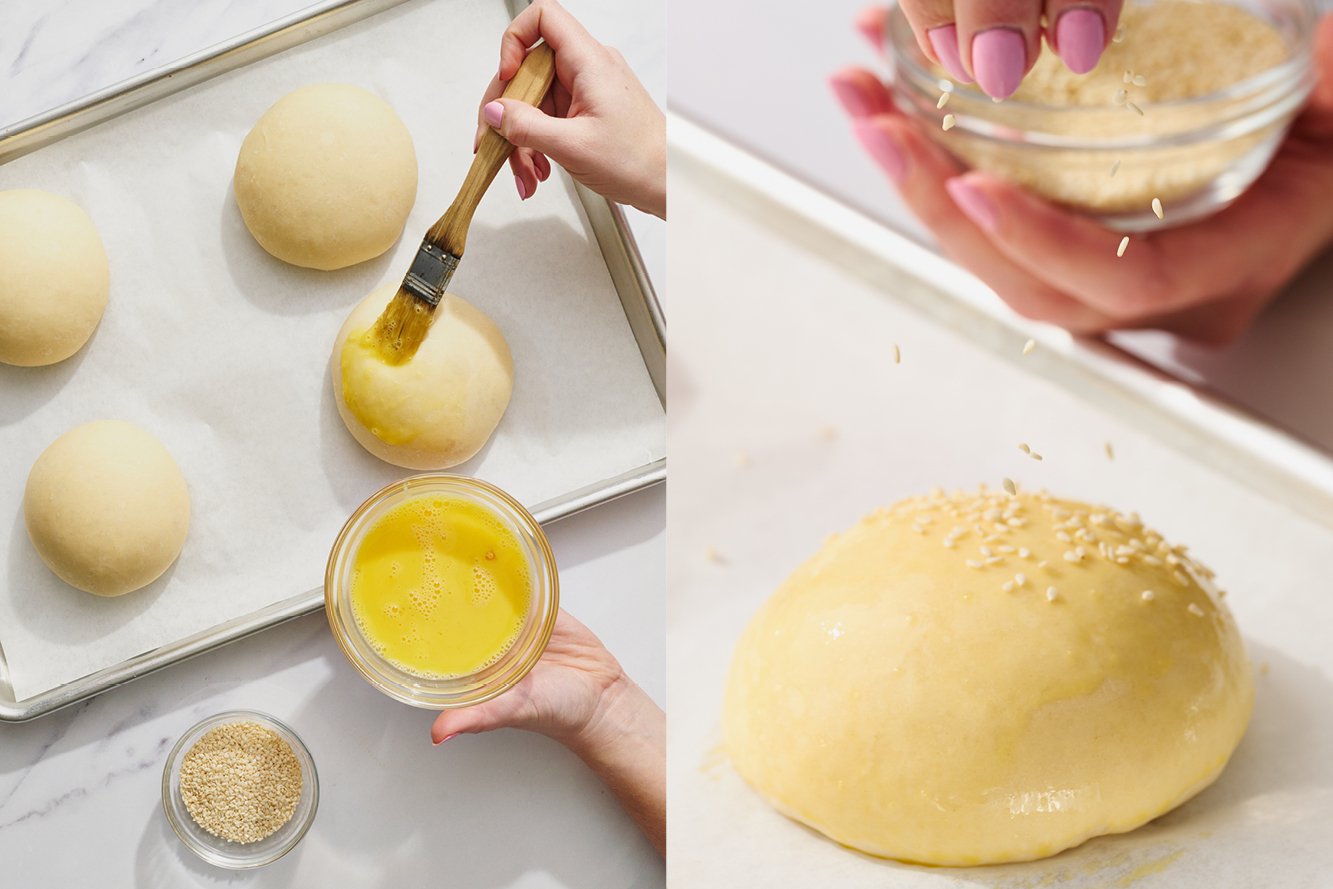
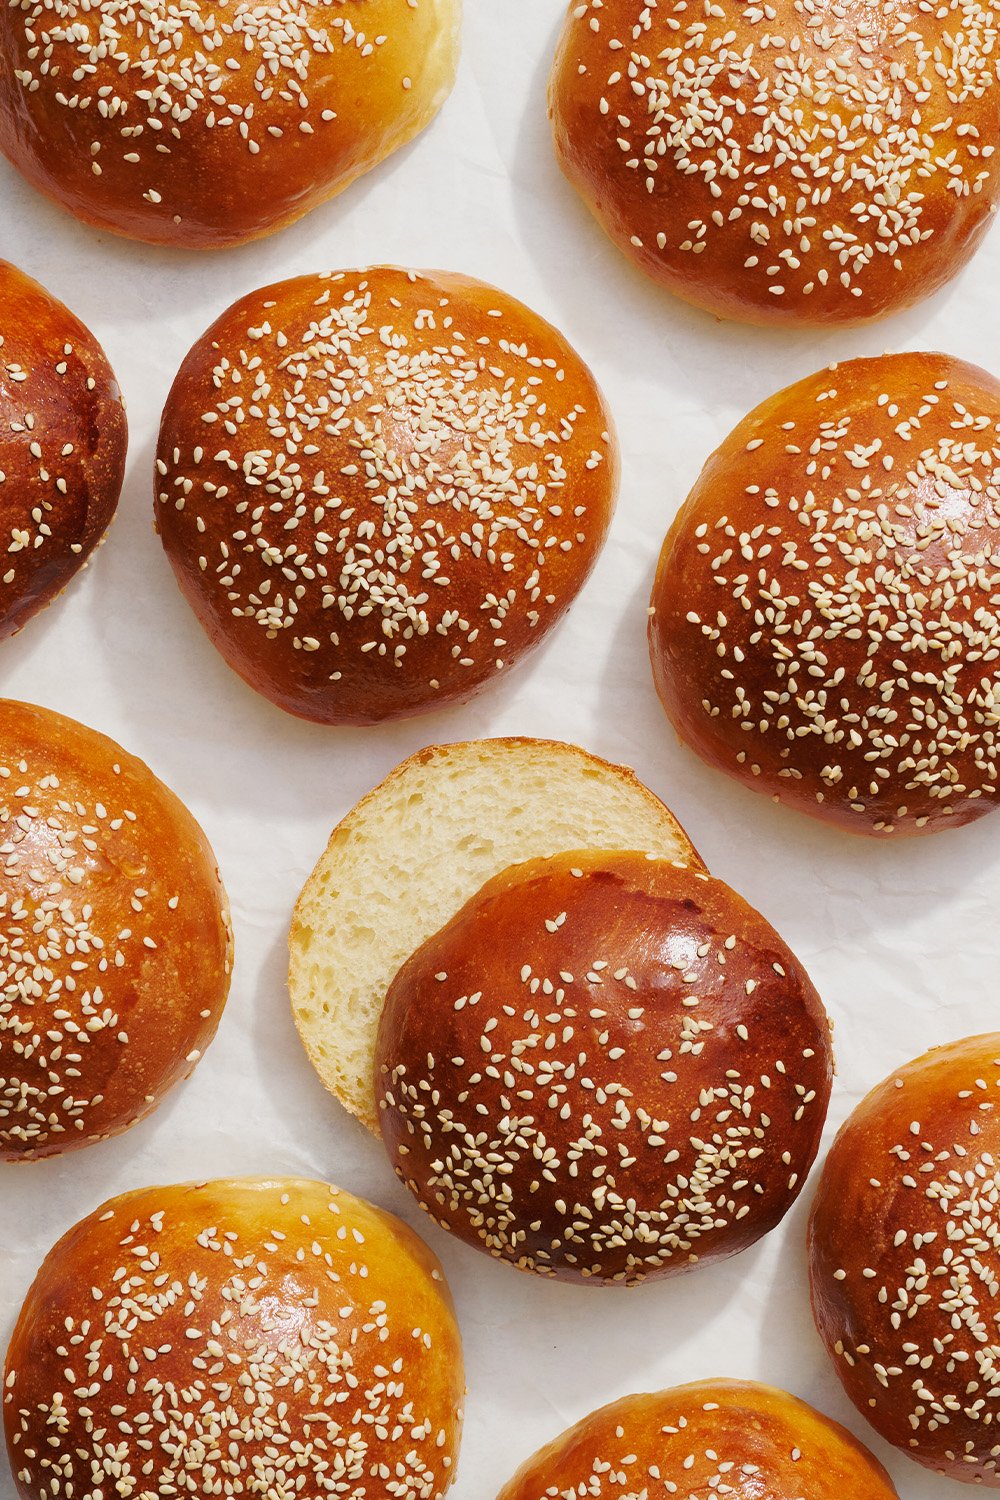
- Egg wash the burger buns. Brush the tops of the buns lightly with the egg wash. This will encourage a deeply golden shiny exterior and provide a glue for the sesame seeds to stick to. Sprinkle with sesame seeds.
- Bake. Bake at 400°F for about 15 minutes, rotating halfway through baking, until the tops are golden brown. Transfer to a rack to cool completely before slicing, topping, and serving.
Which Yeast Is Best to Use For Burger Buns?
Instant yeast, also called rapid rise or quick rise yeast, helps these buns rise faster. You can buy my favorite yeast on Amazon. This type of yeast is specifically formulated to allow you to skip proofing (the step where you combine the yeast with warm liquid and allow it to sit for a few minutes until it becomes bubbly). Instant yeast can be directly added in with all of the other ingredients.
How Can I Use Active Dry Yeast Instead Of Instant Yeast?
Yes, you can swap instant yeast for active dry yeast at a 1:1 ratio. Active dry yeast will take about 20% longer to rise. Here’s how to slightly speed up that process:
- Combine the active dry yeast with the warm water and warm milk called for in the recipe and allow it to proof for 5 minutes, until frothy.
- Then add to the bowl with the other ingredients and proceed with the recipe as written.
How to Tell When Burger Bun Dough Has Properly Risen
- After kneading, shape the dough into a ball. Place in a lightly-oiled mixing bowl. I like to use a glass bowl, so I can see how much it’s rising. I’ll even snap an iPhone picture of the dough before rising, so I can compare it later.
- Cover the bowl with plastic wrap or a clean kitchen towel. Let the dough rise in a warm, draft-free location. Near a sunny window or even a hot oven or laundry dryer (away from scented dryer sheets) are great options. Ideal rise temperatures are between 80°F and 90°F. Lower temperatures will require more rising time.
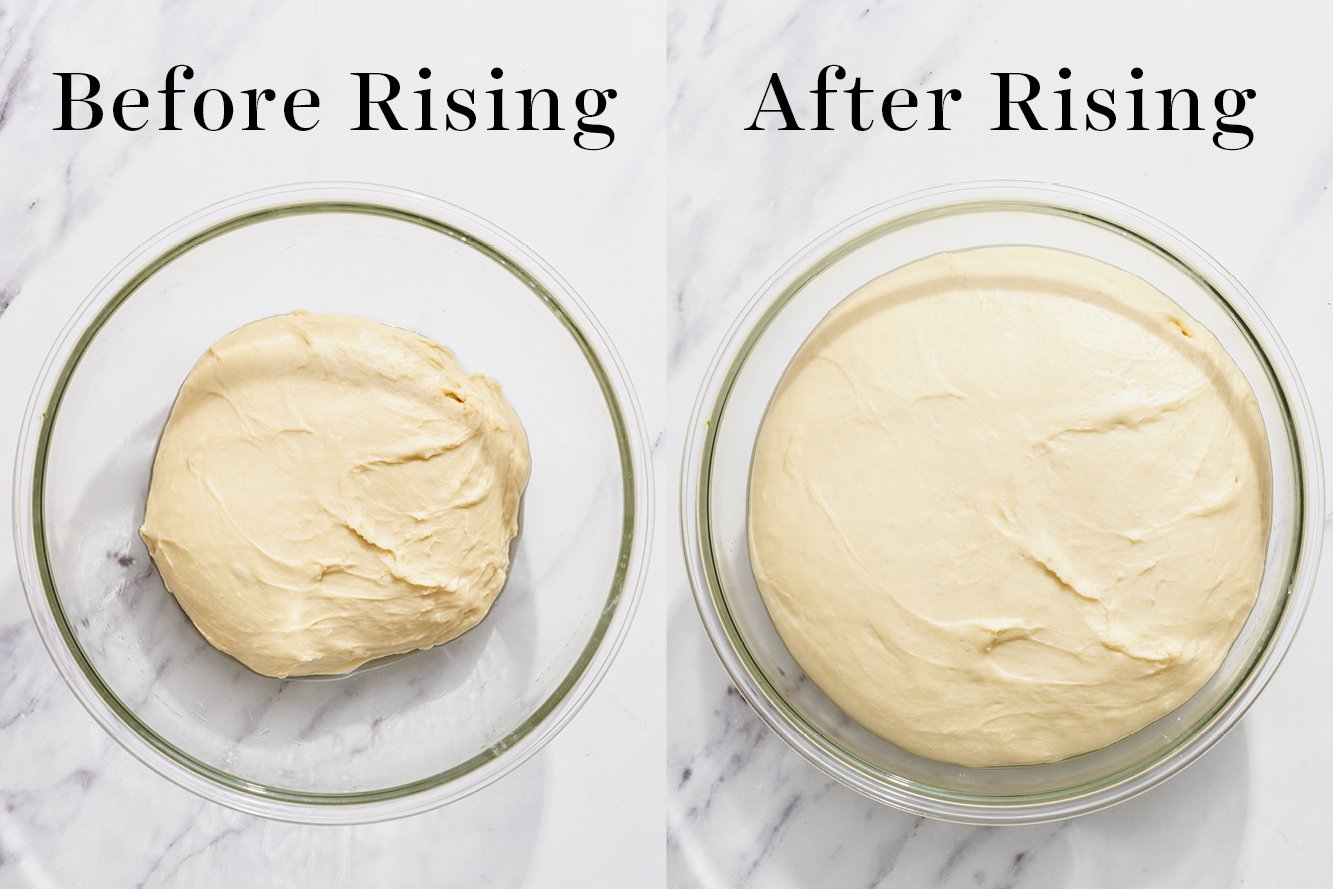
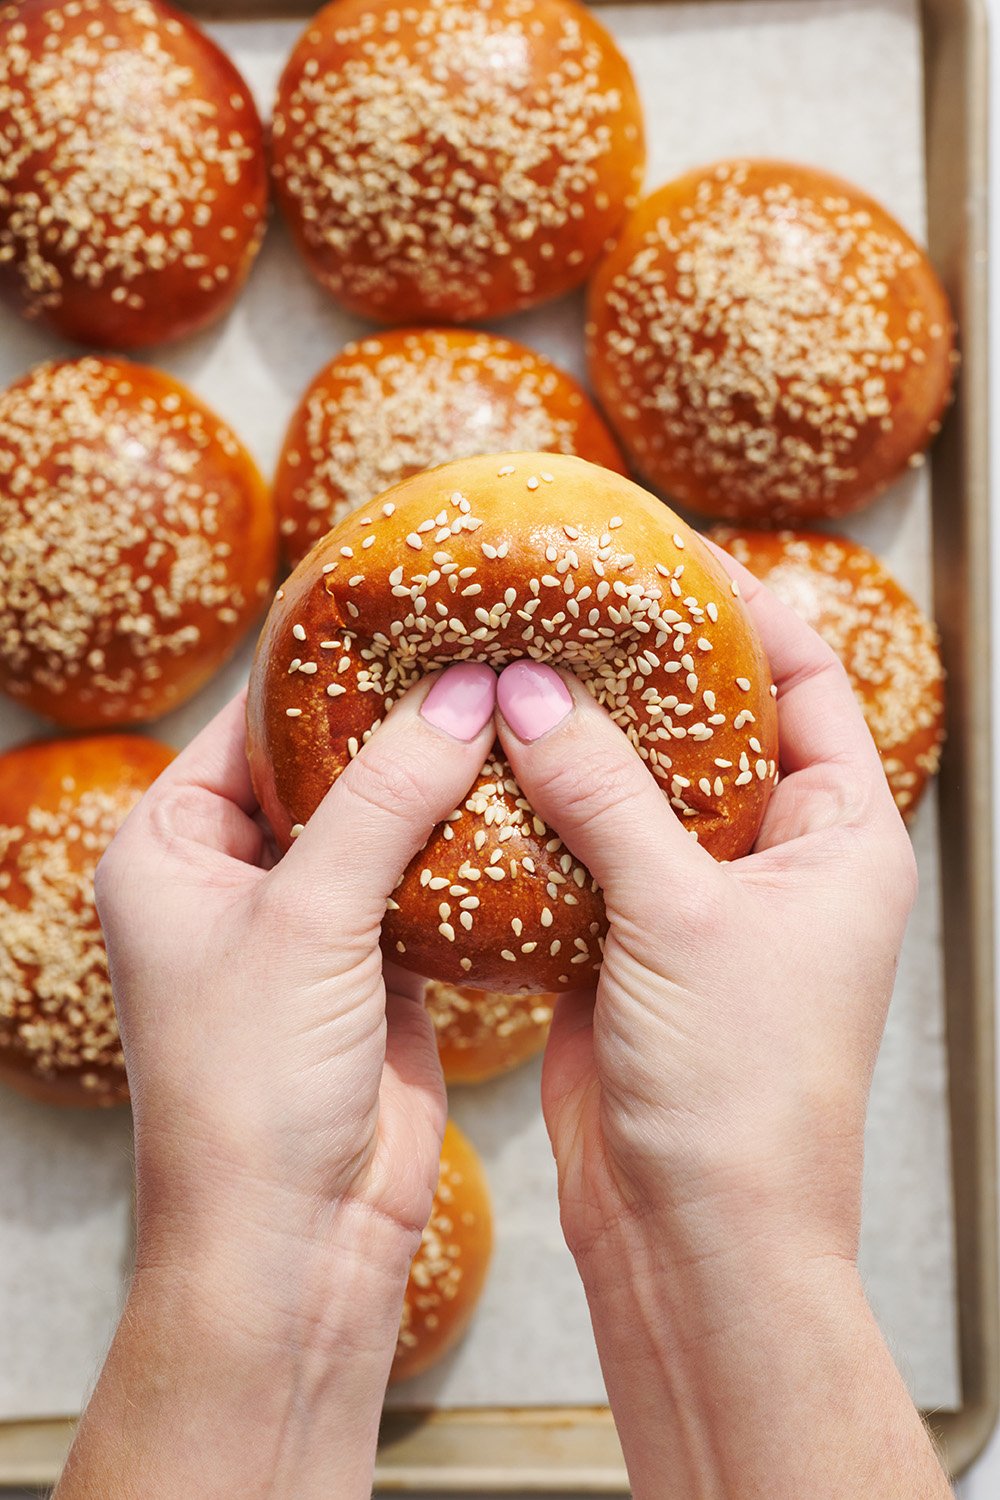
- The dough is done rising when it’s about doubled in size and passes the “ripe” test. Gently stick two fingers in the risen dough up to the second knuckle and then take them out. If the finger marks remain, the dough is ready for shaping into balls. If not, cover and let the dough rise longer until it is.
- The same finger test can be done again after the second rise, when the rolls are shaped and getting ready for baking.
Here’s what my burger buns dough looked like before and after rising:
How To Tell If You Have Over-Proofed Your Hamburger Buns
This can happen easily if your kitchen is very hot, or if you’re super busy and forget to check on the buns. If your buns have over-proofed, they will likely deflate while egg washing, or look deflated once baking. Over-proofed buns will look a little sad, but they should still taste fine.
Do I Have to Use Bread Flour For These Burger Buns? Can I Use Just All-Purpose Flour Instead?
For best results, I really recommend sticking with both bread and all-purpose flour as written. Bread flour contains a higher percentage of protein than all-purpose flour, which helps develop the gluten in the dough. Gluten is the backbone of any bread’s structure and since we are adding ingredients that prohibit gluten development (butter, egg, sugar), this dough needs that additional protein to develop its structure and prevent them from falling flat. When testing this recipe, I found that making the buns with all bread flour resulted in buns that were too tall and stiff. The addition of all-purpose flour balances this out.
Can I Use Whole Wheat Flour For These Burger Buns?
Check out my Whole Wheat Burger Buns recipe, I’ve made the adjustments so you don’t have to!
Can I Knead This Dough By Hand Without A Mixer?
Probably not, unfortunately. This dough is on the sticky side and requires a lot of kneading to develop that gluten, which is best done in a stand mixer with the dough hook attachment. If you want to give this recipe a try without a stand mixer, check out my How to Knead Dough article here.
How To Make Fluffy Bread
- Avoid adding too much extra flour to the dough. Since this dough is enriched and takes quite a while to come together, it’ll look really wet and sticky. Your instinct might be to add extra flour; however, any extra flour will create a denser, tougher bun instead of the light, fluffy, brioche-style bun we want.
- It’s better to be sticky than dense. The sticky factor will continue to lessen as the dough is kneaded and especially as it rises. If the dough doesn’t seem like it’s coming together at all, let it rest for about 10 minutes before continuing kneading to relax the gluten.
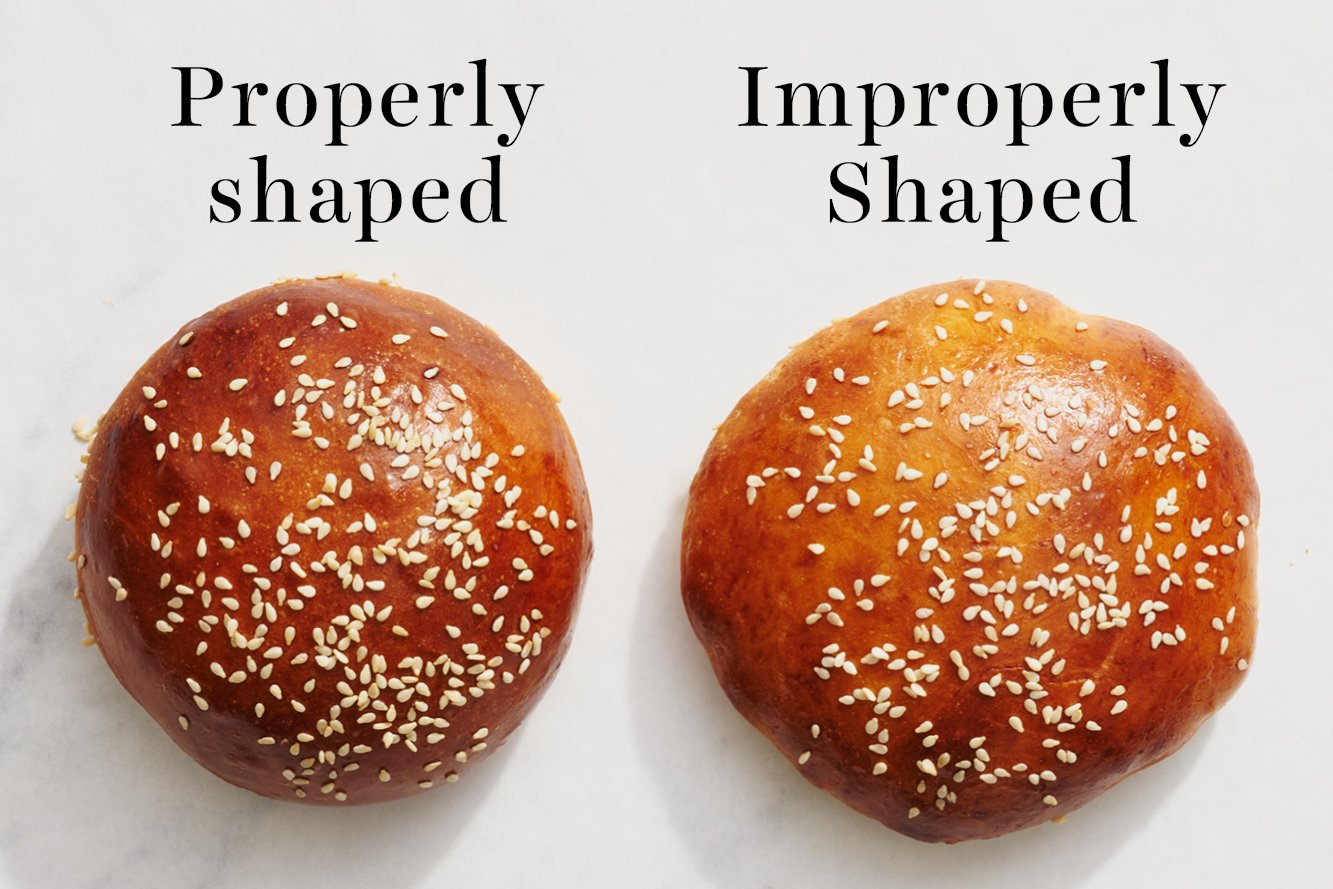
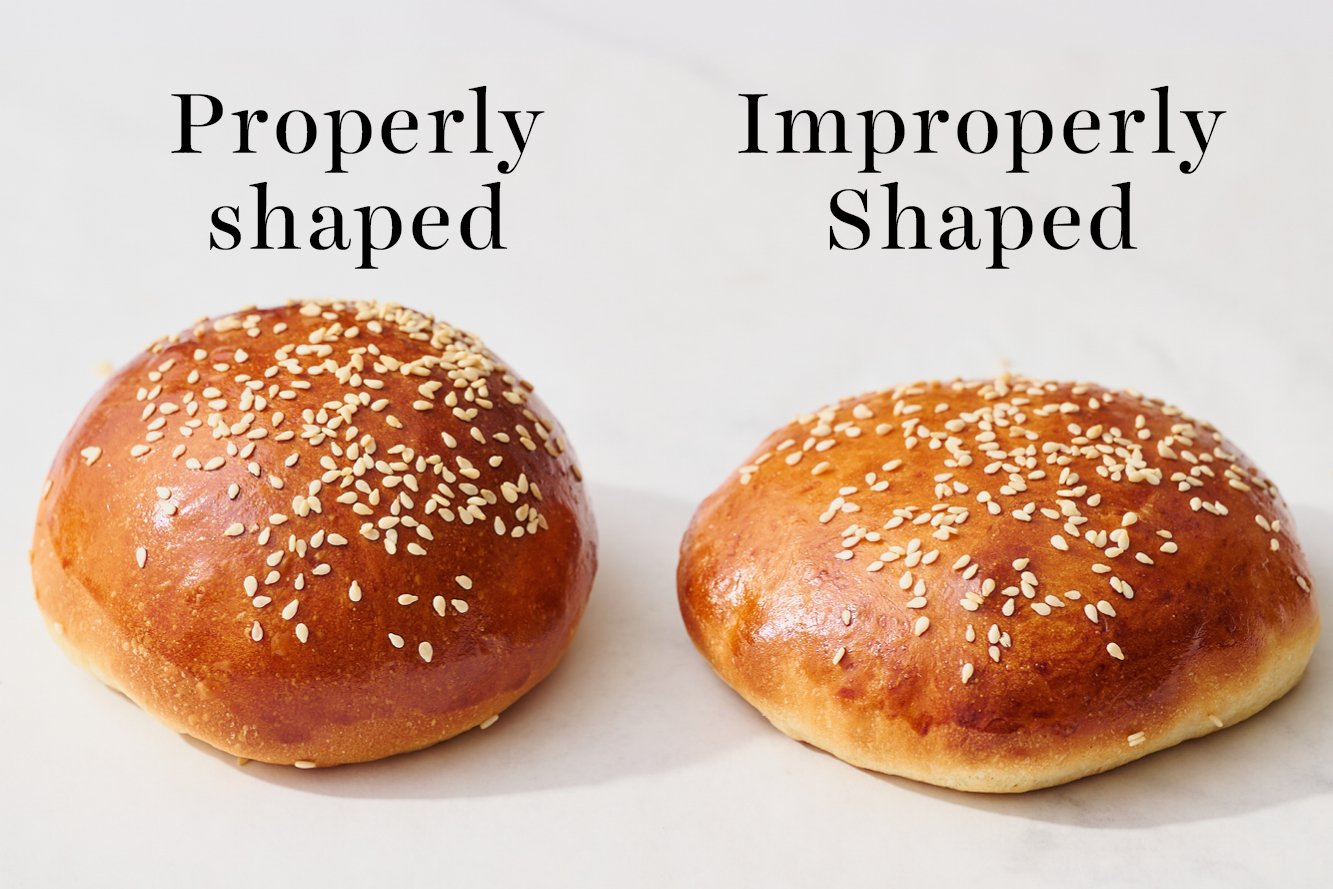
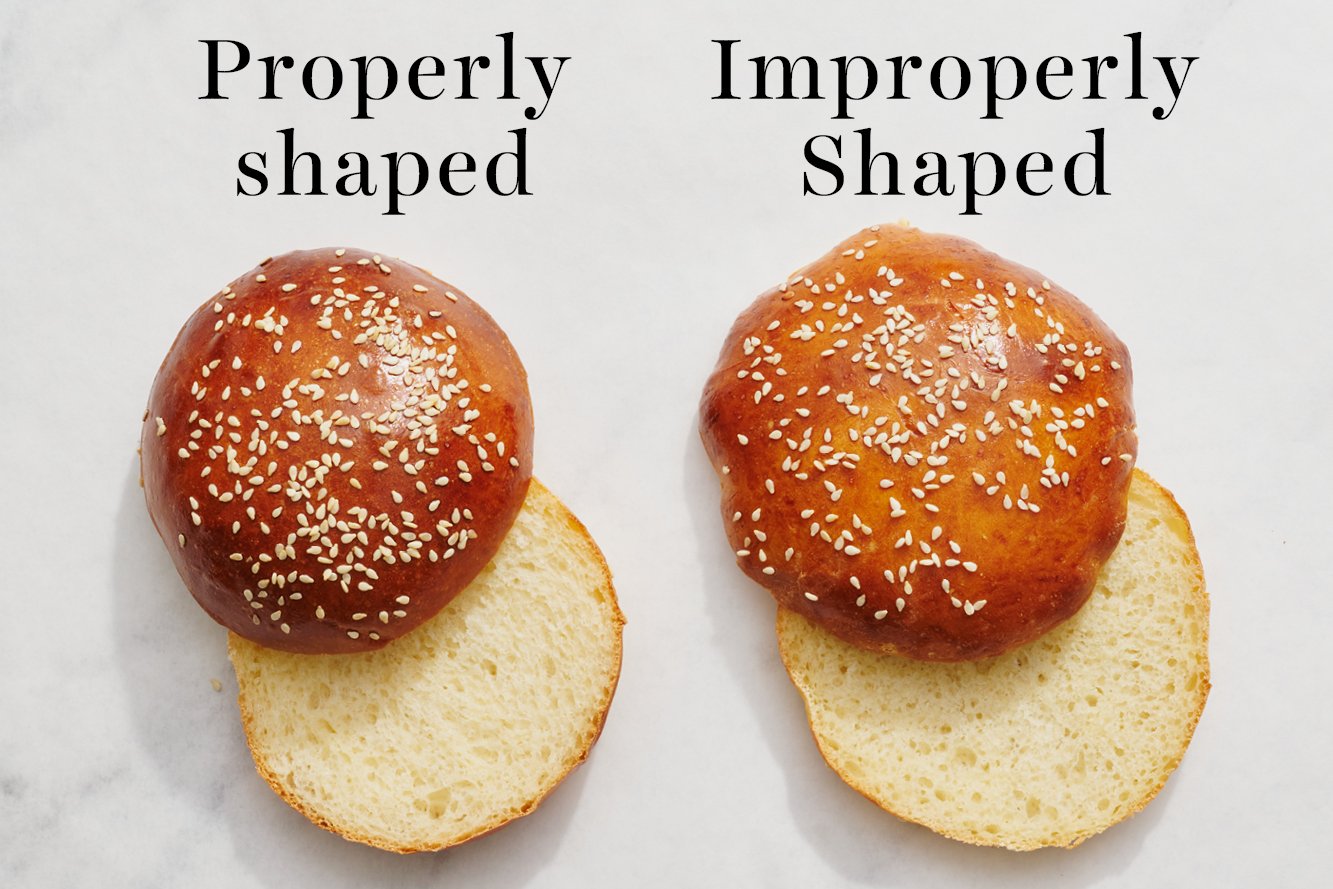
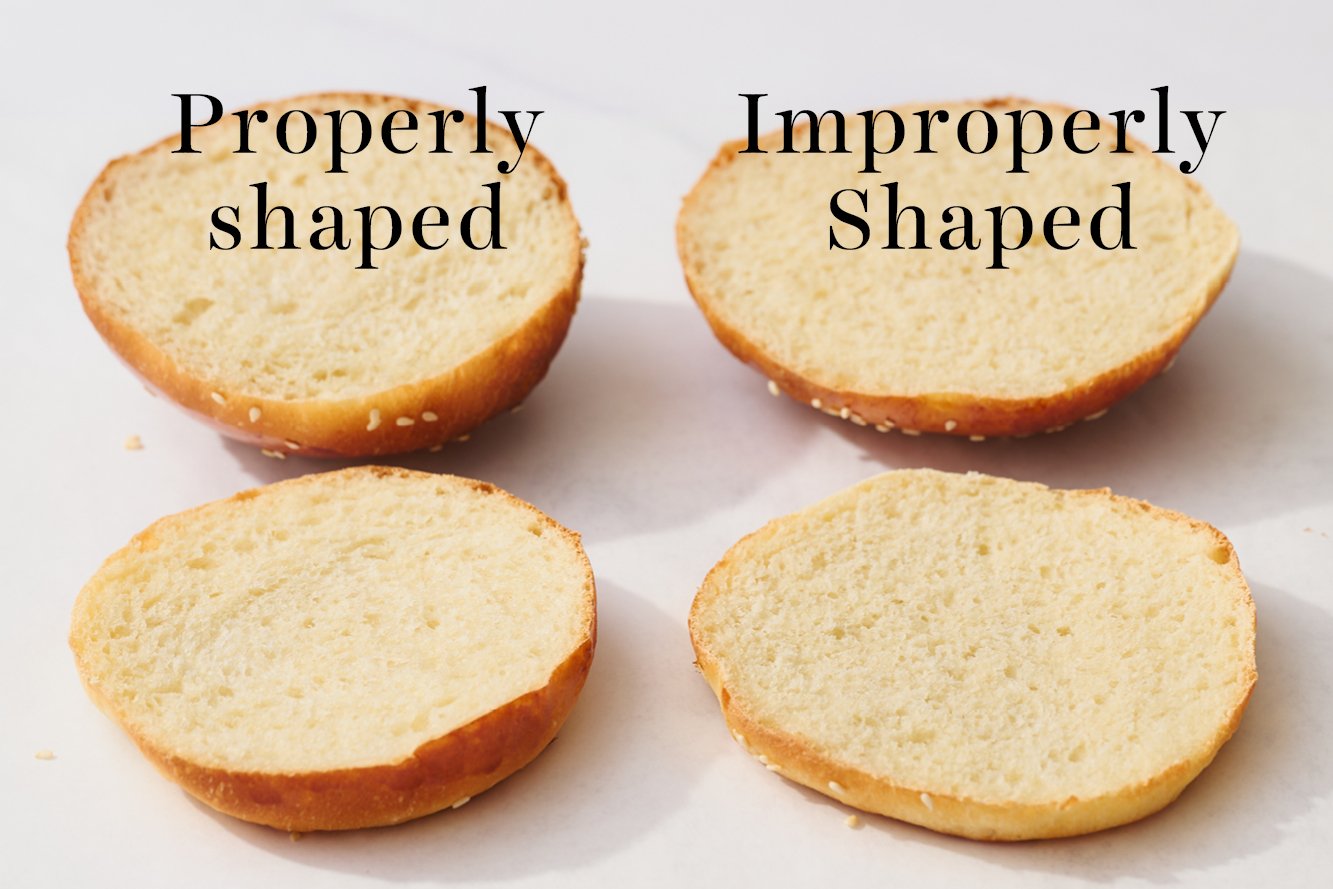
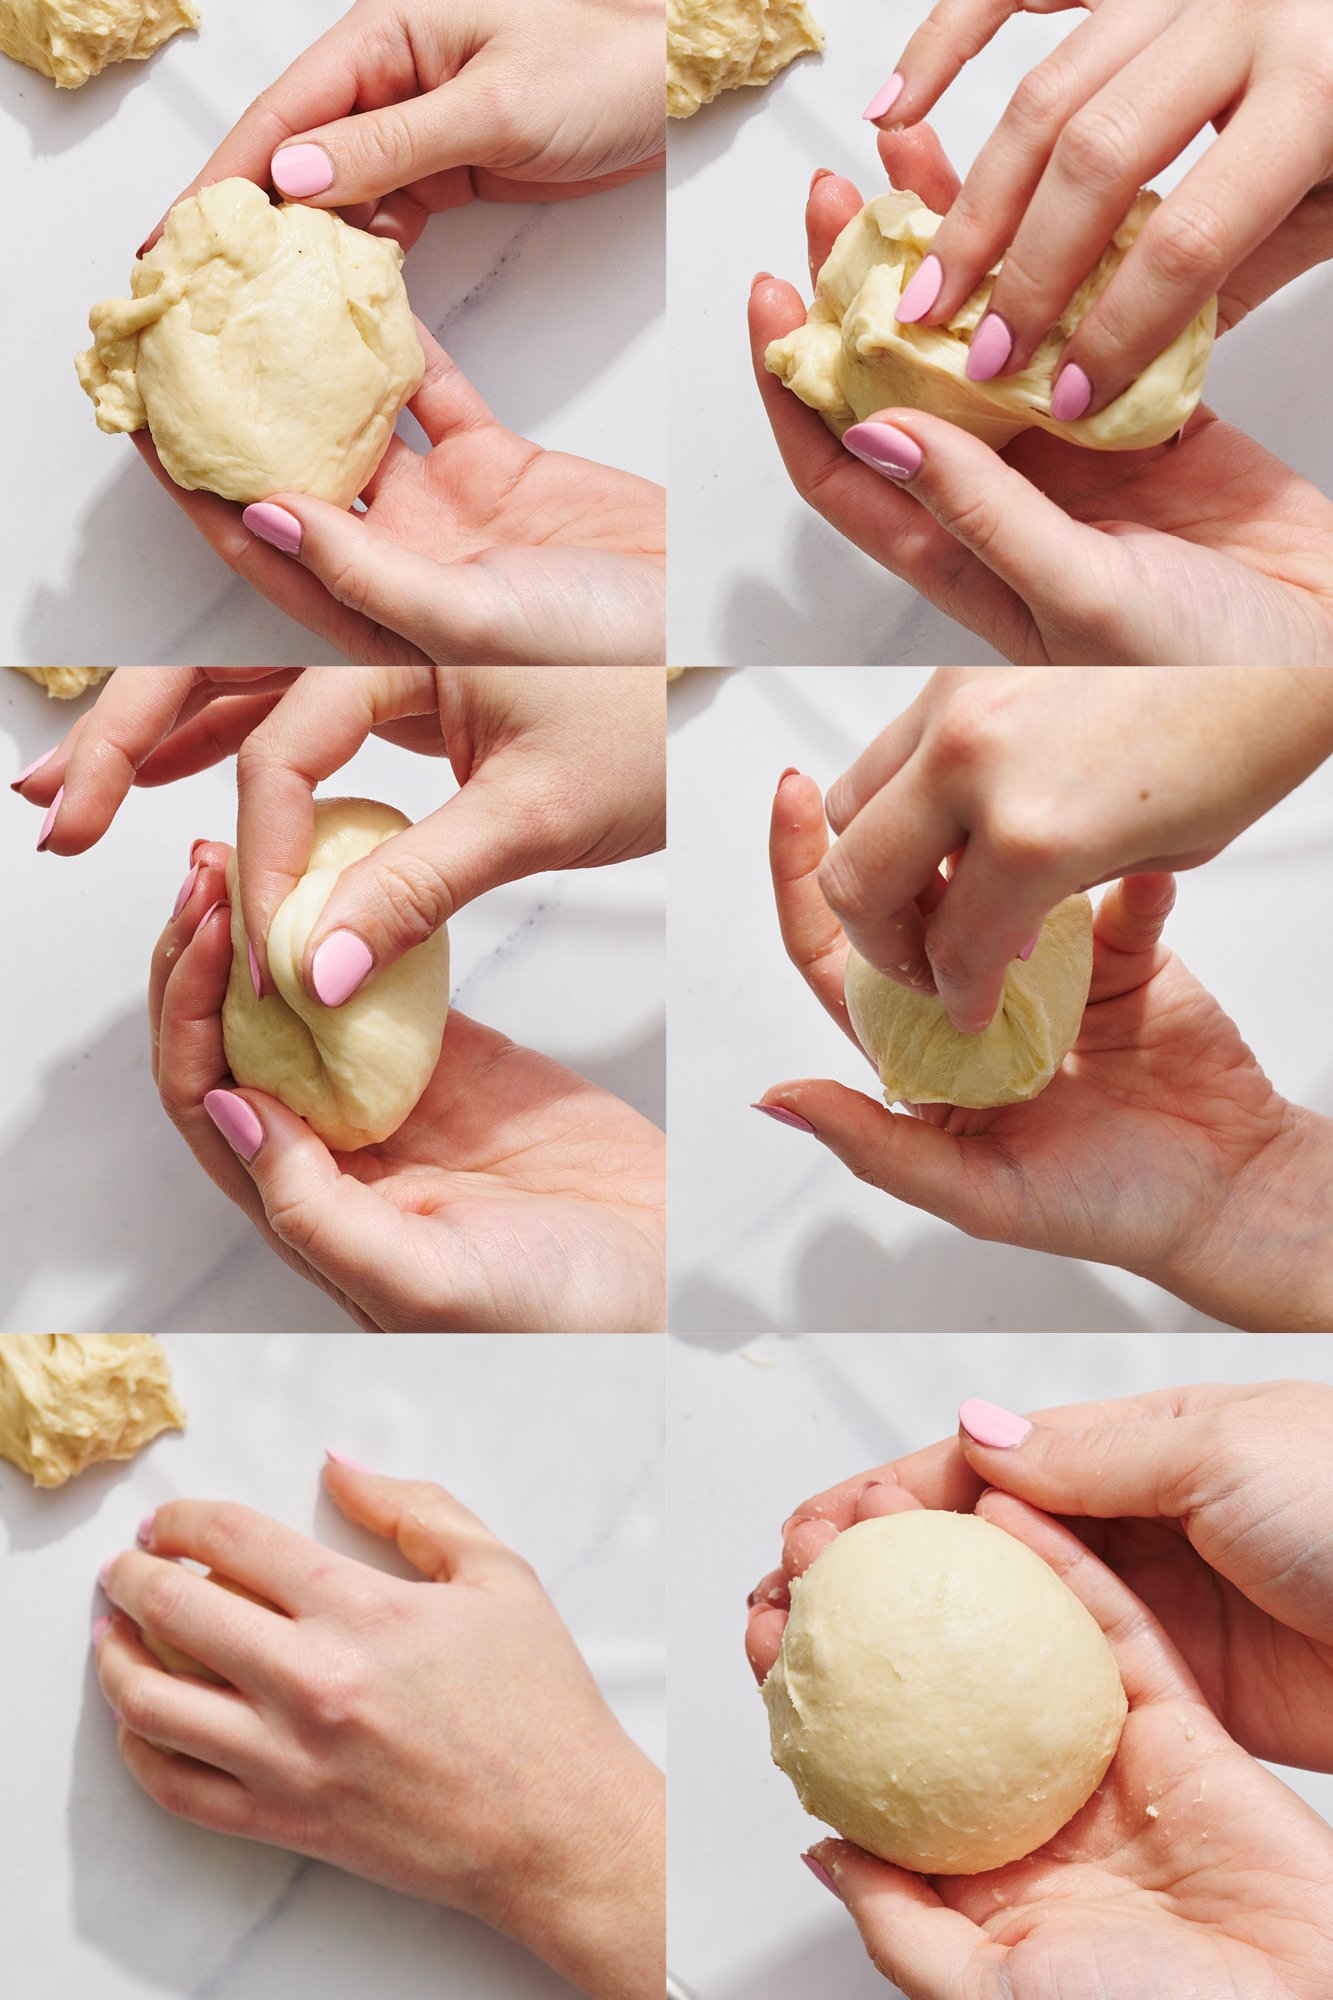
How to Shape Burger Buns
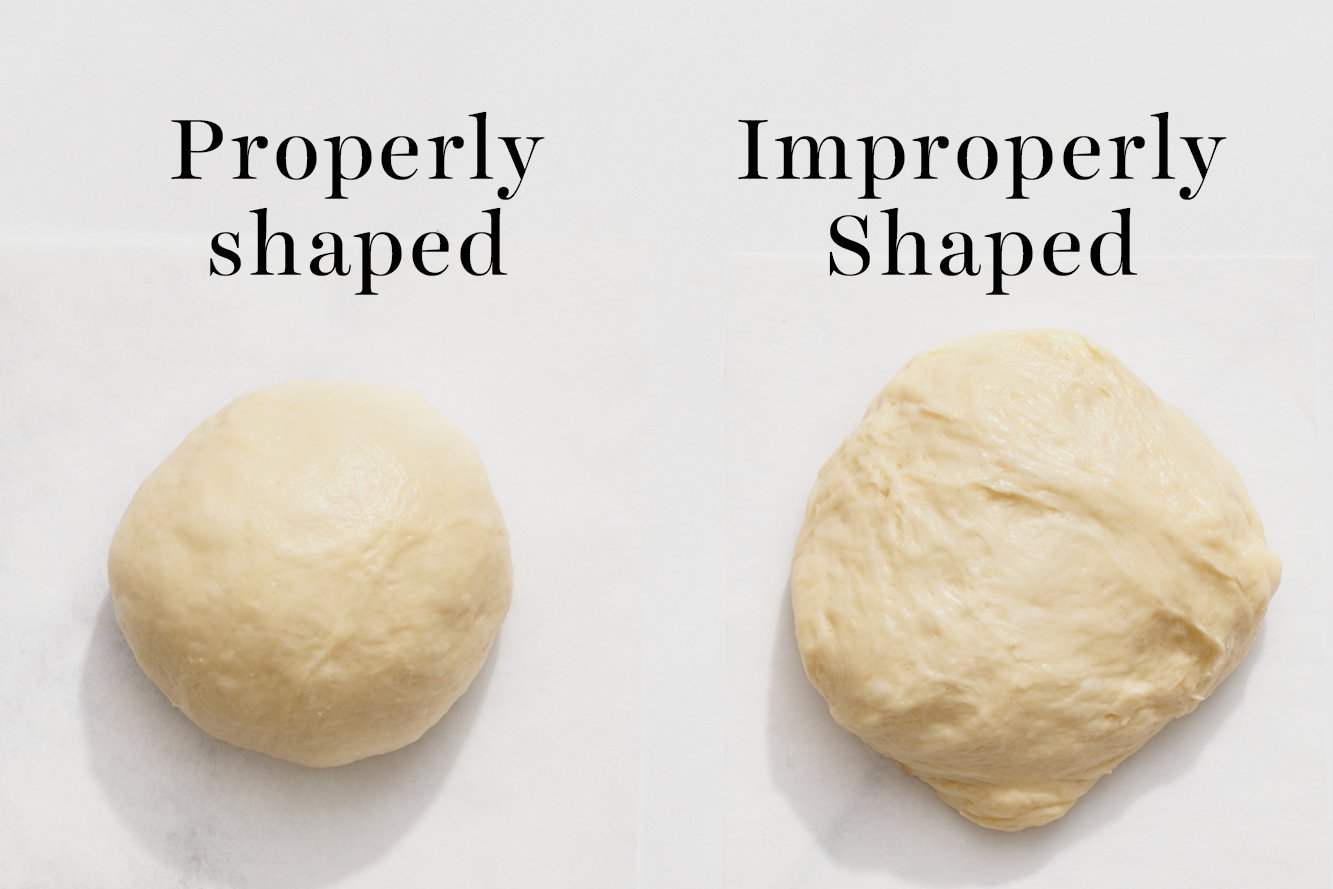
Knowing how to properly shape burger buns, as well as bread rolls, makes the difference between sad flat buns and beautifully round tall ones that look professional. Just take a look at how this recipe looks when properly shaped vs. improperly shaped:
- Deflate the dough. Once the dough is risen, press it down to deflate it slightly.
- Place on work surface. Place the dough onto a clean surface (not a floured surface).
- Divide the dough. Use a bench scraper to section the dough into 8 equal pieces. Feel free to eyeball it, but if you’re a perfectionist like me, weigh the entire mass of dough, divide that number by 8, then portion each piece perfectly by weight.
- Shape into rounds. As you’re shaping each piece into a round, make sure to tug on pieces of dough to bring towards a central point. Pinch those pieces together to create a very tight, taught ball of dough. Roll the ball on your work surface to even out. This will help the buns rise beautifully.
- Don’t flour the work surface. Don’t flour your work surface when shaping the buns because you want some resistance to roll them into taut balls.
- Tip if the dough is too sticky to handle easily: Very lightly oil or flour your hands – just enough that you can handle the dough without it sticking to your hands.
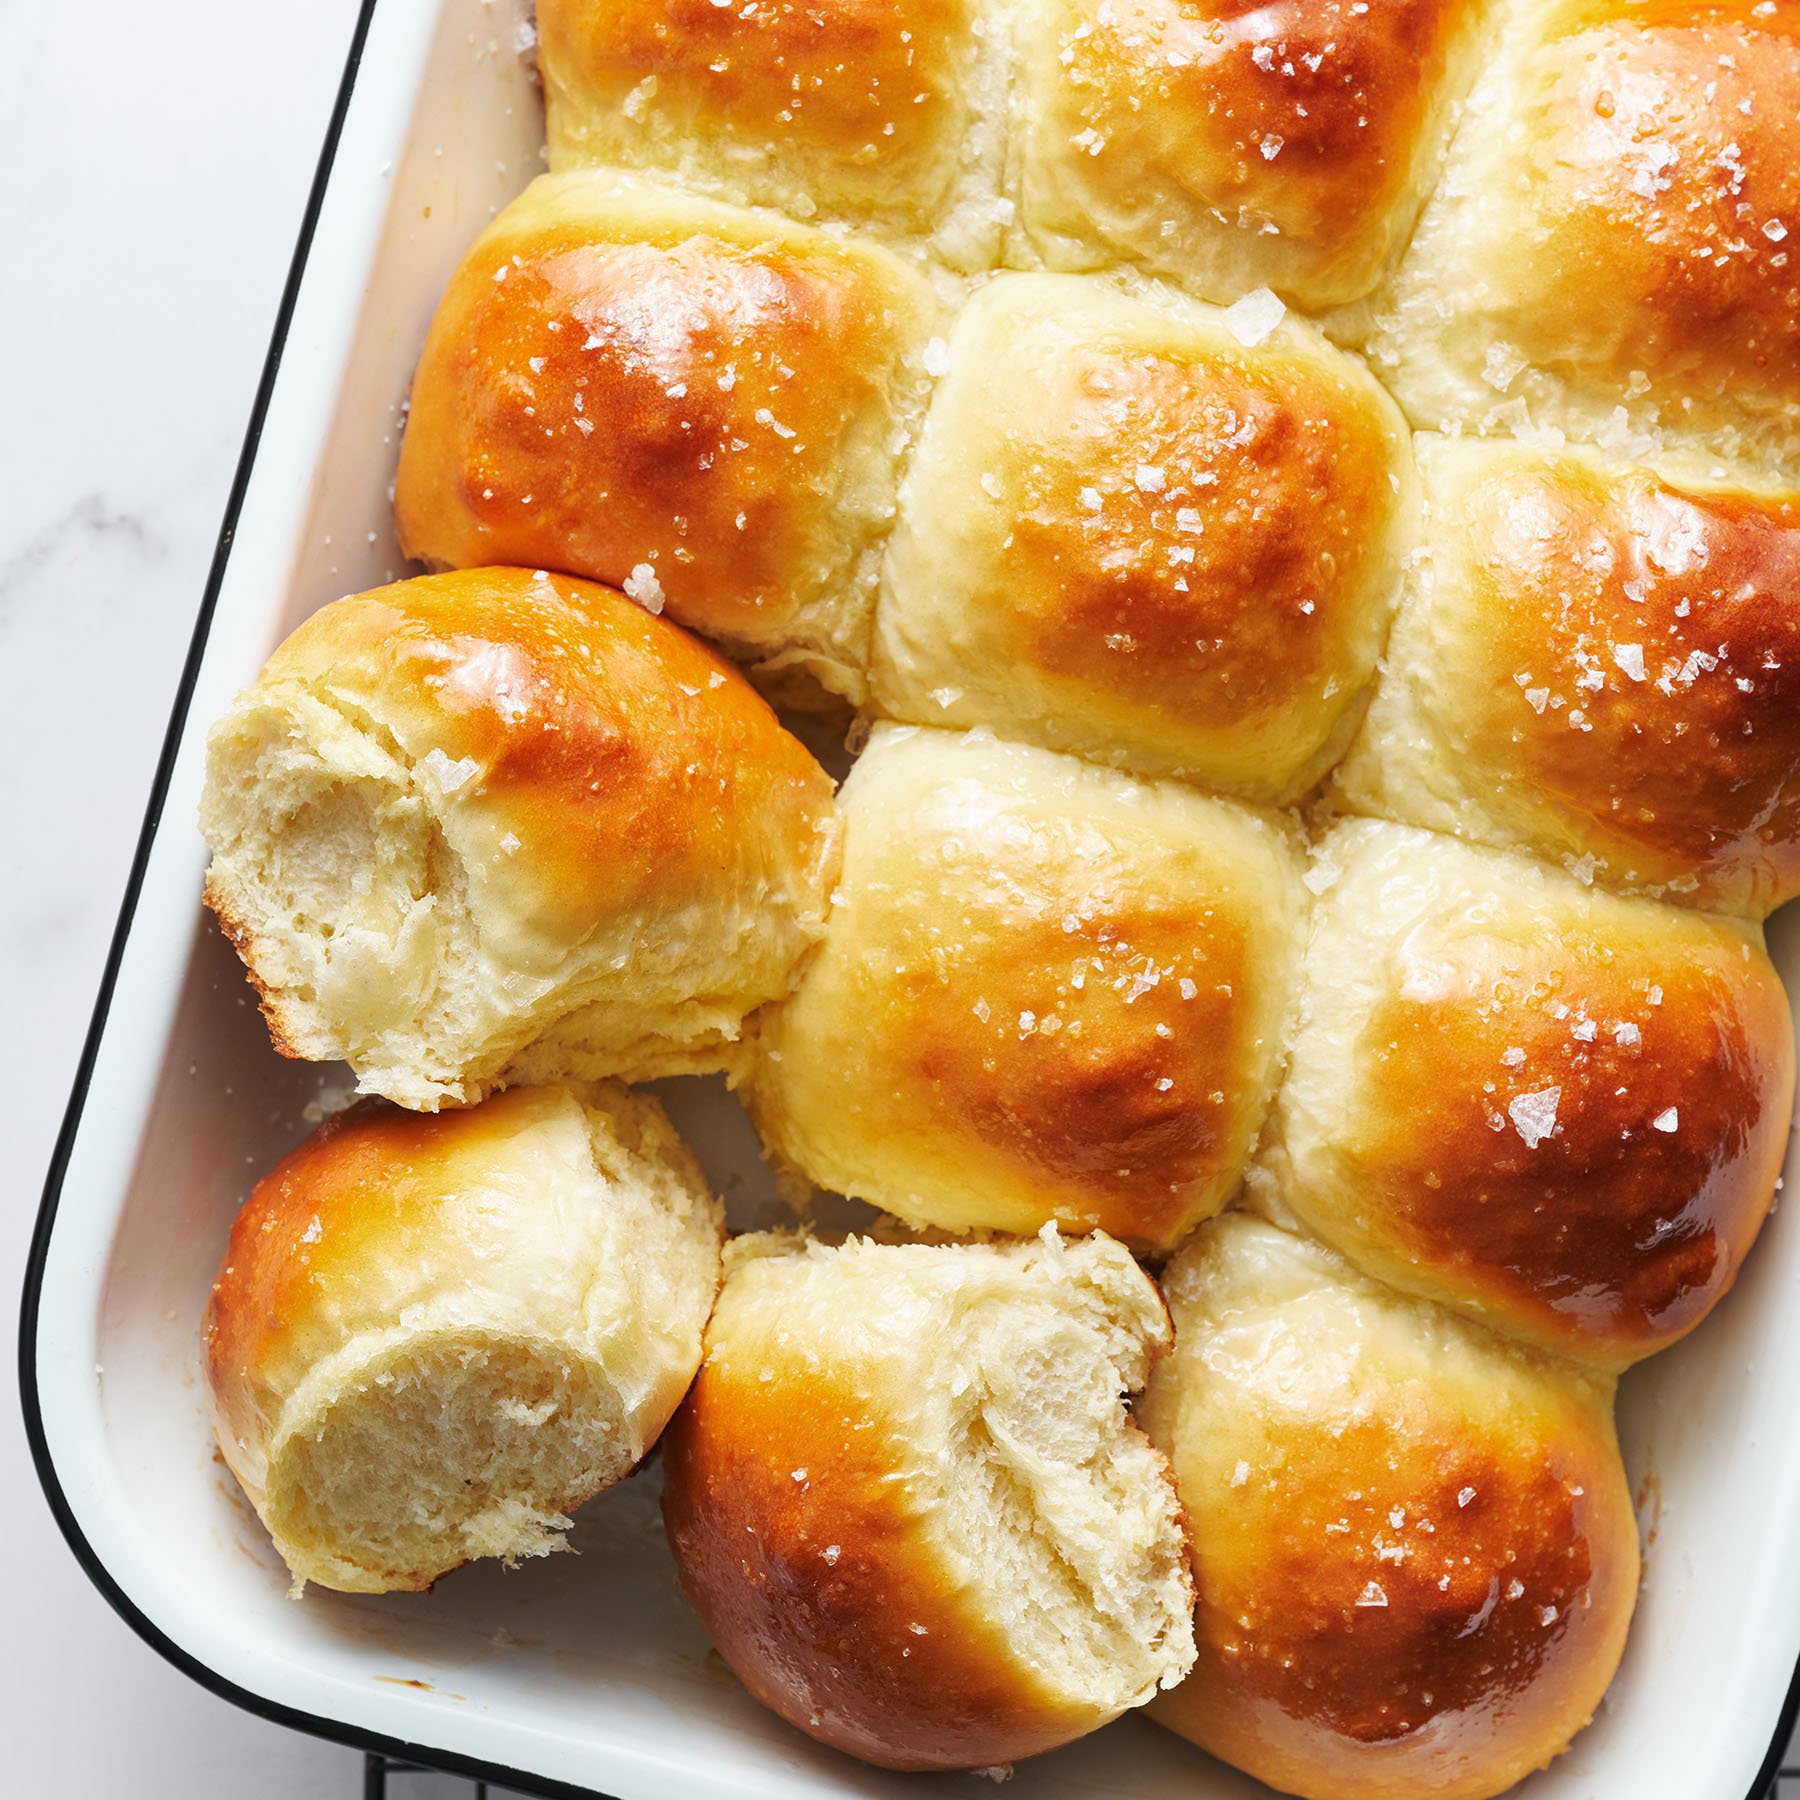
Can This Recipe Be Made Into Sliders?
Yes! Simply divide the dough into 15 and place in a 9×13-inch metal pan. Bake at 400°F for 15-20 minutes, rotating halfway through baking, until the tops are golden brown.
How Do I Make These Burger Buns Ahead Of Time?
Most yeasted doughs can be made ahead of time. I recommend preparing the buns through the first rise, dividing and shaping the rolls, letting them rise for about 20 minutes, then covering them well with plastic wrap and refrigerating for up to 24 hours. Chilling the dough like this stunts the rising, preventing the dough from rising further. Remove from the fridge and allow to sit at room temperature for at least another hour. If the buns haven’t doubled in size yet, continue to leave the buns at room temperature until doubled, before baking as the recipe directs.
To make these hamburger buns further in advance, freeze the unbaked rolls after their first rise and shaping. Place the rolls in a baking pan, cover tightly with plastic wrap, and store in an airtight container in the freezer for up to 2 months. Loosen the plastic wrap and thaw to room temperature. Let rise until an indentation made with your finger into the dough remains and proceed with the recipe as written.
How to Store Burger Buns
Store baked, cooled burger buns in an airtight container for up to two days at room temperature.
How to Freeze Hamburger Buns
Store in an airtight container in the freezer for up to two months. Let defrost at room temperature or in the microwave before toasting the buns in your toaster or on your griddle or grill.


I live in the Denver,CO and because of altitude I know sometimes recipes have to be modified. Do I need to add extra flour or anything in order for it to rise correctly ? We don’t have humidity here.
Hi Jaclyn! Unfortunately, no one at Team Handle the Heat has experience baking at high altitudes, but this King Arthur Baking resource has some great tips. Also be sure to check out all the other tips and information Tessa has packed into the pink tip box (above the recipe). I hope that helps! Happy baking 🙂
Hi!
I loved the simplicity of making these buns but I noticed a couple of shaped buns had bubbles forming…is that a sign of excessive yeast? I used the same amount as the recipe called for (active dry yeast). Also, bubbles only formed on 1 or 2 shaped buns.
Can you help me understand why?
Thanks!
Hi Tej! Air bubbles can form in yeasted breads for many reasons. Under-kneading, over-proofing, and improper shaping can all be causes. Only some rolls may form bubbles just because that’s where the gas has built up, and in shaping, the air wasn’t knocked out of those particular rolls, so the bubbles grew as they continued to proof. Your rolls should still taste delicious, but I’d encourage you to check out all the info Tessa packed into this post, in the pink tip box (above the recipe), as she included tips on how to know when your rolls are kneaded enough, proofed well, and how to shape them 🙂 I hope that helps, and I hope you still enjoyed your rolls!
Brilliant, never thought to use some plain flour. No more buns that look like top hats! Delicous
I made this recipe, followed it to a t. It was easy to make. I had the oven at 400 f , and baked them for 15 minutes rotating them . However instead of being golden brown , they turned super dark . Otherwise I absolutely loved this recipe . I will definitely try it again and maybe lower the cooking time .
Hi Janine! We’re glad to hear that you enjoyed these burger buns! Do you have an oven thermometer to check that your oven’s temperature is accurate? Most ovens aren’t accurate, and some can be running up to 25°F hot, which could be why your buns browned so quickly. Check out Tessa’s post on Ovens here.
I made this today and I told myself. If this comes out great, I will never buy buns again. I want to say a big thank you and wow. The best buns I ever ate. so yummy, crispy and soft. I made chicken sandwiches and my family love them. Will make this again. God Bless you. ❤️. Thanks again.
These buns we’re so good. The problem I had was when I added the egg wash. Hey had risen so well and when I gently applied the wash, they fell a little. Do you think I could just spray them with olive oil next time?
Hi Gayle! So glad to hear that you enjoyed these Burger Buns! If your buns deflated when applying the egg wash, it sounds like they may have been a tiny bit over-proofed. It’s so easy to over-proof in the warmer weather! Next time, I would recommend baking slightly earlier. Check out the pink tip box (above the recipe), where Tessa explains more about proofing dough and lots of tips! We haven’t tried spraying the buns with olive oil, but that may encourage the buns to darken more quickly. I hope this helps!
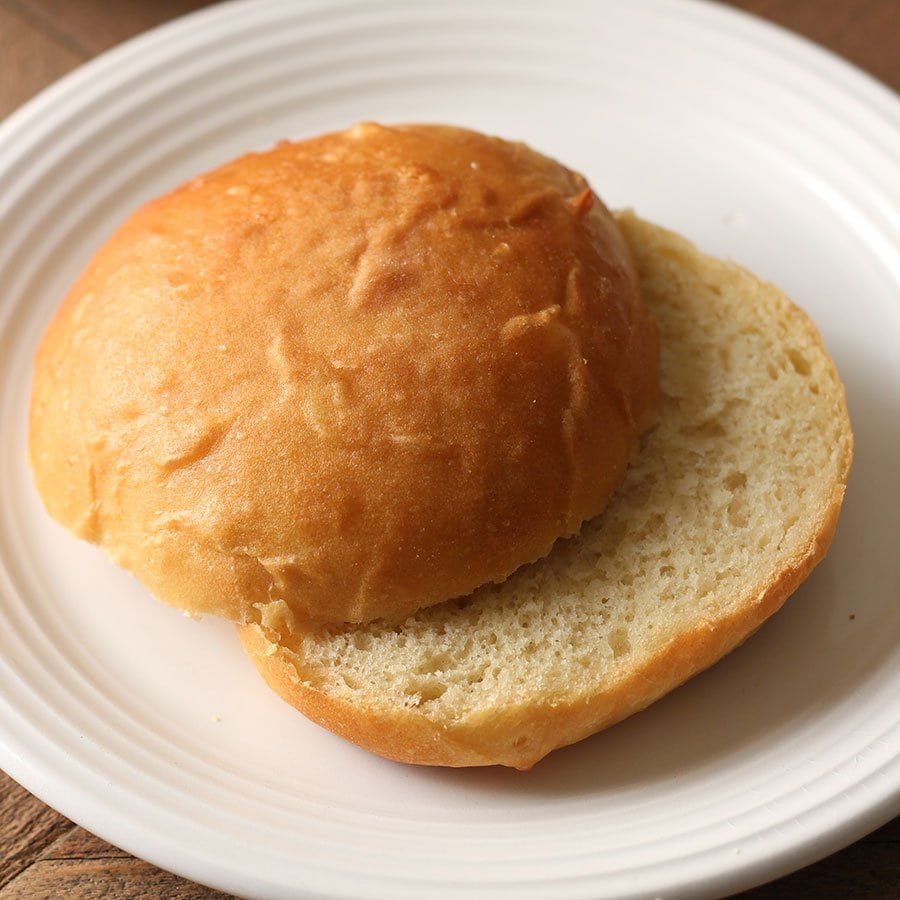
I have tried many many recipes for buns. Lover the whole wheat bun and this one, Burger Buns! Really light, and moist. I understand why you said Bread Flour! The dough was a wet dough but with oil hands and my board also, so easy to place them after rising and simply cutting in half, again, and again! 8 lovely buns and look just like the picture. To get the bottom a tad browner might bake 18 – 20 minutes next time, but they are pretty perfect. I baked with parchment on 1/2 sheet pan. Reduced the sugar by 1T, just a preference. Everything right on recipe. Thank you so much for sharing.
delicious burger bun recipe. I made 6 buns out of this because I like a big buns and it was well worth the 4 hours of my time.
Woohoo! This bun came out like a soft like a pillow. Recipe was easy to make. It’s perfect for a bbq event.
My fist try the dough was too wet. They were almost impossible to shape. Baked well and tasted good. After reading recent reviews I used 3/4 cup water. Perfect!!! So easy to shape. Taste is great!
This recipe was quite easy to make, but I am so glad I read ahead about how sticky the dough was! Once I mastered the oil on the hands, it went quite smoothly. I am freezing these buns to be used for our barbecue on the 4th, but they came out so soft and smell so good, I can’t wait to taste them!!
Just made these fantastic burger buns the other day and am making my second batch for the 4th of July! So good!!
I almost always have issues when shaping my burger buns, I try to use little to no flour, but they still always end up deflated.
I’m curious what your thoughts are on the bun molds. Have you had any experience using those to help with shaping?
Hi Sarah! Tessa included some shaping tips and pictures in the pink tip box above the recipe! We haven’t had much experience using bun molds, and we didn’t test this recipe using molds, so we can’t say for sure how that will work. Let us know if you give it a try 🙂
Made these a few days ago and were delicious!
Just wondering if the dough can be made in advance and refrigerated or even frozen?
Thanks! Looking forward to making many more of your recipes!!
Absolutely worth the (minimal) effort – these buns turned out perfect! Not sure that I’ll ever buy a store bought bun again, especially since they freeze so well. Make sure to take the egg wash all the way down and around the bottom edge of the bun for maximum picture-perfect browning!
I never thought it was worth it to make burger buns—I was wrong! These turned out amazing and made our burgers taste much more like restaurant quality. They were really fluffy and domed perfectly with a lovely golden color. It was a little tricky to shape them because the dough is sticky, but we put olive oil on our hands and that helped. Another recipe success, thanks!
These are so good and easy to make.. I have made several batches,, I also bought a hotdog bun mold and used this recipe to make 12 buns. They come out so delicious. If you haven’t tried these yet do yourself a favor and do it, you will not be disappointed..
These buns are so good, and very easy to make.
AMAZING!! I wouldn’t change a thing! Perfectly soft and fluffy, yet still sturdy enough to hold up a good burger!
I waited until the middle of the month to make this June Challenge recipe. I’m mostly a “sweets” baker. I was happily surprised how much fun these were to make! They tasted incredible! Everyone said they were much, much better than store bought buns. They have much more flavor, a wonderful texture and although they are soft and easy to eat, they don’t fall apart. Love love love and will have to make them all the time now. Good thing they’re easy and fun to make. Thanks for another amazing recipe!
These are very good! Turned out light and fluffy thanks to all the tips in the recipe! Will definitely be making these again.
This is my first time making yeast bread, and I was surprised at how easy it was! They came out a little flat, but pretty good for my first try! I’m also a novice using the bread hook (and a stand mixer in general) so this helped me step outside my comfort zone in many areas. They were very tasty, had a nice texture, and my husband said that he only wants homemade ones from now on (just like you said we would, Tessa!). We used them for sandwiches, and my husband made some Sloppy Joes for himself. They held up great! Nice recipe!
These are really good and super easy to make. I was finally able to get them to be rounded thanks to the helpful video about shaping them!
wow – so delicious! I was sloppy with the shaping because it was so sticky, but they turned out fantastic anyways. we’re eating them like dinner rolls.
Best burger buns ever!! I may never go back to store bought again!
This recipe was very easy to follow and the buns came out better than I was expecting! The hardest part for me was shaping the dough into balls since the dough was sticky but as soon as I put a little cooking spray on my fingers it was very easy to shape! I highly recommend trying this recipe if you are looking for a good bun recipe even if you never baked with bread before!
These are buns are great and were easy to make! Smelled great in the oven and tasted good out of the oven! We will be using these for burgers and meaty sandwiches for sure! Will have to try them out with sesame seeds next time for sure!
These are AMAZING! And super easy. There is no downside. I was worried it was going to be too dry/crumbly on the inside, but when I cut it open, it was perfect. There’s enough structure there to hold a sandwich or burger together, and the flavor is phenomenal!! I will definitely be making these again, even just as regular sandwich bread!! Thank you!
I’d like to do a double batch of these hamburger buns. Would I double all the ingredients? Thanks.
Hi Donna! Yes, but keep in mind that double the dough will also dough the volume, and could overwhelm your mixer. I’d recommend simply making the recipe twice, to avoid your mixer burning out. Happy baking 🙂
So good!
I haven’t made many yeast recipes but this one came together quick and easy, and turned out great!
Homemade is so good! Just make sure you plan out ahead of time how much time you will need for the double proofing :-).
Super fun to make! I made them ahead of time and did the second rise on the second day. Give plenty of time to rise! Don’t hesitate on the egg wash!
Delicious and my house smells great! Everyone loved them.
Really impressed with how well the gluten free version turned out!
I love how satisfying it was having this recipe come together! Also, how delicious are home made burger buns! My kids absolutely loved them too and they are normally my harshest critics haha will definitely make them again. Another great HTH recipe for the books.
These buns were really good, but it did take me a couple of tries to get it right. Using a full cup of water in the first batch made the dough completely unworkable. In the second batch I reduced the water to 3/4 cup and the dough was a lot less sticky and the buns still came out fluffy and delicious.
These buns are amazing! My husband said they tasted like bakery purchased rolls. Nice and fluffy, yet sturdy enough for the burger. So much better than store bought. Will absolutely make again.
What a game changer!! Loved them with the burgers and also super excited to use tomorrow morning for an egg sandwich!
These were so easy to make, and super delicious! My whole family loved them, and now will want them every time we have burgers!
The perfect sturdy bun for your burgers that won’t get saggy and fall apart. They have great flavor and can together so quickly.
I’m going to have to try again. The buns taste amazing and everyone said they are the best, but I know they should be higher and more fluffy. I challenge myself to try again and perfect these~!
Hi Judy! So glad you found these buns to be delicious! I recommend checking out Tessa’s baking and shaping tips for these buns, if you haven’t already. There’s a ton of great info in the pink tip box, above the recipe, which you may find helpful for next time. Enjoy 🙂
For my first try these turned out pretty good! I had to add a tad bit flour to make the dough more workable though. Other than that these looked and taste just like store bought buns… Thank you for sharing your recipe Tessa.
I might make 10 buns rather than 8 next time as they poof up bigger than I expected!My kids esp. loved the aroma of the baked buns in my kitchen. Thank you once again.
I always divide the dough and make 10 buns.. You will be happy with the results if you choose to do this..
Easy to make and yummy!
Soooo good ! Everybody loved them , nothing better then a successful homemade bum like these ❤️❤️❤️
Light, fluffy and delicious with sliders!
I took advantage of the unexpected heatwave in the UK to make these knowing they would proof well. They proofed up to a even bigger size than expected They tasted great. I made panko breadcrumbed chicken burgers using these buns. It was my first time baking fresh bread and my family was impressed so it was a hit.
These look amazing! I am taking them to a cookout tomorrow so I won’t know how they taste until then … but they *smell* amazing! I’m so excited to try them!
When you say rotate them….flip the buns over?
Hi Kris! These buns will be baked on two separate pans, so just quickly and carefully reverse the positions of the baking trays halfway through the bake time. This ensures both trays bake evenly, and one tray doesn’t bake faster or brown more quickly than the other. I hope that helps! Happy baking 🙂
These buns are so good! Light, pillowy, and flavorful. They’re surprisingly easy (and fun!) to make. I did use a little less water because it was a fairly humid day. My husband implied that we won’t be buying burger buns any more! He also made a turkey sandwich with one.
Delicious! Years ago, this was the recipe I searched for & found Handle the Heat which has been my go to for baking recipes & tips ever since!
That makes us SO happy to hear, Jennifer! 🙂
Big hit with the family! Love that it’s meant for the dough hook, my arthritis thanks you for that .
These buns were so tasty and easy to make! I will definitely be making them again.
Loved the texture of the buns. Much better than store bought
These buns were so yummy!! They had the nice crisp outer layer with the super moist inside. Why have I not done this before…. These will be a new go to recipe in the kitchen. Thanks again Tessa for sharing your knowledge and love of cooking ♡
I had a tough time shaping the buns. The flavor was fine, but they were a bit flat.
Tasted really good, held together really well/didn’t fall apart while eating a burger; I think I needed to add a little more flour as my dough was too sticky to role into balls so buns were more flat
I’ve made burger buns once before and these turned out way better. Fairly easy to do and tasted good! I just need to improve my bun making skills.
Thanks Tessa for sharing this amazing recipe. The flavor is so so good and the fluffiest of the dough, oh god!