This post may contain affiliate links. Read our disclosure policy.
This Homemade Hawaiian Roll recipe was a true labor of love to get just right. The store-bought ones have quite a few ingredients not available in the home kitchen so it took a LOT of testing.
At first, the rolls weren’t fluffy enough. So we made a bunch of tweaks to get the texture to match the store-bought kind. Then they weren’t sweet enough. 15 batches later (yes, 15!), we finally nailed it.
Honestly, it took over a year to get this copycat recipe perfected. Luckily, we didn’t mind testing these rolls so many times because they’re THAT good.
These Homemade Hawaiian Rolls are so versatile. They’re perfect as a side with dinner or as the main course (think ham and cheese sliders!). Take them as a side to a barbecue. Make little sandwiches with turkey and leftovers after Thanksgiving. The options are endless!
And bonus: the scent that will waft through your house as these bake is utterly intoxicating.
These Hawaiian Rolls are so much better than the prepackaged versions. You’ll never want to buy store-bought again after trying these!
If working with yeast feels a little intimidating, don’t fret. I’ve included a ton of tips and tricks below so even newbie bread bakers can nail this recipe.
How to Make Homemade Hawaiian Bread Rolls
What Are Hawaiian Rolls?
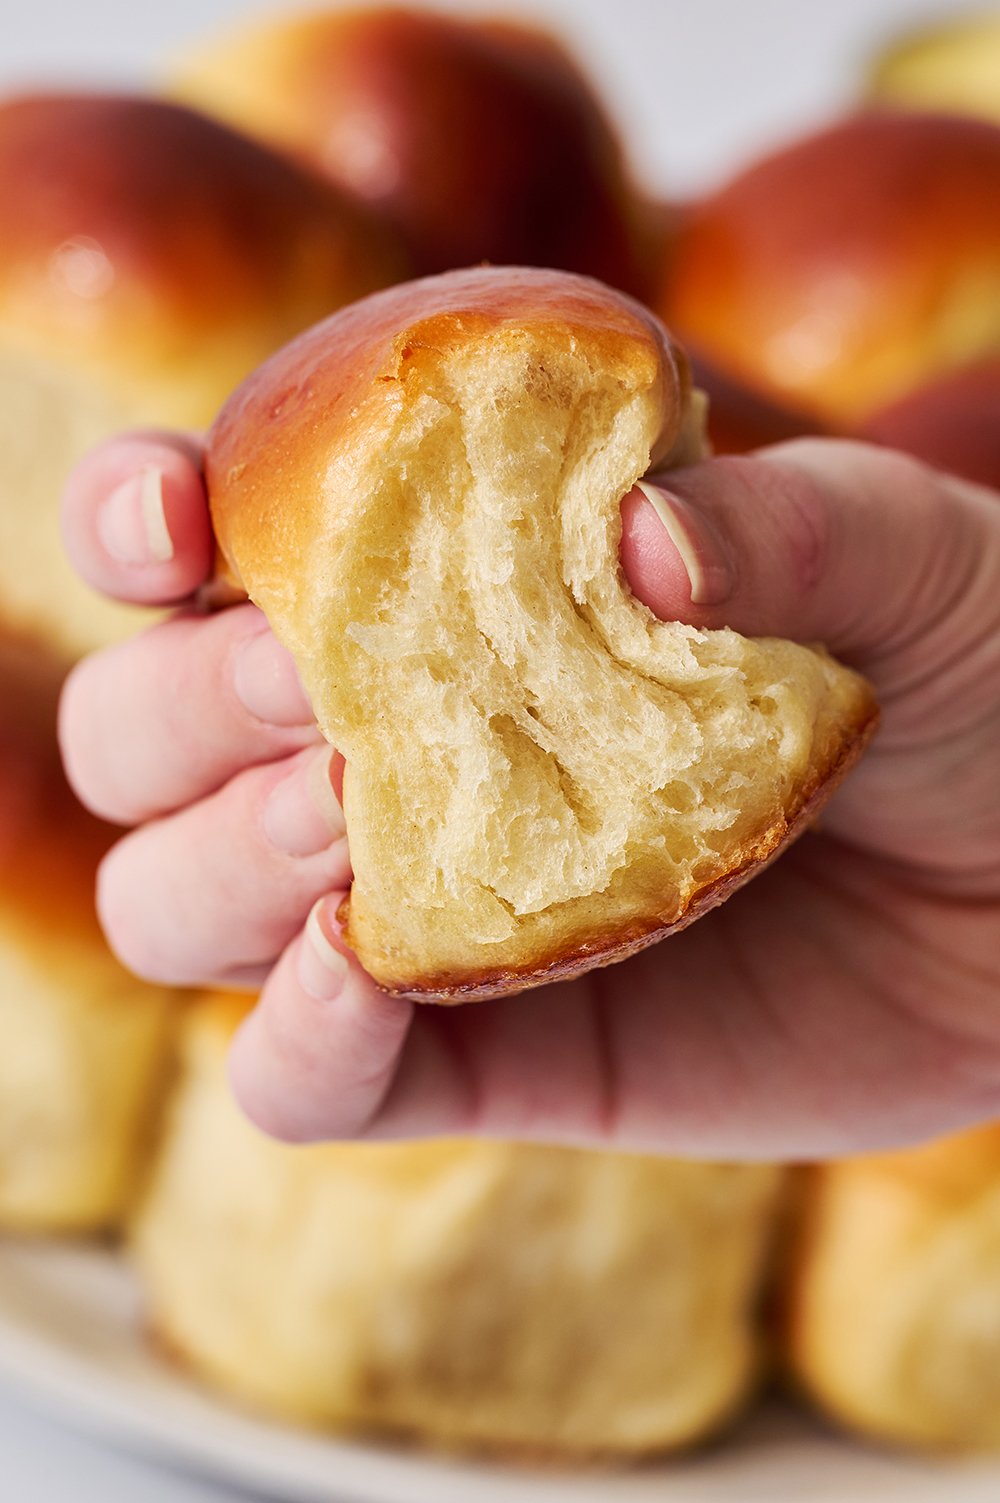
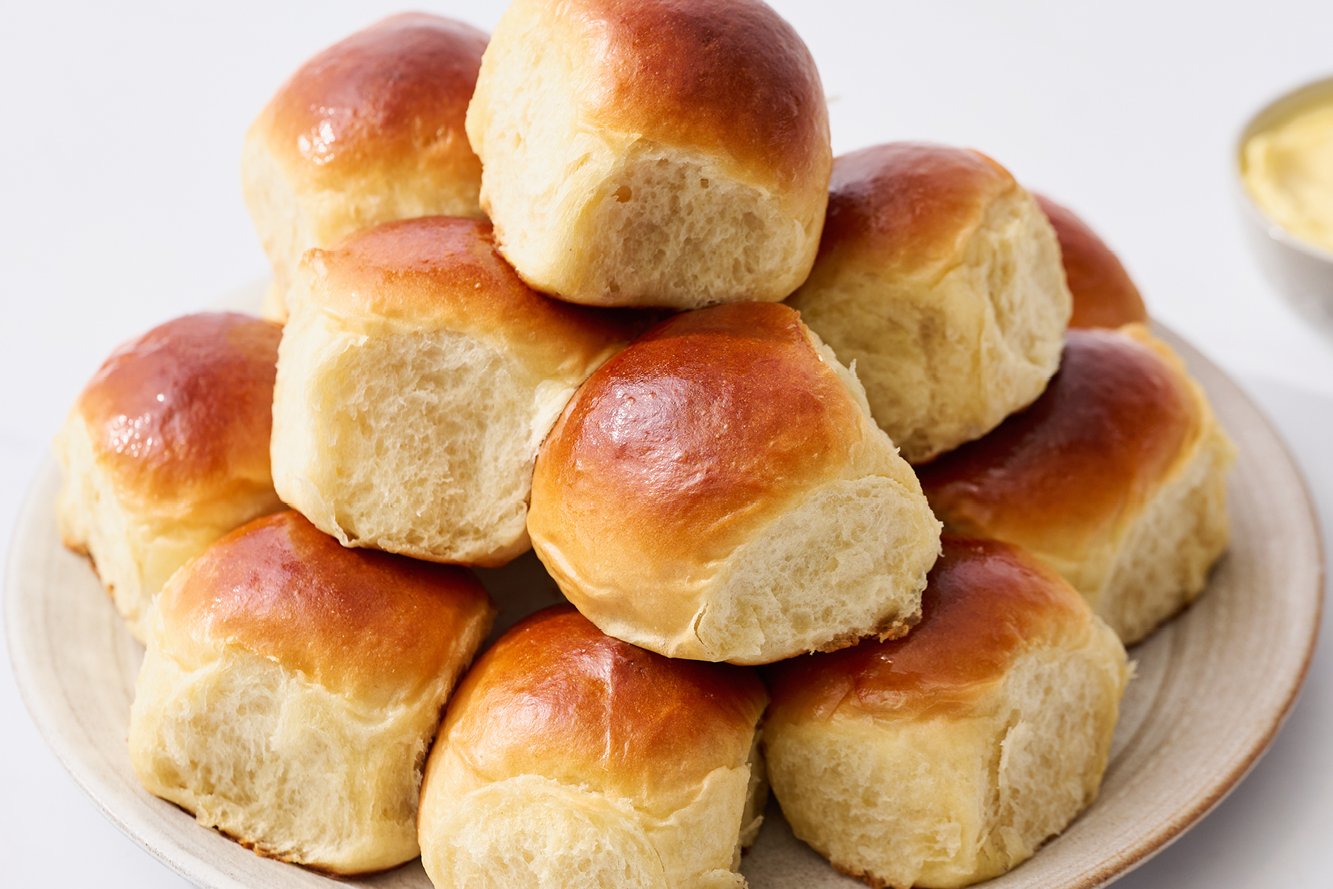
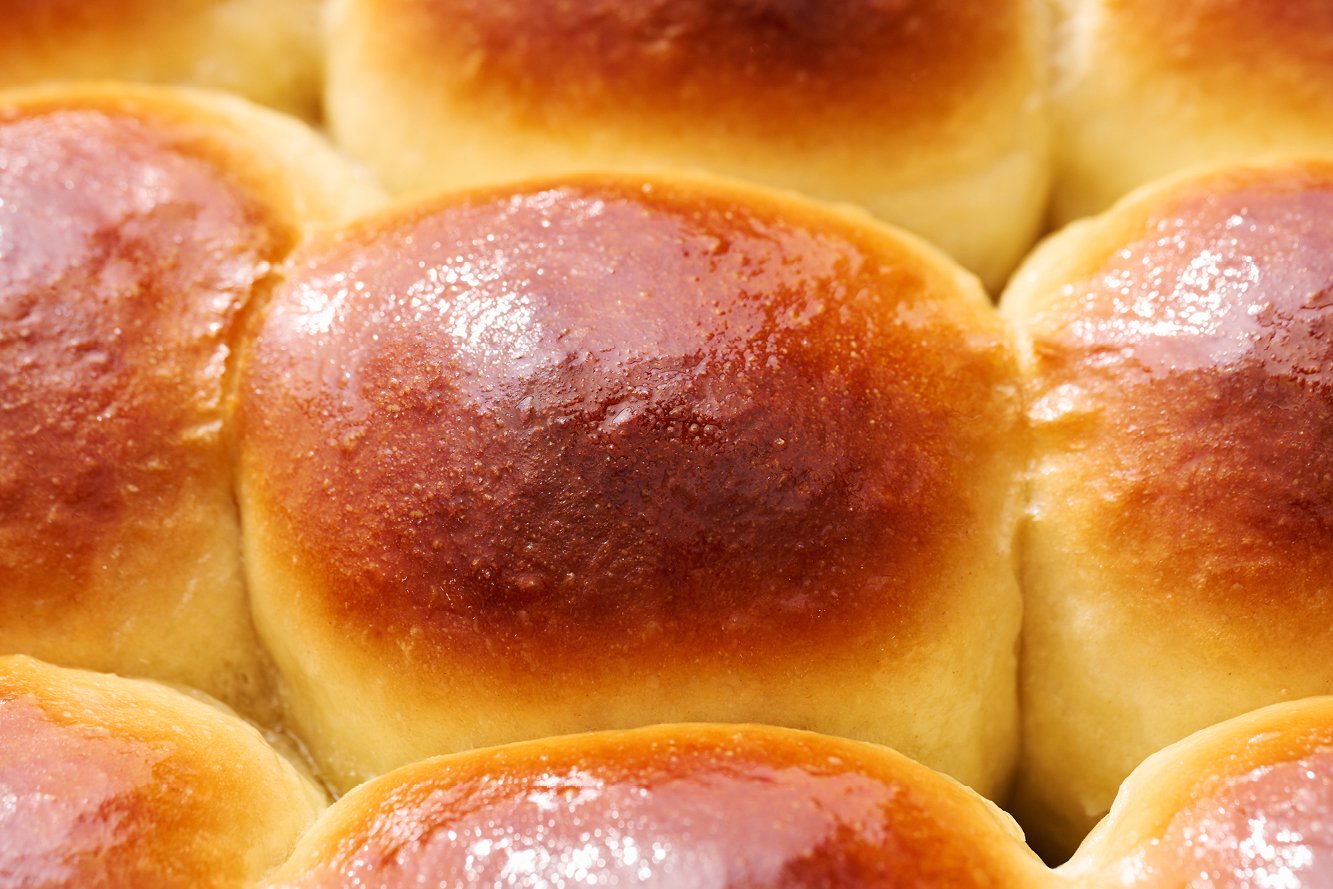
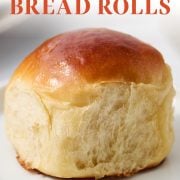
You may have seen Hawaiian Rolls at your local supermarket – but these homemade versions are SO much better! Hawaiian Rolls are distinctly sweet and ridiculously soft and light, perfect for making delicious mini sandwiches, breakfast sandwiches, sliders, and more. Your kids will go crazy for these rolls, too!
Can I Make Homemade Hawaiian Rolls Without a Mixer?
Probably… but it won’t be easy! Your KitchenAid stand mixer does all the hard work in kneading these Homemade Hawaiian Rolls. By hand, it’s going to take a lot of elbow grease, a long time, and give your arms and hands a heck of a workout. Learn more about kneading dough by hand here.
How To Make FLUFFY Hawaiian Rolls:
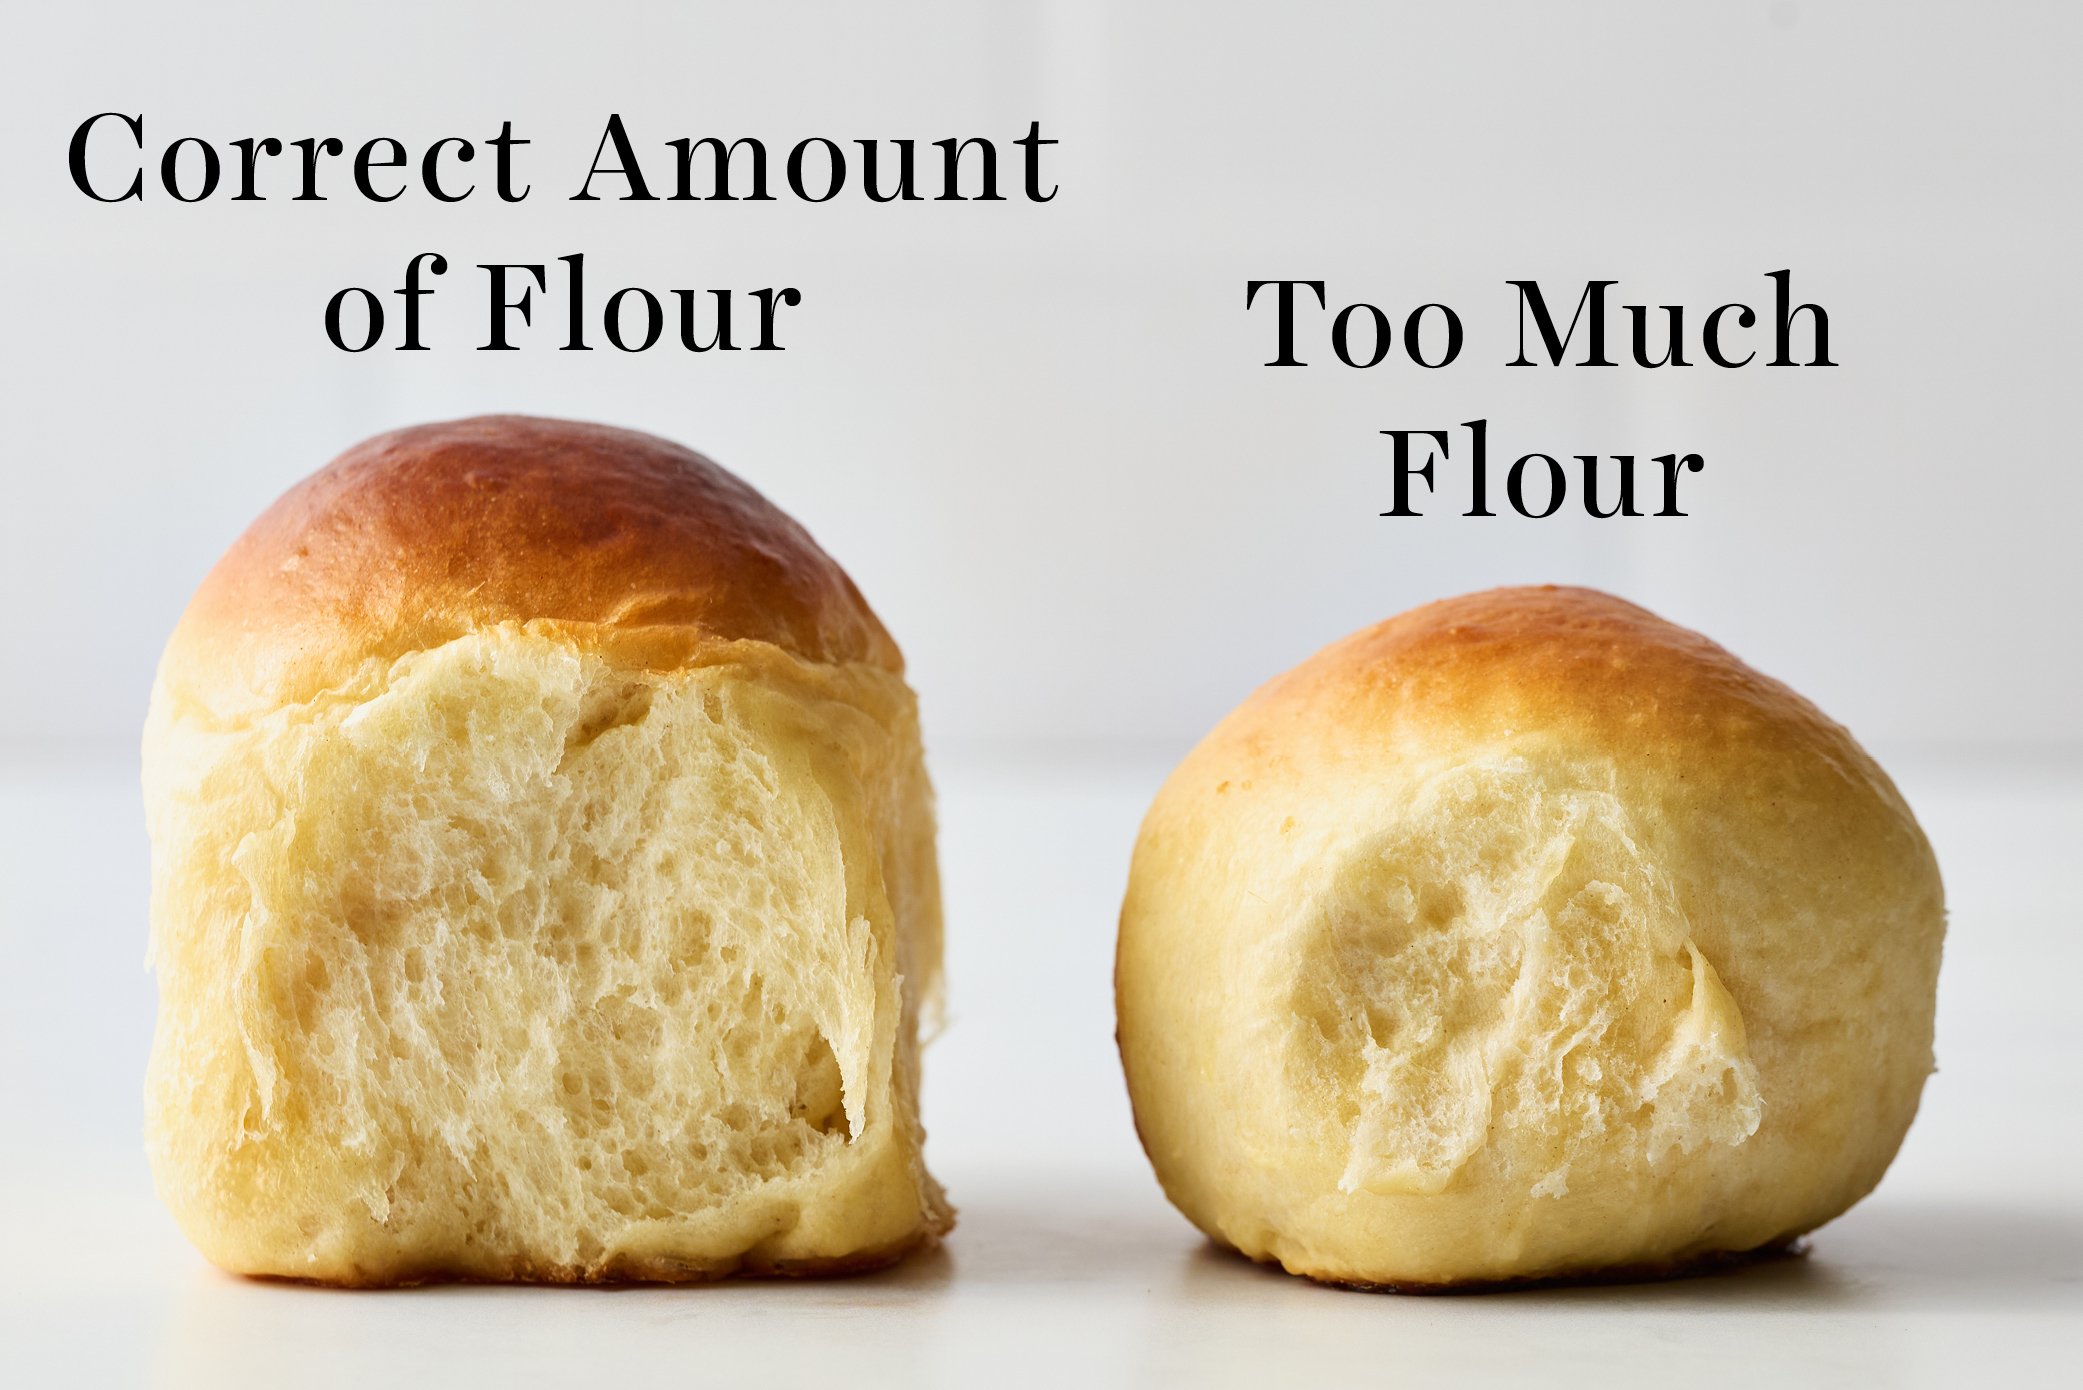
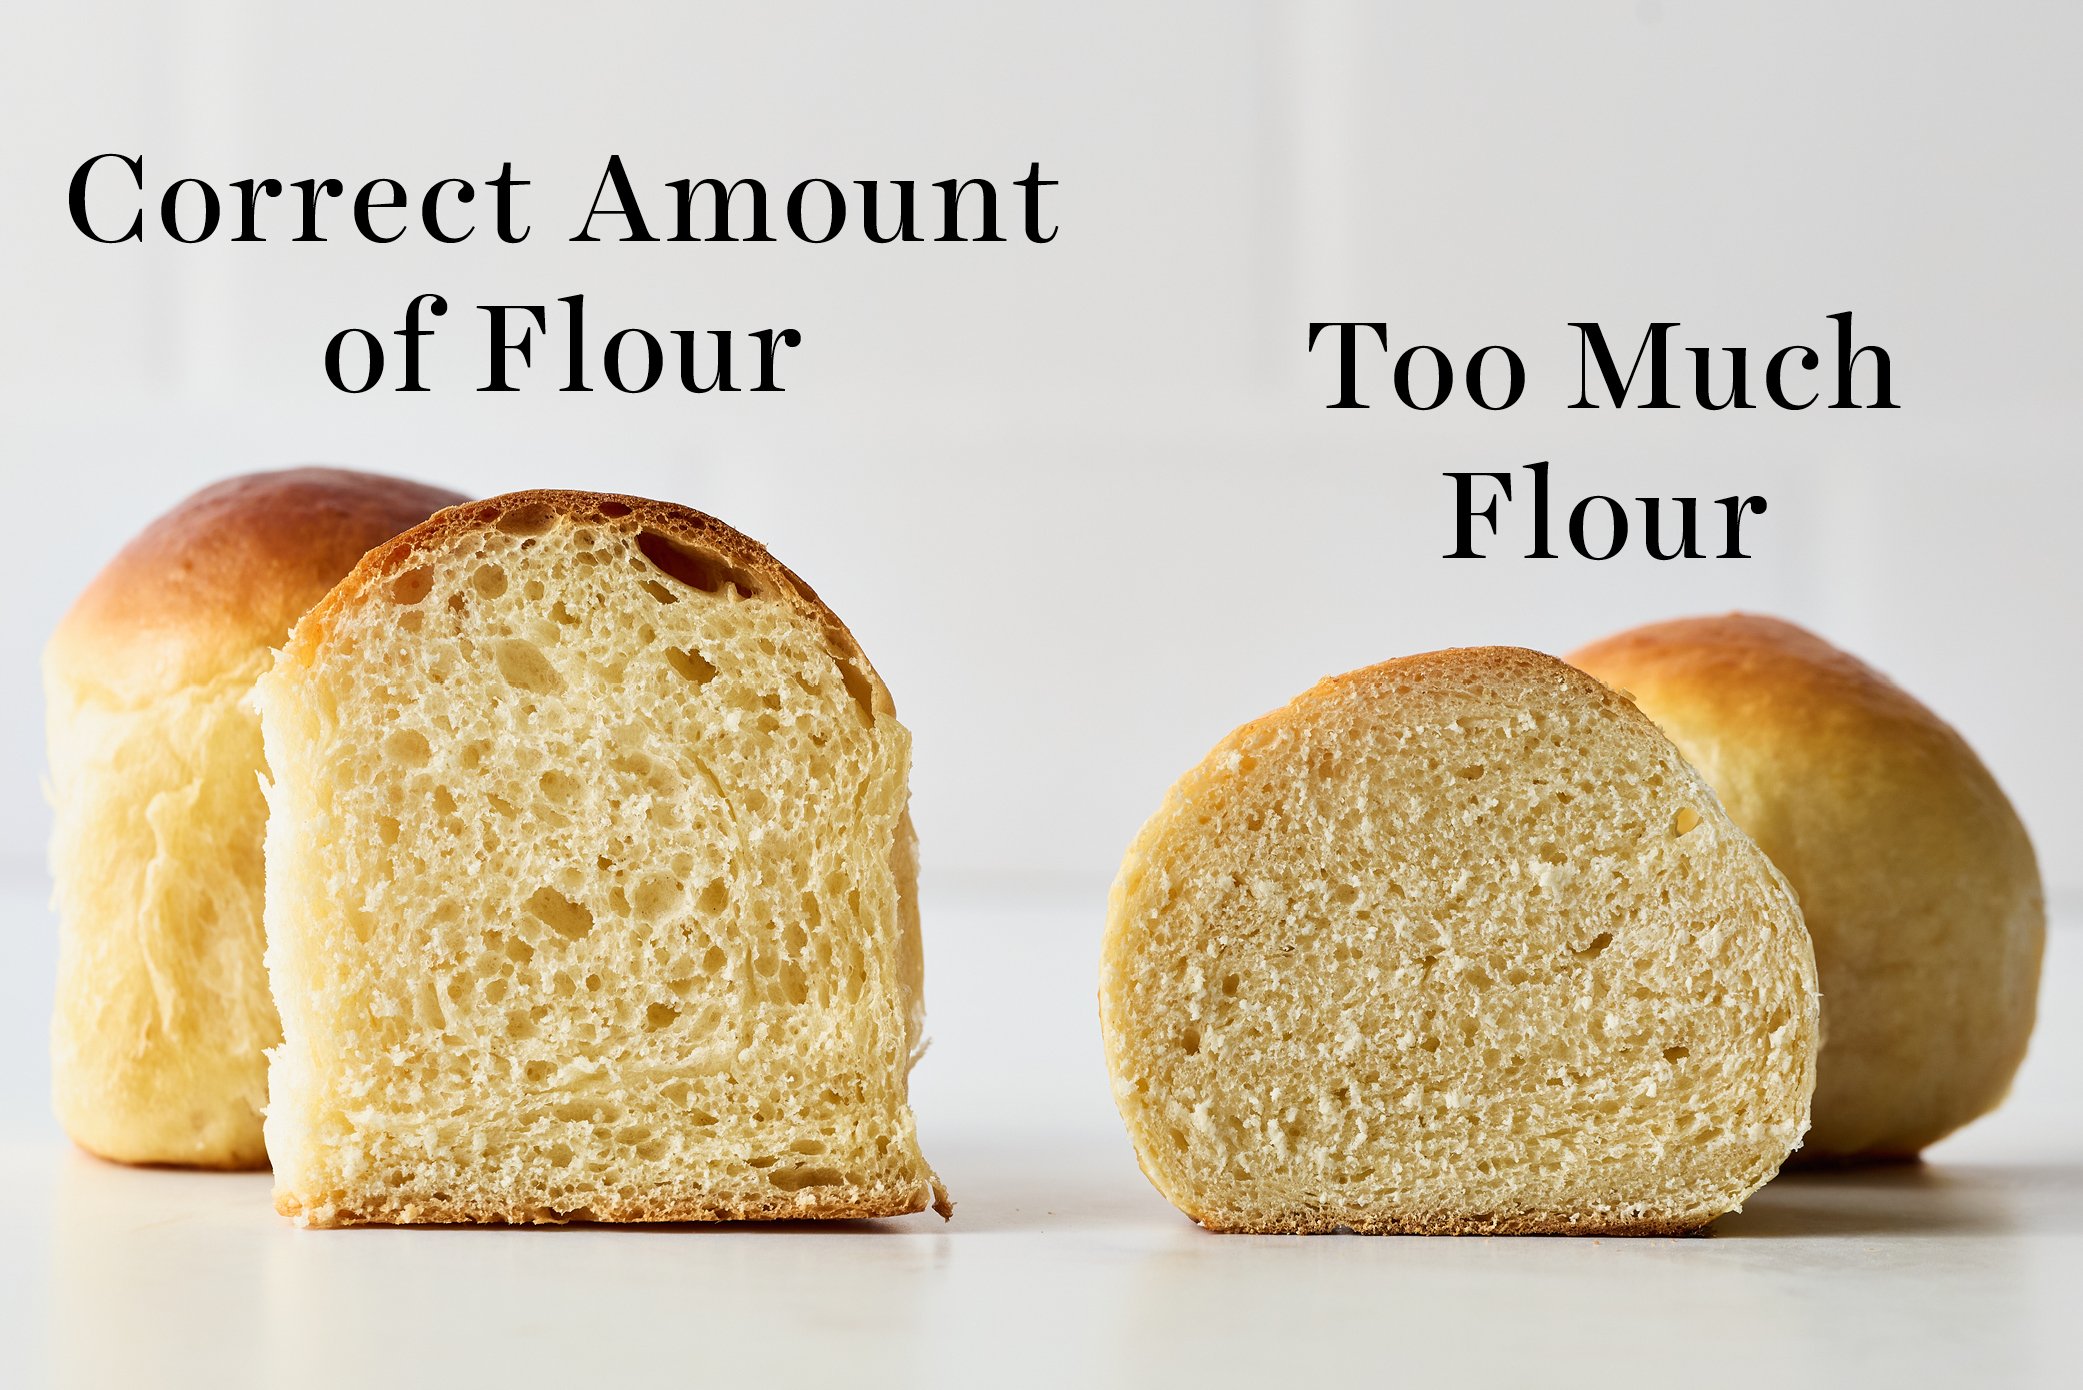
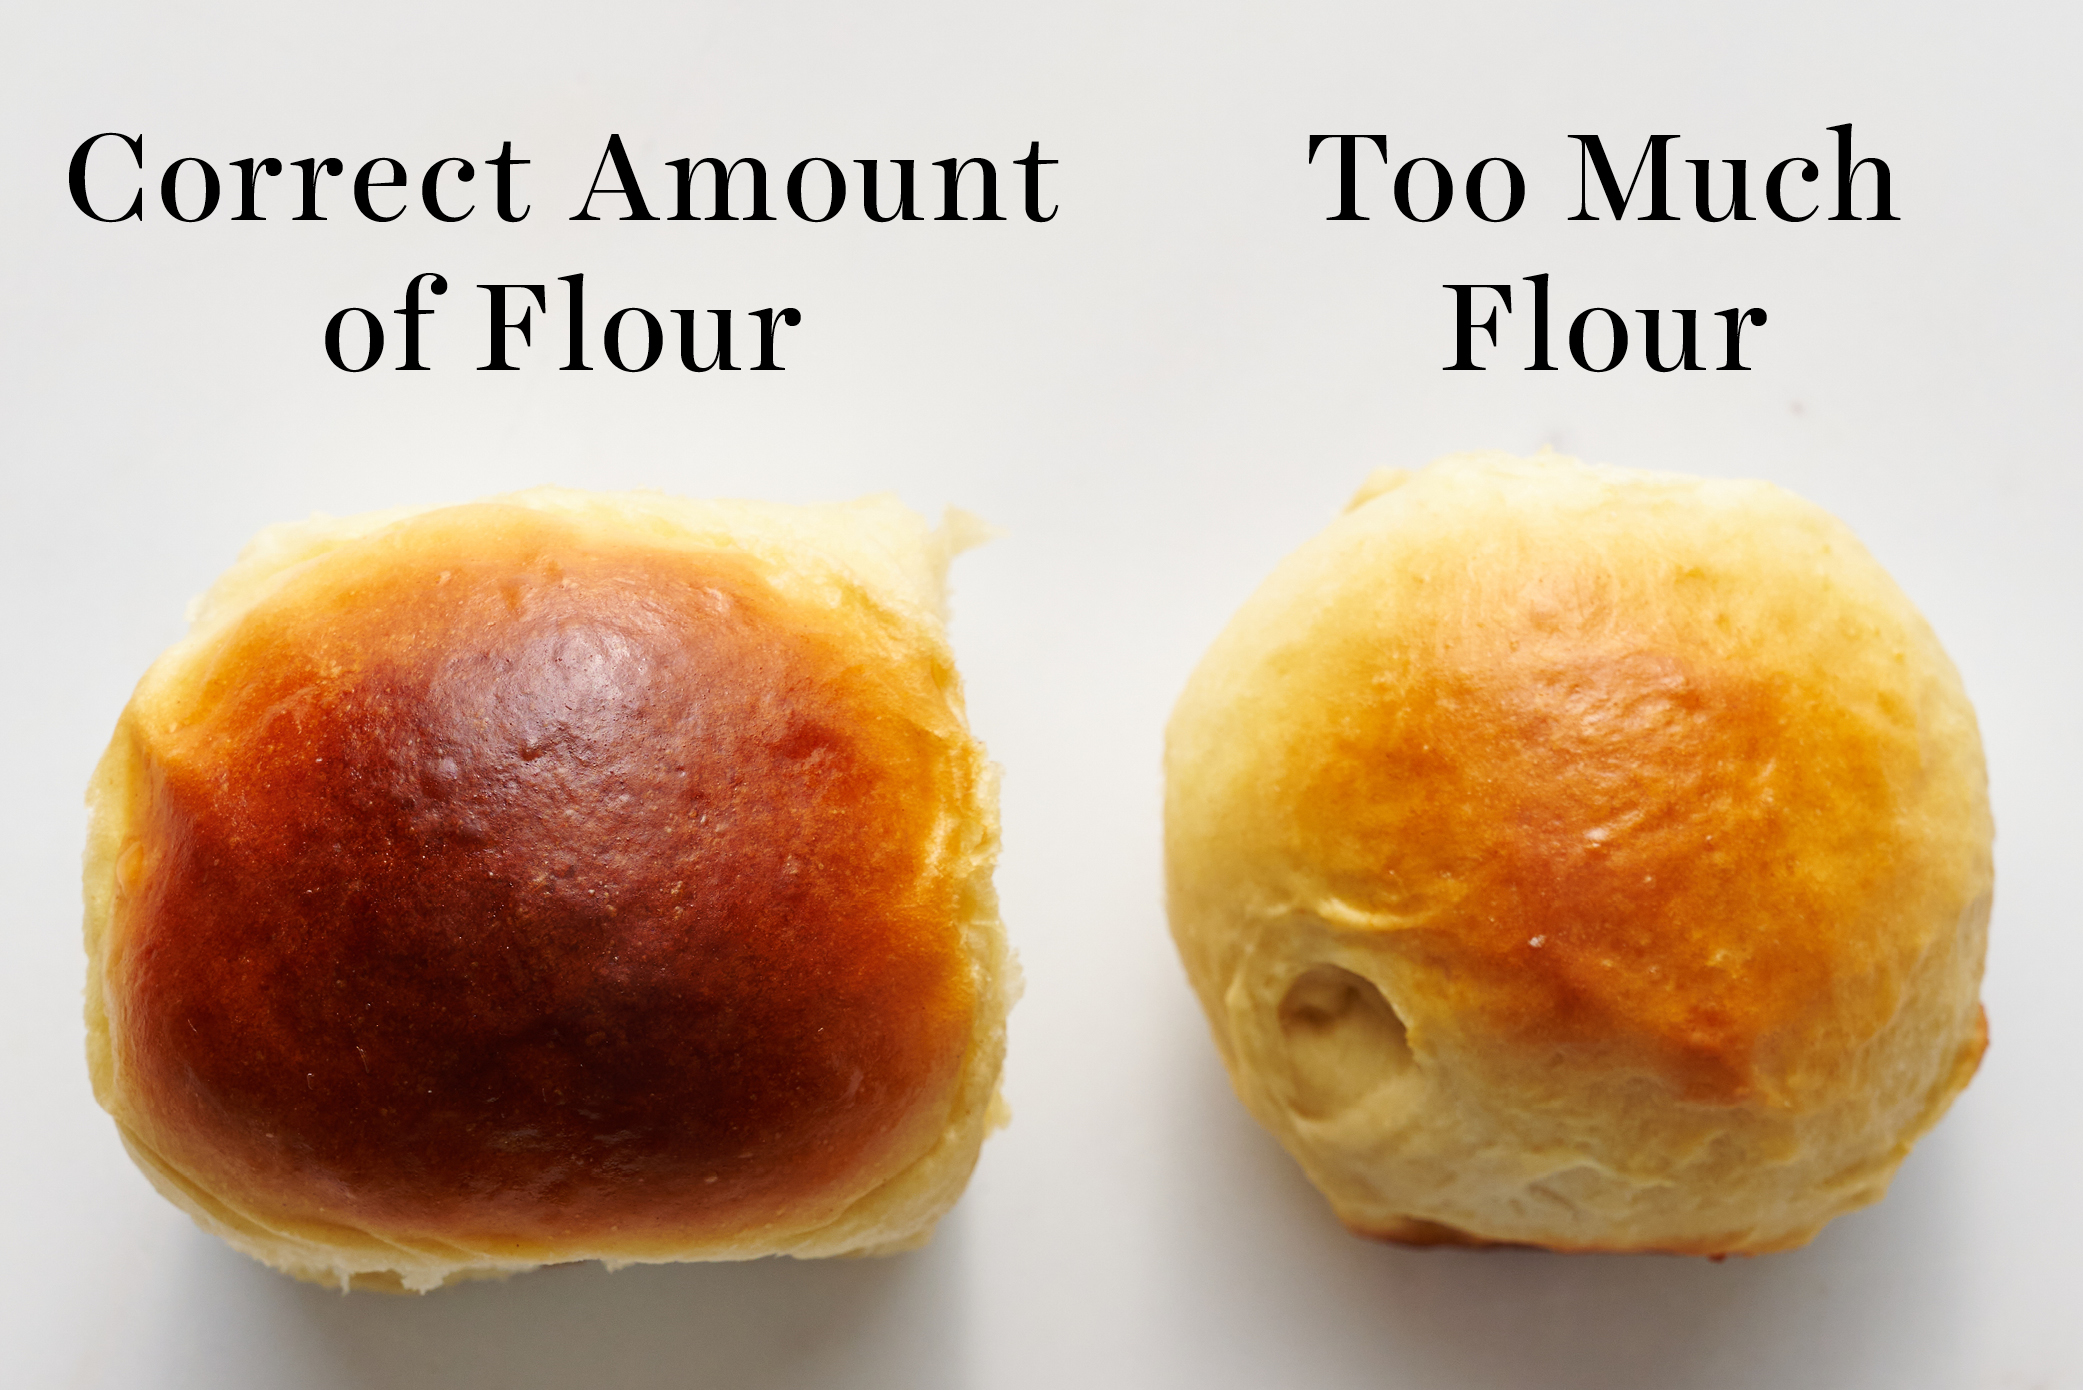
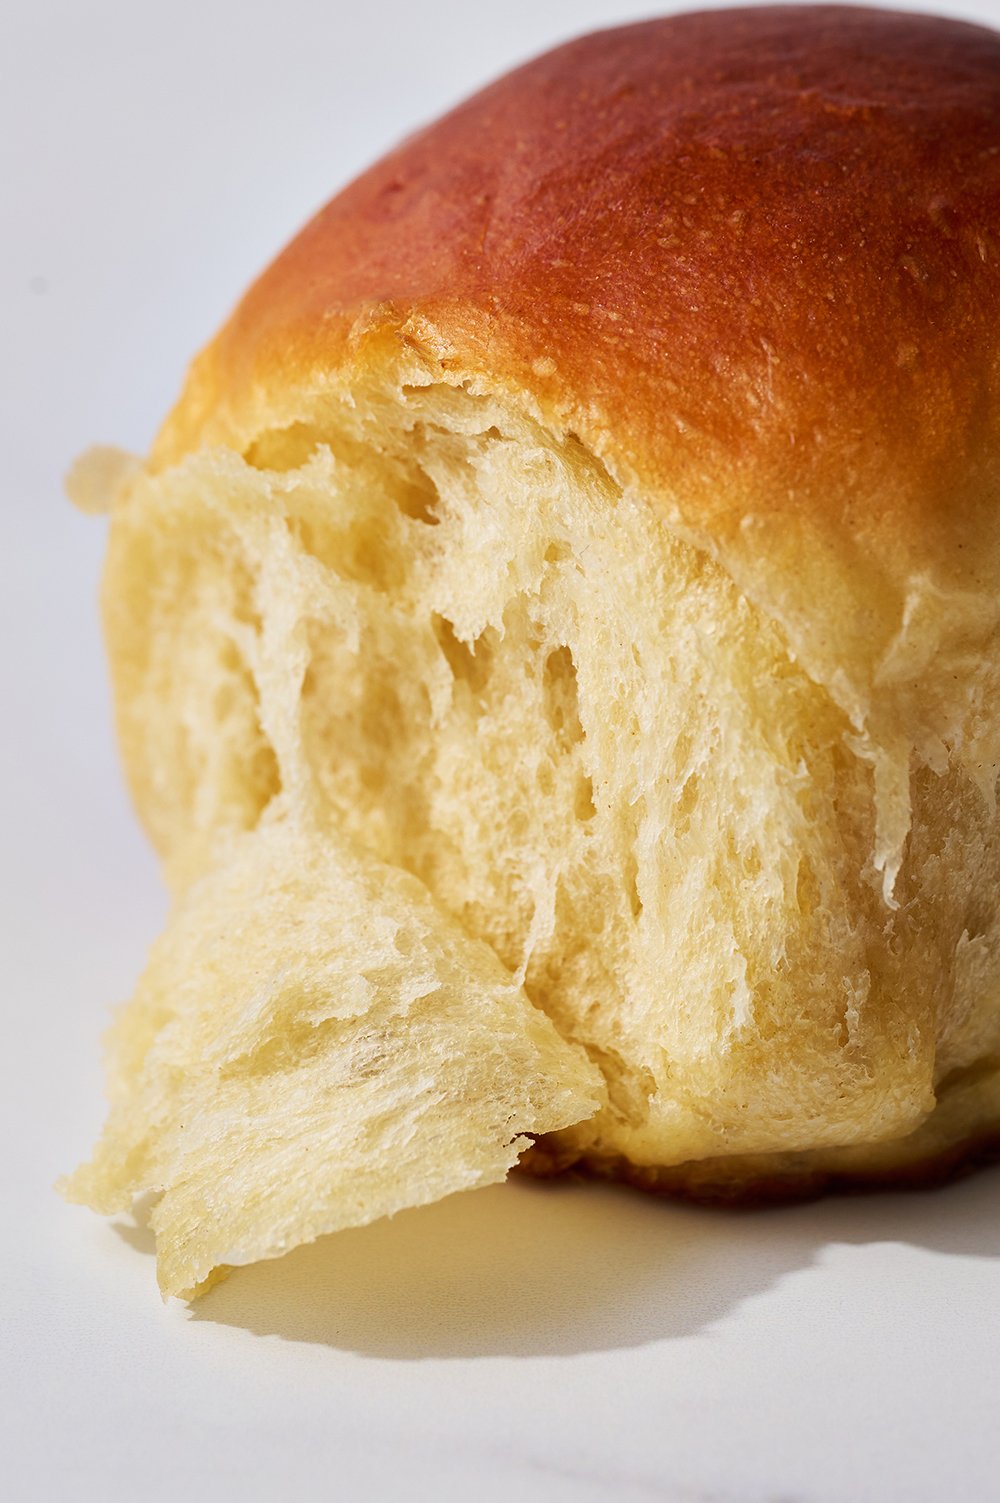
- Avoid adding too much extra flour to the dough. Since this dough is slightly sticky and enriched with milk, butter, and a lot of sugar, it takes quite a while to come together. These ingredients slow down gluten development. Your instinct might be to add extra flour; however, any extra flour will create a denser, tougher bun instead of the light, fluffy, brioche-style bun we want.
- Know your kitchen climate. This recipe was tested in Arizona, Michigan, and New York. During testing, Emily from Team HTH’s kitchen (in Michigan) was about 87% humidity, Kiersten from Team HTH’s kitchen (in New York) was about 65%, whereas our studio kitchen in Arizona was 14% humidity. The more humid your location, the stickier your dough will be. If your kitchen is about 65% humidity or higher, use the higher range of bread flour listed (4 1/2 cups, or 540 grams). Reduce the bread flour if your kitchen is less than 65% humidity. Begin with the lower range listed (4 cups + 1 tablespoon, or 516 grams) and add additional flour by the tablespoon (8 grams) as needed.
- It’s better to be slightly sticky than dense. This dough shouldn’t be unbearably sticky, but it will be tacky. Resist the urge to add extra flour as this will negatively impact the texture of the rolls. The dough will be easier to work with after the first rise!
Proofing Homemade Hawaiian Rolls Sliders:
- This dough will take some time to proof, especially if your kitchen is cold. The sugars, pineapple juice, eggs, and butter in this recipe add deliciousness but also slow the proofing process.
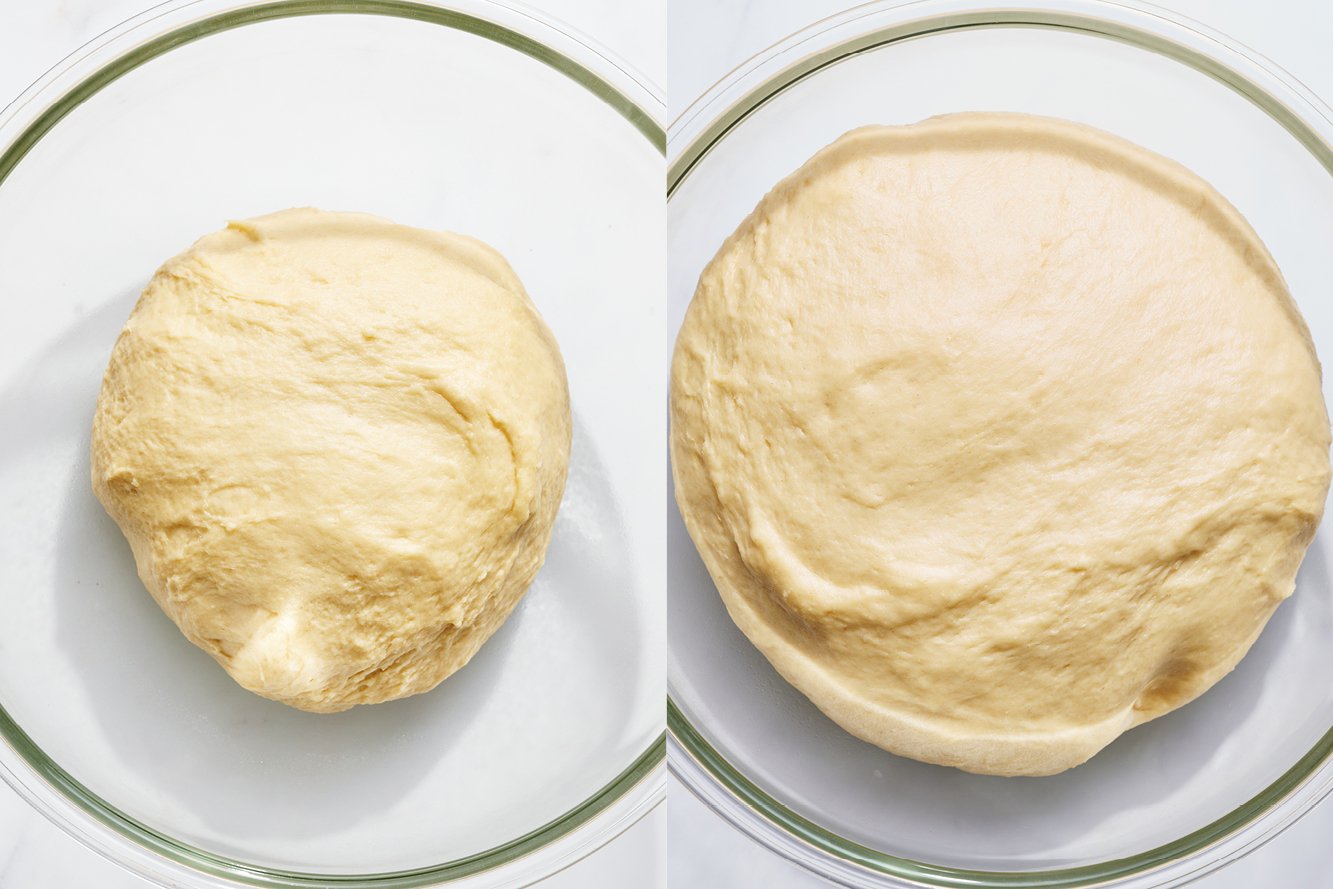
- The first rise will take about 90 minutes and the second rise will take about 1 hour; however, these times are completely influenced by the temperature of the rising environment.
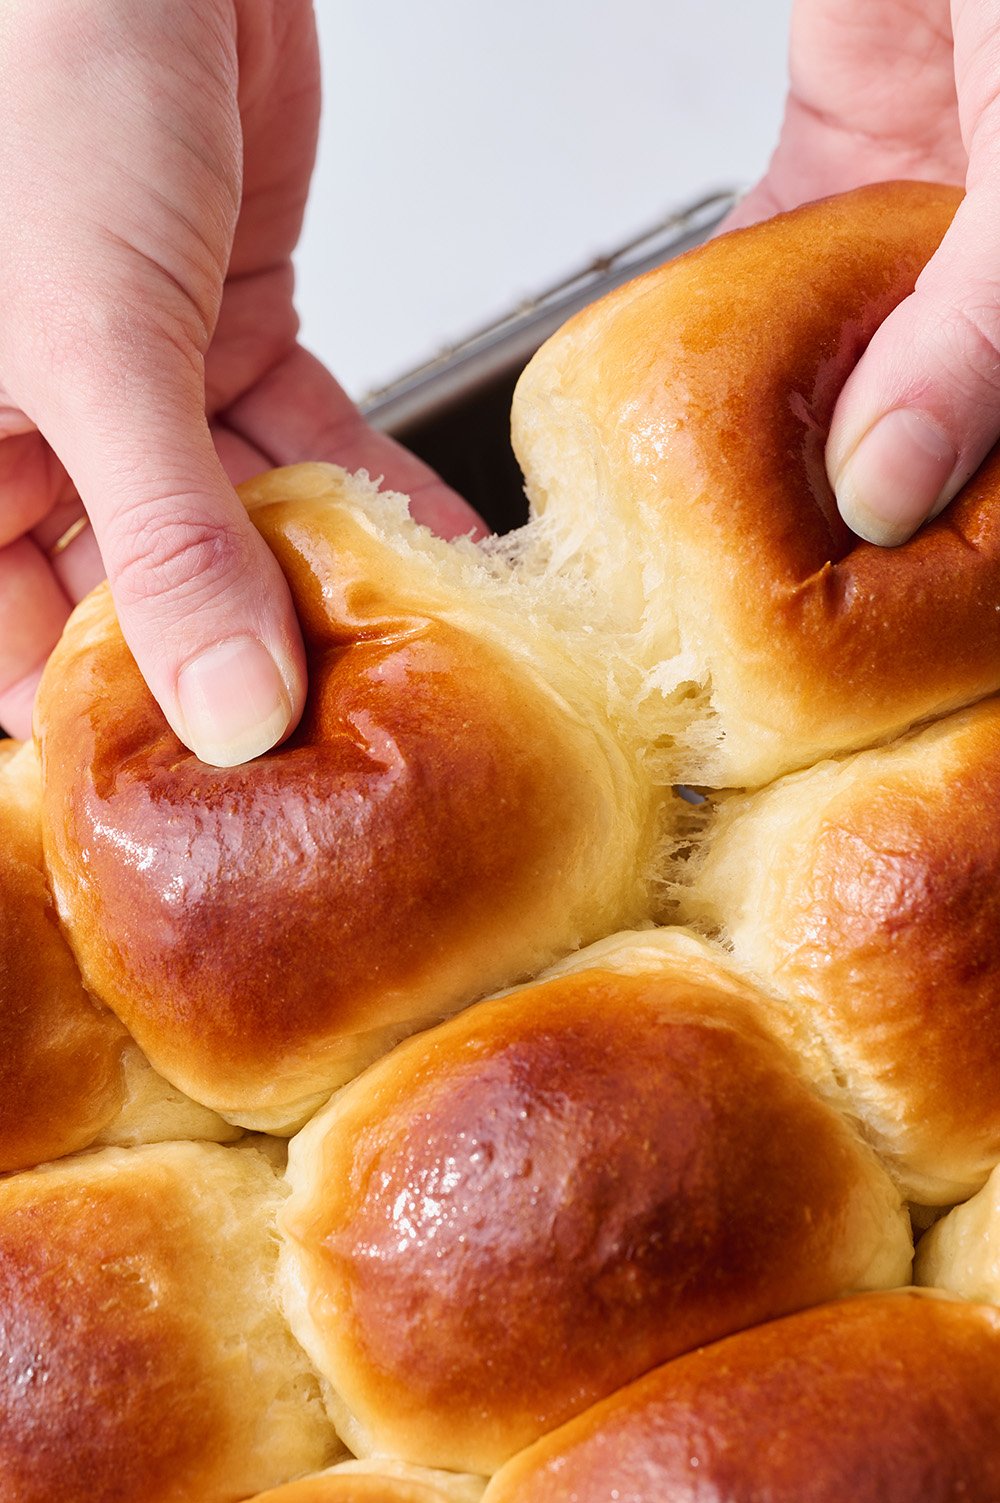
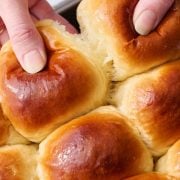
- You can tell if your bread is well-proofed by giving it a gentle poke with your finger or knuckle. Bread dough that has proofed well will spring back slowly when poked and leave an indent. If it snaps back too quickly, it needs more time.
- Don’t be tempted to speed up the rise time too drastically, as too much heat will kill the yeast and reduce flavor development.
- If you’re lucky enough to have a proofing setting on your oven, you can use that (provided you’ve tested it previously and it doesn’t get too hot!).
- If your kitchen is very cold, turn your oven on and place the bowl nearby, so it gets a little indirect warmth. If your kitchen is very hot, watch the rolls very carefully, as your rise time might be much shorter than specified.
How To Tell If You Have Over-Proofed Your Homemade Hawaiian Rolls
This can happen easily if your kitchen is very hot, or if you’re super busy and forget to check on the rolls. If your rolls have over-proofed, they will likely deflate while egg washing, or look deflated once baking. Over-proofed rolls will look a little sad, but they should still taste fine.
How to Shape Hawaiian Bread Rolls
It’s important to properly shape your bread rolls for beautiful, tall, fluffy rolls.
- Once the dough is risen, press it down to deflate it slightly.
- Place the dough onto a clean surface (not a floured surface). Use a bench scraper to section the dough into 12 equal pieces. Don’t worry if they’re not perfectly equal in size. However, if you’re a perfectionist you can actually weigh the entire mass of dough, divide that number by 12, then portion each piece perfectly by weight.
- As you’re shaping each piece into a round, make sure to pinch the dough into one central point to create a tight ball. This will help the rolls rise beautifully. Don’t flour your work surface when shaping the rolls because you want some resistance to roll them into taut balls.
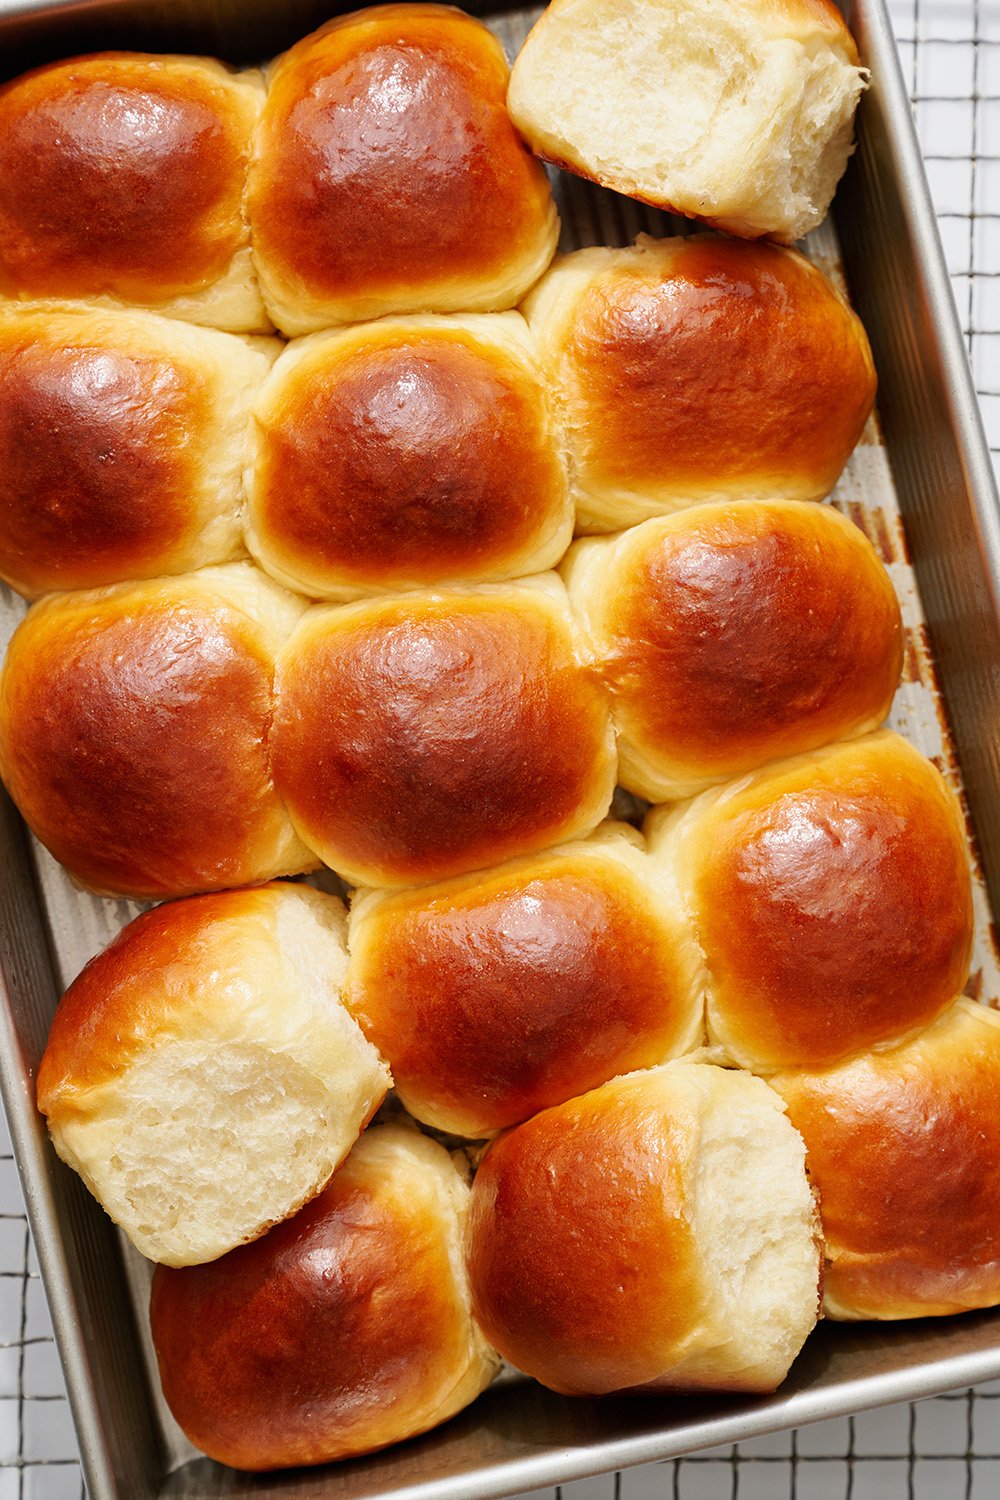
The Best Pan for Homemade Hawaiian Rolls
- This is my favorite pan for baking Homemade Hawaiian slider rolls, but any light-colored metal pan will work just fine.
- Avoid dark-colored metal pans, as these can cause excessive browning and dry out the edges.
- If using a glass or ceramic baking pan, you may need to extend the baking time. Learn more about baking in Glass vs. Metal Pans here.
For Those Who Prefer Not-So-Sweet Rolls
These rolls are subtly sweet, but please don’t experiment with reducing the sugar (we’ve tested it!), it’s an essential part of this copycat Hawaiian Roll recipe. The texture will dramatically worsen with a reduction in the sugar. Learn more about sugar’s role in baking here. If you prefer a less sweet roll, try my Ultimate Dinner Rolls recipe instead.
Do I Have to Use Bread Flour For These Hawaiian Rolls? Can I Use Just All-Purpose Flour Instead?
For best results, I firmly recommend sticking with both bread and all-purpose flour as written. Here’s why:
- Bread flour contains a higher percentage of protein than all-purpose flour, which helps build gluten and will aid in giving the rolls structure, height, and a little chewiness. Gluten is the backbone of any bread’s structure and since we are adding ingredients that prohibit gluten development (pineapple juice, butter, egg, sugar), that additional protein is needed to develop structure.
- When I tested a batch of Homemade Hawaiian Rolls using only all-purpose flour, the rolls were way too dense, noticeably drier, and took significantly longer to knead and rise.
- I also found that making the rolls with only bread flour yielded rolls that were too firm. The addition of a little all-purpose flour balances this out, making the rolls softer.
If you absolutely must use only all-purpose flour, just note that they’ll take much longer to knead, longer to proof, and they won’t be as soft and fluffy.
How Long Do Homemade Hawaiian Rolls Last?
These Homemade Hawaiian Rolls will keep for 3 days in an airtight container, stored at room temperature. Don’t refrigerate these Hawaiian Rolls, as it will dry them out faster. Refresh in a 300°F oven for 5 minutes, or pop in the microwave for 15-20 seconds, or until warm, before serving.
Can I Make Homemade Hawaiian Rolls Ahead of Time?
Enriched yeast doughs can have issues rising properly if made ahead. Instead, I recommend freezing the fully baked rolls as directed just below.
How to Freeze Hawaiian Rolls:
- Once cooled, place rolls in a ziptop bag or airtight container and freeze for up to 3 months.
- To thaw, leave at room temperature for a few hours.
- Reheat in a 400°F oven for 5-10 minutes, or pop in the microwave for 15-20 seconds, until warmed through, if desired.
More Bread Recipes You’ll Love:
More Sides You’ll Love:
Intimidated by bread baking? Download my *free* Beginner’s Quick Guide to Bread here.
-
½
cup
(116 grams) canned pineapple juice,
at room temperature
-
½
cup
(116 grams) whole milk,
warmed, (100-110°F)
-
5
tablespoons
(71 grams) unsalted butter,
melted and slightly cooled to just warm (~85°F)
-
6
tablespoons
(75 grams) granulated sugar
-
2
tablespoons
(25 grams) light brown sugar
-
2
eggs,
at room temperature
-
1
teaspoon
vanilla extract
-
2 ¼
teaspoons
(1 packet) instant yeast1
-
4
cups + 1 tablespoon
(516 grams) - 4 1/4 cups (540 grams) bread flour2,
dependent on kitchen climate, see notes
-
¼
cup
(32 grams) all-purpose flour
-
1 ½
teaspoons
fine salt
For egg wash & finishing:
-
1
egg,
lightly beaten
-
2
tablespoons
water
-
1
tablespoon
(14 grams) salted butter,
melted
-
Combine the pineapple juice, milk, melted butter, sugars, 2 eggs, vanilla, and yeast in the bowl of a stand mixer. Add 2 cups (286 grams) of the flour and stir with a wooden spoon until the dough forms a rough, shaggy mass. Stir in the salt. Attach the dough hook to the mixer and turn to medium-low speed. Gradually add the remaining flour JUST until the dough comes together. You may only need some of the flour, depending on your kitchen environment and brand of flour. Continue kneading on medium-high speed for 4 to 5 minutes, until a soft and smooth ball of dough forms.
-
Lightly grease or wet your hands and place the dough in a lightly greased medium-sized bowl. Cover with plastic wrap. Let rise until puffy and doubled in size, about 1 ½ hours3.
-
Spray a 9x13-inch metal baking pan with cooking spray. Gently deflate the dough. Use a bench scraper or knife to divide the dough into 15 equal pieces. Shape each piece into a ball and place in the prepared pan.
-
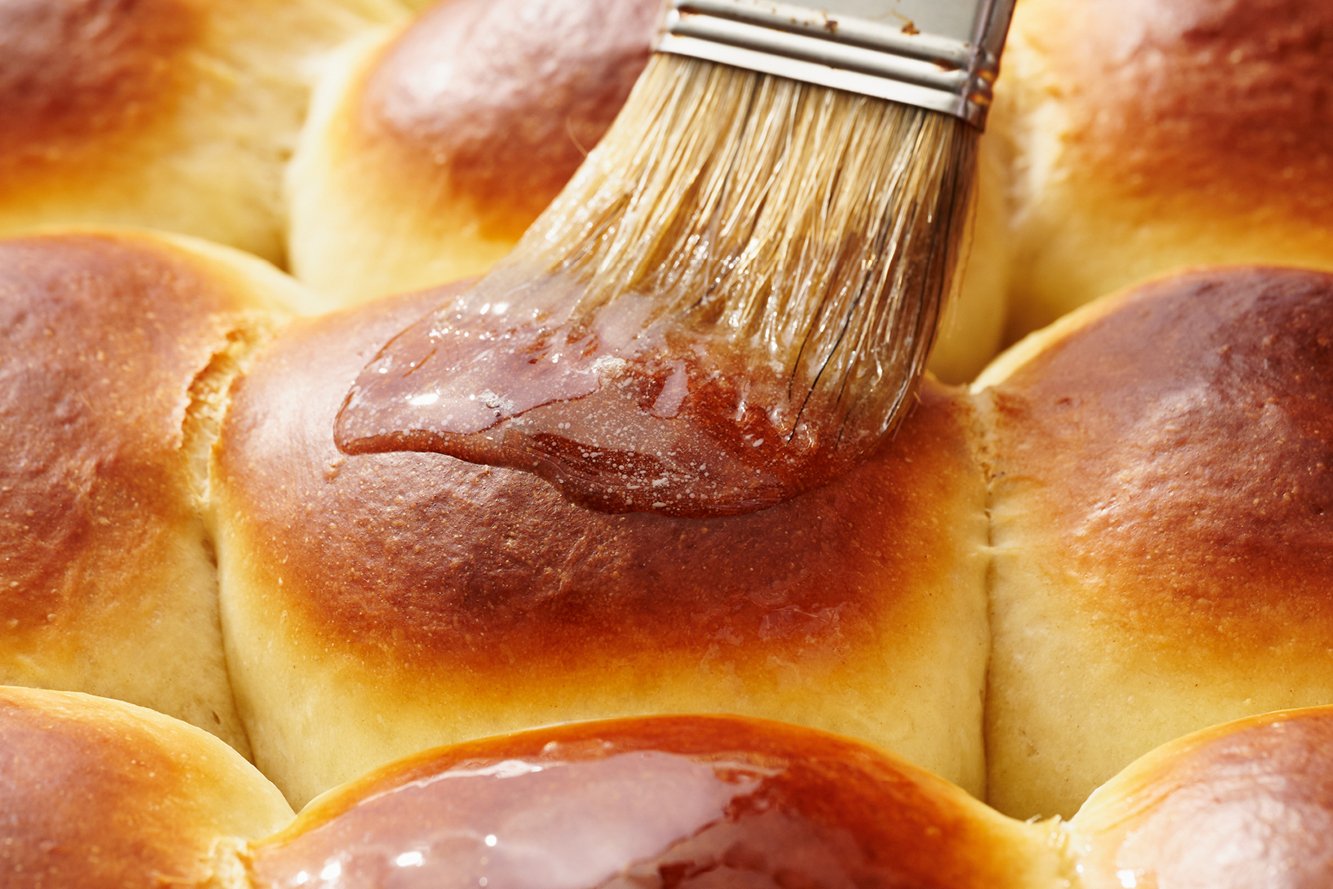
In a small bowl, combine the remaining egg with 2 tablespoons of water. Brush all over the rolls. Cover with plastic wrap and let rise again until doubled in size, about 1 hour**.
-
Meanwhile, preheat the oven to 375°F.
-
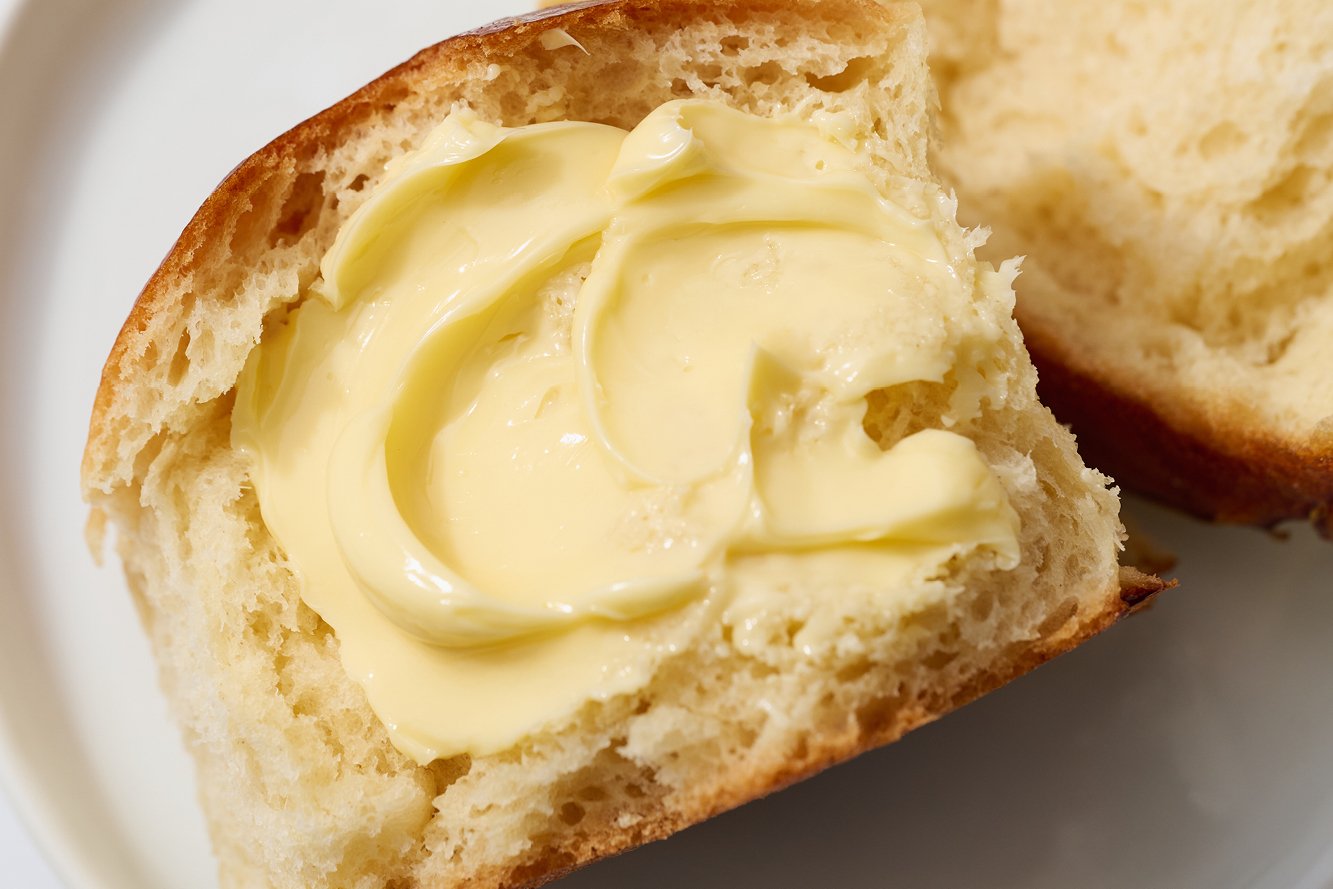
Bake the rolls for 20 minutes, or until golden brown. Brush with melted butter. Serve warm. Store leftovers in an airtight container for up to 3 days.
1. If you don’t have or can’t find instant yeast, you can easily use active dry yeast instead. Add it right in with the dry ingredients like instant yeast, just know the dough will take about 20% more time to rise. Or, to speed up that rise time slightly, simply combine it with the warm milk called for in the recipe and allow it to proof for 5 minutes before adding into the bowl with the other ingredients.
2. The more humid your location, the stickier your dough will be. If your kitchen is about 65% humidity or higher, use the higher range of bread flour (4 1/2 cups, or 540 grams). Reduce the bread flour if your kitchen is less than 65% humidity. Begin with the lower range listed in the recipe (4 cups + 1 tablespoon, or 516 grams) and add additional flour by the tablespoon (8 grams) as needed.
3. Rise time may vary depending on kitchen environment and climate.
This post was originally published in 2014 and has been updated with additional tips, recipe improvements, and new photos. Photos by Joanie Simon.


I tried making rolls with the fresh pineapple juice. Agreed the flour just wouldn’t stiffen up and form a ball, no matter how much I added. Does the enzyme in the fresh juice also kill the yeast?
I’ve never used fresh juice for this recipe, only canned. It would appear from other commenters that fresh juice does have a negative effect on the yeast :/
Question, love the Hawaiian rolls but don’t always want a sweet roll for sliders. Could I just use milk in place of pineapple juice so they would not be sweet?
Sure! Let us know how they turn out.
Hello there. Is there any way I can make these into loaves of bread instead of buns?
I’ve never tried so I’m not sure. If you do try let me know how it works out!
This was an absolute wonderful dough to work with, I however only did one thing different, I put all my dry ingredients into the mixing bowl, then made a huge well in the center down to the bottom of the bowl, pulling the dry ingredients up the sides of the bowl, then poured the premixed dry ingredients into the center, then with a wooden spoon quickly pulled all the ingredients together, therefor the wettest in the center, then added the dough hook, and let it knead for 5 min. Perfect dough! This may help the one that said the flour didn’t incorporate into the dough, my Granny taught me that, and it helps with bread dough to incorporate the ingredients evenly.Thank you Tessa and Hope that helps Lola. May the smell of fresh bread fill your house and surround you and your loved ones with warm hugs! ^_^
Thanks for leaving your feedback, Lisa! Glad you enjoyed the recipe. Your Granny sounds like she was a great baker 🙂
I’ve learned so much from from you! As a former teacher, I’d like to give you an A+ on your instructions. Well done!!!!!
Wow, thank you so much! 🙂
Can’t wait to try them!
Wish i would have read these comments before making them. Not sure if using fresh vs canned pineapple juice made the difference but the juice kept destroying the gluten and the dough turned into a soupy, sticky mess. Adding additional flour did not make a difference as after a few minute, my nice, firm ball of dough reverted back to slime. What a waste of ingredients.
If I wanted to reduce the amount of rolls by half, do I just halve the ingredients? Thank you!
I made the dough for these in a bread machine. This is a great recipe ! Light and fluffy so the bread machine did the hard part. are not s sweet as the store brand. I will make these for Thanksgiving!
Great recipe! Im uk based so i had a real struggle converting everything precisely and the mixture was extremely goey. I was concerned so i took a gamble and added more flour to half of the mixture. They both turned out great although the one with more flour was denser. The method is a quite a struggle due to the goey dough but I wouldn’t mind trying it again!!!
Hi Tessa
The recipe look very tasty, but I was wondering if I can convert the butter with something else? We can’t it butter because of cholesterol. Thanks
I haven’t tried using a butter substitute so I can’t say for sure. If you give it a try let us know how they turn out!
My dough is not soft it’s hard and not raising much after 45 mins What did I do wrong?
This is so much better than another recipe I tried from a different site. Your rolls rose twice as fast! The only thing I added was a half tsp. of ground ginger, which was something the other recipe called for that I really liked.
Thank you so much for posting!
These are not only delicious but they look great and easy to make.
Wonderful! Glad to hear it.
Tessa,
Thank you so much for this recipe I make it all the time and my family loves it . I make them hamburger bun size then make pulled pork sandwiches and cheese burgers they’re so good.
Fantastic! That sounds absolutely delicious.
Cant wait to try.
Need to get bread flour and my on it!!!
Just a note to anyone in the same boat as I was just in. I didn’t have any pineapple juice, but had a fresh pineapple so I blended and strained 1/2 c. of the juice instead. Unfortunately, the enzymes in the fresh pineapple break down and destroy the gluten you are trying to form when kneading, leaving you with a stick, mushy dough that will not recover…baker beware!
Omg! Thank you! Happened to me just now! #PineappleEnzymes
I had the same problem – Very sad and a waste of flour. Tessa, I suggest the recipe is annotated to ensure the baker uses only canned pineapple juice and NOT juice from fresh pineapple.
Hi Eileen – it does say that already, it’s how the pineapple juice ingredient is listed. Both in the recipe and in the notes in the blog post.
Absolutely delicious! I followed your recipe exactly. We live in the UK and I am from the USA. Lately we’ve been craving the Hawaiian Rolls. So glad I made these! Thank you for the recipe and helpful tips!
Forgot to mention I used all purpose flour.
I’ve just made these twice in the last week. The first batch was to test the recipe and it was great. I did it exactly as the recipe called for and it came out perfect each time.
I didn’t have a mixer, or a bread maker, so I did it by hand with a fork and a bowl, then some elbow grease to knead. Each time it was delicious.
The flavor was great, not too sweet at all, and the pineapple juice really put them over the top. I don’t even like pineapple.
I wanted to give my two cents and hopefully help others feel confident about this recipe. Go ahead and make it your family will love you.
do they freeze well ?
Can I use all purpose flour?
Are you sure that your flour to liquid ratios are right, as the liquid seems high. When I followed your recipe, I could not achieve a soft ball using 20 oz of bread flour. I added and additional approx 6 oz and still did not have a soft ball. I had stopped at this point because the dough seemed very heavy. Current RH is 84%. Please advise.
I make this recipe in my bread machine on the sweet dough cycle all the time. You will find that a sweet dough will take longer the rise once they are formed into buns. I find that if I turn on the light in my oven when I start the dough that the oven is warm enough to make an ideal environment for the dough to rise. I also put a 4 cup glass measuring cup with 3 cups of water that I have boiled in the microwave in the oven during the proofing time. The steam prevents a crust to form on the dough and the buns will rise higher. Remove the buns and the water before you preheat the oven.
Just made these using the dough setting on my bread machine. I used bread machine yeast, and, OMG, they are amazing. Thank you for the best Hawaiian roll recipe ever.
Wonderful Lenore, thanks for sharing about the bread machine!
I have tried many copy cat Hawaiian bread recipes. This is the only one that is SPOT ON!!! These will become a regular on my “Breads To Bake List”. Thanks so much. I am a hit with my granddaughter. Hawaiian rolls are her favorite!
Just made these…. ABSOLUTELY delish! So easy to make. Thanks Tessa!
I made your recipe today. Well attempted to.
The dough was really wet and sticky…..until I realized that I added 1 cup of milk and 1 cup of juice instead of a half cup of each, lol.
Once I added twice as many of the other ingredients, it came together nicely. I cooked half of the recipe and froze the other half.
Sometimes mistakes are good, I’m glad that I had enough ingredients.
It turned out really good. 🙂
Hi, I just made these and they looked great but were really dense 🙁 . I used active yeast w 1/4 cup of water and bread flour. I also baked them in a glass dish so I lowered the temp to 350 and baked till golden brown. So bumbed. Any suggestions to make them turn out fluffier?
S
A little late, but mine also came out denser than I would have liked. I accidentally had the oven set at 350. So I’m wondering if that’s the issue.
I have the packets of Fleischmann’s RapidRISE HIGHLY ACTIVE YEAST. can I use it in this recipe? If so, how many packs. Should I use?
I made these rolls this weekend and they turned out great! They’re not quite as sweet as regular Hawaiian rolls, which is nice. Thanks for the recipe!
I used instant yeast, turn out terrible. The dough became very dry and falling apart. Oh and the yeasty smell is super awful even though I followed the recipe to a T. So I switch to active dry yeast and everything come out perfect. I’m so glad I didn’t get discourage after the first fail. Also, the second time I use only 3 2/3 cup bread flour. Thanks so much for this wonderful recipe.
I’m guessing your experiences have less to do with the yeast and way more to do with the amount of flour used! Use a scale to weigh your flour for the most accurate results or be sure to use the spoon and level method of measuring flour with measuring cups. More info here: https://handletheheat.com/2014/07/ultimate-guide-measuring.html
I don’t have a stand up mixer. Can I fold in the flour by hand and how long should I knead it?
She addresses that in the post.
These turned out perfect! I cut the sugar in half to make less sweet rolls for the particular dinner I was making. I’ll definitely try out the original soon too!
I had to let you know that my family LOVES these rolls, thank you so much for posting your recipe!! I make them at least twice a week. I hate buying mass-produced, chemical filled bread so I always make my own and this is my kids’ favorite for their school lunches. They are delicious!
@Lola, since the OP seems confused: if all of your flour does not incorporate, it is probably due to your house/where you love being much drier. In more humid climates, you need more flour to compensate for the moisture in the air. I’ve noticed that for some bread recipes the flour requirements can fluctuate by +/- 1.5 cups from winter to summer here in the humid South.
Oi magiasbook.
Se vc nao achar a farinha propria para pao. Use uma farinha de boa qualidade.E so isso.
Olá vou experimentar sua receita e fazer,espero acertar o que é farinha de pão para vocês aqui no Brasil eu conheço farinha de trigo .
Alexandra
I will be using Active Dry Yeast and read your instructions on how to substitute; however, I am wondering if I need to adjust the measurement you stated for the instant yeast and if so what would the new amount be for the Active Dry Yeast? Thank you and great video btw!
Active dry yeast and instant yeast can be substituted for each other 1:1. Happy baking!
Chelsea, I had issues of whether the pineapple juice’s temperature was crucial for this recipe to come out right. I researched two other Hawaiin roll recipes and BOTH said to use ROOM temperature pineapple juice. It makes sense because of the yeast. Thanks for bringing this to light in this recipe.
I just made these, and I don’t think they came out right. The dough didn’t double in size before I formed them for baking. Does the pineapple juice have to be warm? Mine was cold, but I had the milk warmed to the appropriate temperature. I baked them. They rose, but I think it was because of the eggs. I also kneaded by hand because I do not have a have kitchen aid, will that make a difference?
Hello. The recipe states “4 1/2 cups (20 ounces) bread flour” but 4.5 cups is not 20 ounces. Which is correct for the recipe, 4.5 cups (36 ounces) or 2.5 cups (20 ounces)?
Hi! If you’re not familiar with weighing ingredients it can be a bit tricky to wrap your head around at first but think of it this way – 1 cup of feathers will not weigh the same amount as 1 cup of lead. 1 cup does not always equal 8 ounces. Please see my Ultimate Guide to Measuring for more help: https://handletheheat.com/ultimate-guide-measuring/
Thanks for sharing this recipe!
I made these rolls with my brand new Kitchenaid mixer (1st thing I made with the KA mixer). Filled them with Mojo style pulled pork, topped with pan seared pineapples.
Very delicious!
Better than the Store bought Hawaiian Sweet Rolls.
♡♡♡♡♡♡
Will make again!
How did you keep the milk and pineapple from curdling when mixed? This would seem to be a possible problem with recipe
What’s your recommendation for storage? I’ll need to bake this weekend for Thanksgiving. Fridge or counter?
Hi! Please see the “make ahead” advice in the post. I would not recommend baking 4-5 days ahead of time, they will go stale unless you freeze.
Hi Tessa,
I just took these rolls out of the oven and ate 2! They are wonderful! My girls really liked them too. Very easy to do. Will be making regularly. Thank you! Will be trying more of your recipes.
Yay! So glad to hear that, thanks for sharing.
Not all the flour is not being incorporated. I have followed the recipe to a T. Now what do I do? Too much money to waste.
Not all the flour is not being incorporated? I really have no idea what the means! 🙁
I am curious. My dough has been sitting in the bowl for about 45 minutes now and it hasn’t risen at all. First time making any kind of bread.
It sounds like you didn’t use instant yeast or your yeast might be dead (or your kitchen is really cold).
This was sooooo fantastic tasting and easy. I’ve turned into a Carb-Monster…. I ate two in a row !!!
These look great and will be the first recipe I make with my new stand mixer. Thanks so much
Good day ma’am Tessa that was another amazing bread recipe…it’s a big help to me because here in our country philippines culinary school is so expensive ..so I’m very thankful to find your website…thank you so much…more power and Godbless…
I made these yesterday and they turned out harder then i’m sure there supposed to be rather than light and fluffy. I’m wondering if that is the result of not letting it rise long enough? Thanks!
Can’t wait to try this! Have always loved those King Hawaiian Bread Rolls. Quick question, can the recipe be halved? Otherwise would you instead recommend using some AP flour since I won’t have enough bread flour? I prob have around 3 cups of bread flour left but can’t wait to make this soon!
You should be just fine using up all the bread flour you have then substituting AP flour for the remaining amount.
Wow, these look great, and I imagine taste even better! I love these with pork, and coleslaw.
Can you do this in a bread maker as a loaf?
I don’t own a bread maker but I don’t see why not… it wouldn’t exactly be a copycat recipe at that point though!
So soft and with just a hint of sweetness, these would be irresistible!
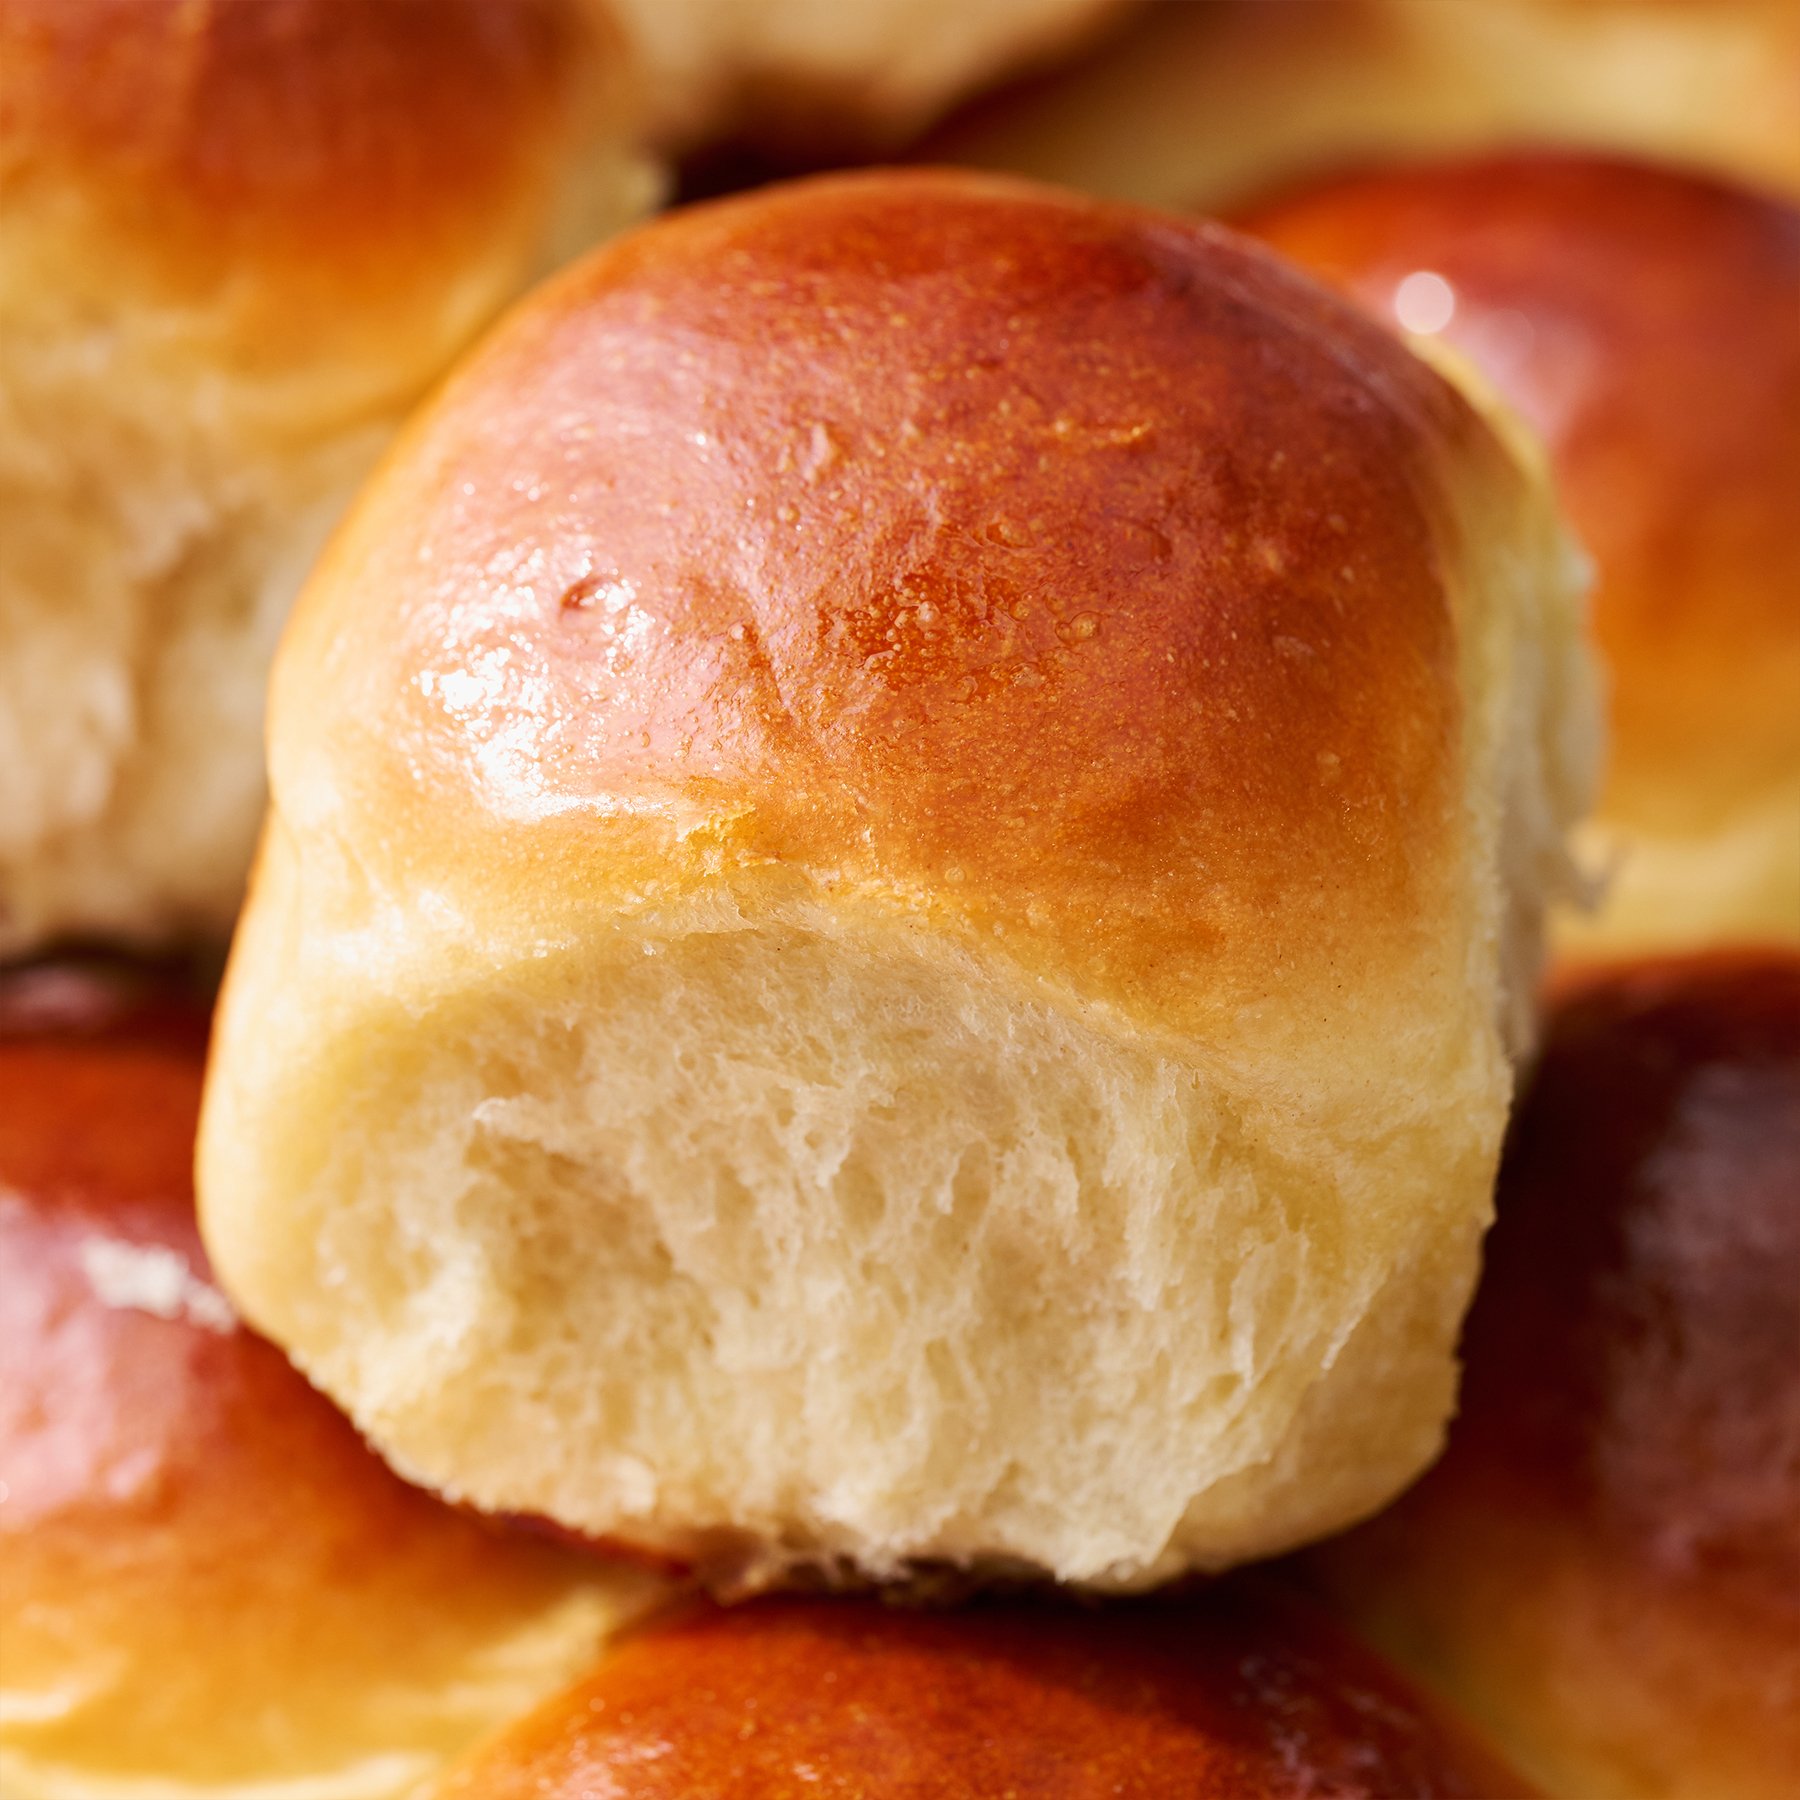
That texture looks PERFECT! And that golden top, to die for!
I know what I’m making this weekend. These would be amazing with pulled pork.
I literally had these with pulled pork for dinner on Tuesday night!
Just made the dough. I wish I would’ve sprayed the bowl I placed the dough in as it was very sticky. Hope it comes out easily.
It turned out great!!!
I swear those little sweet rolls get me every time. I find myself not able to stop eating them if I have them around, but if I made them myself, I couldn’t feel bad about snarfing them down since I’d never waste anything I actually made. 🙂
These look so soft and fluffy, mmm 🙂
These look amazing!
Just follow the recipe! These came out perfect! Thanks a million!