This post may contain affiliate links. Read our disclosure policy.
Send me to a deserted island with a lifetime supply of these Red Lobster Homemade Cheesy Garlic Biscuits and I’d be happy.

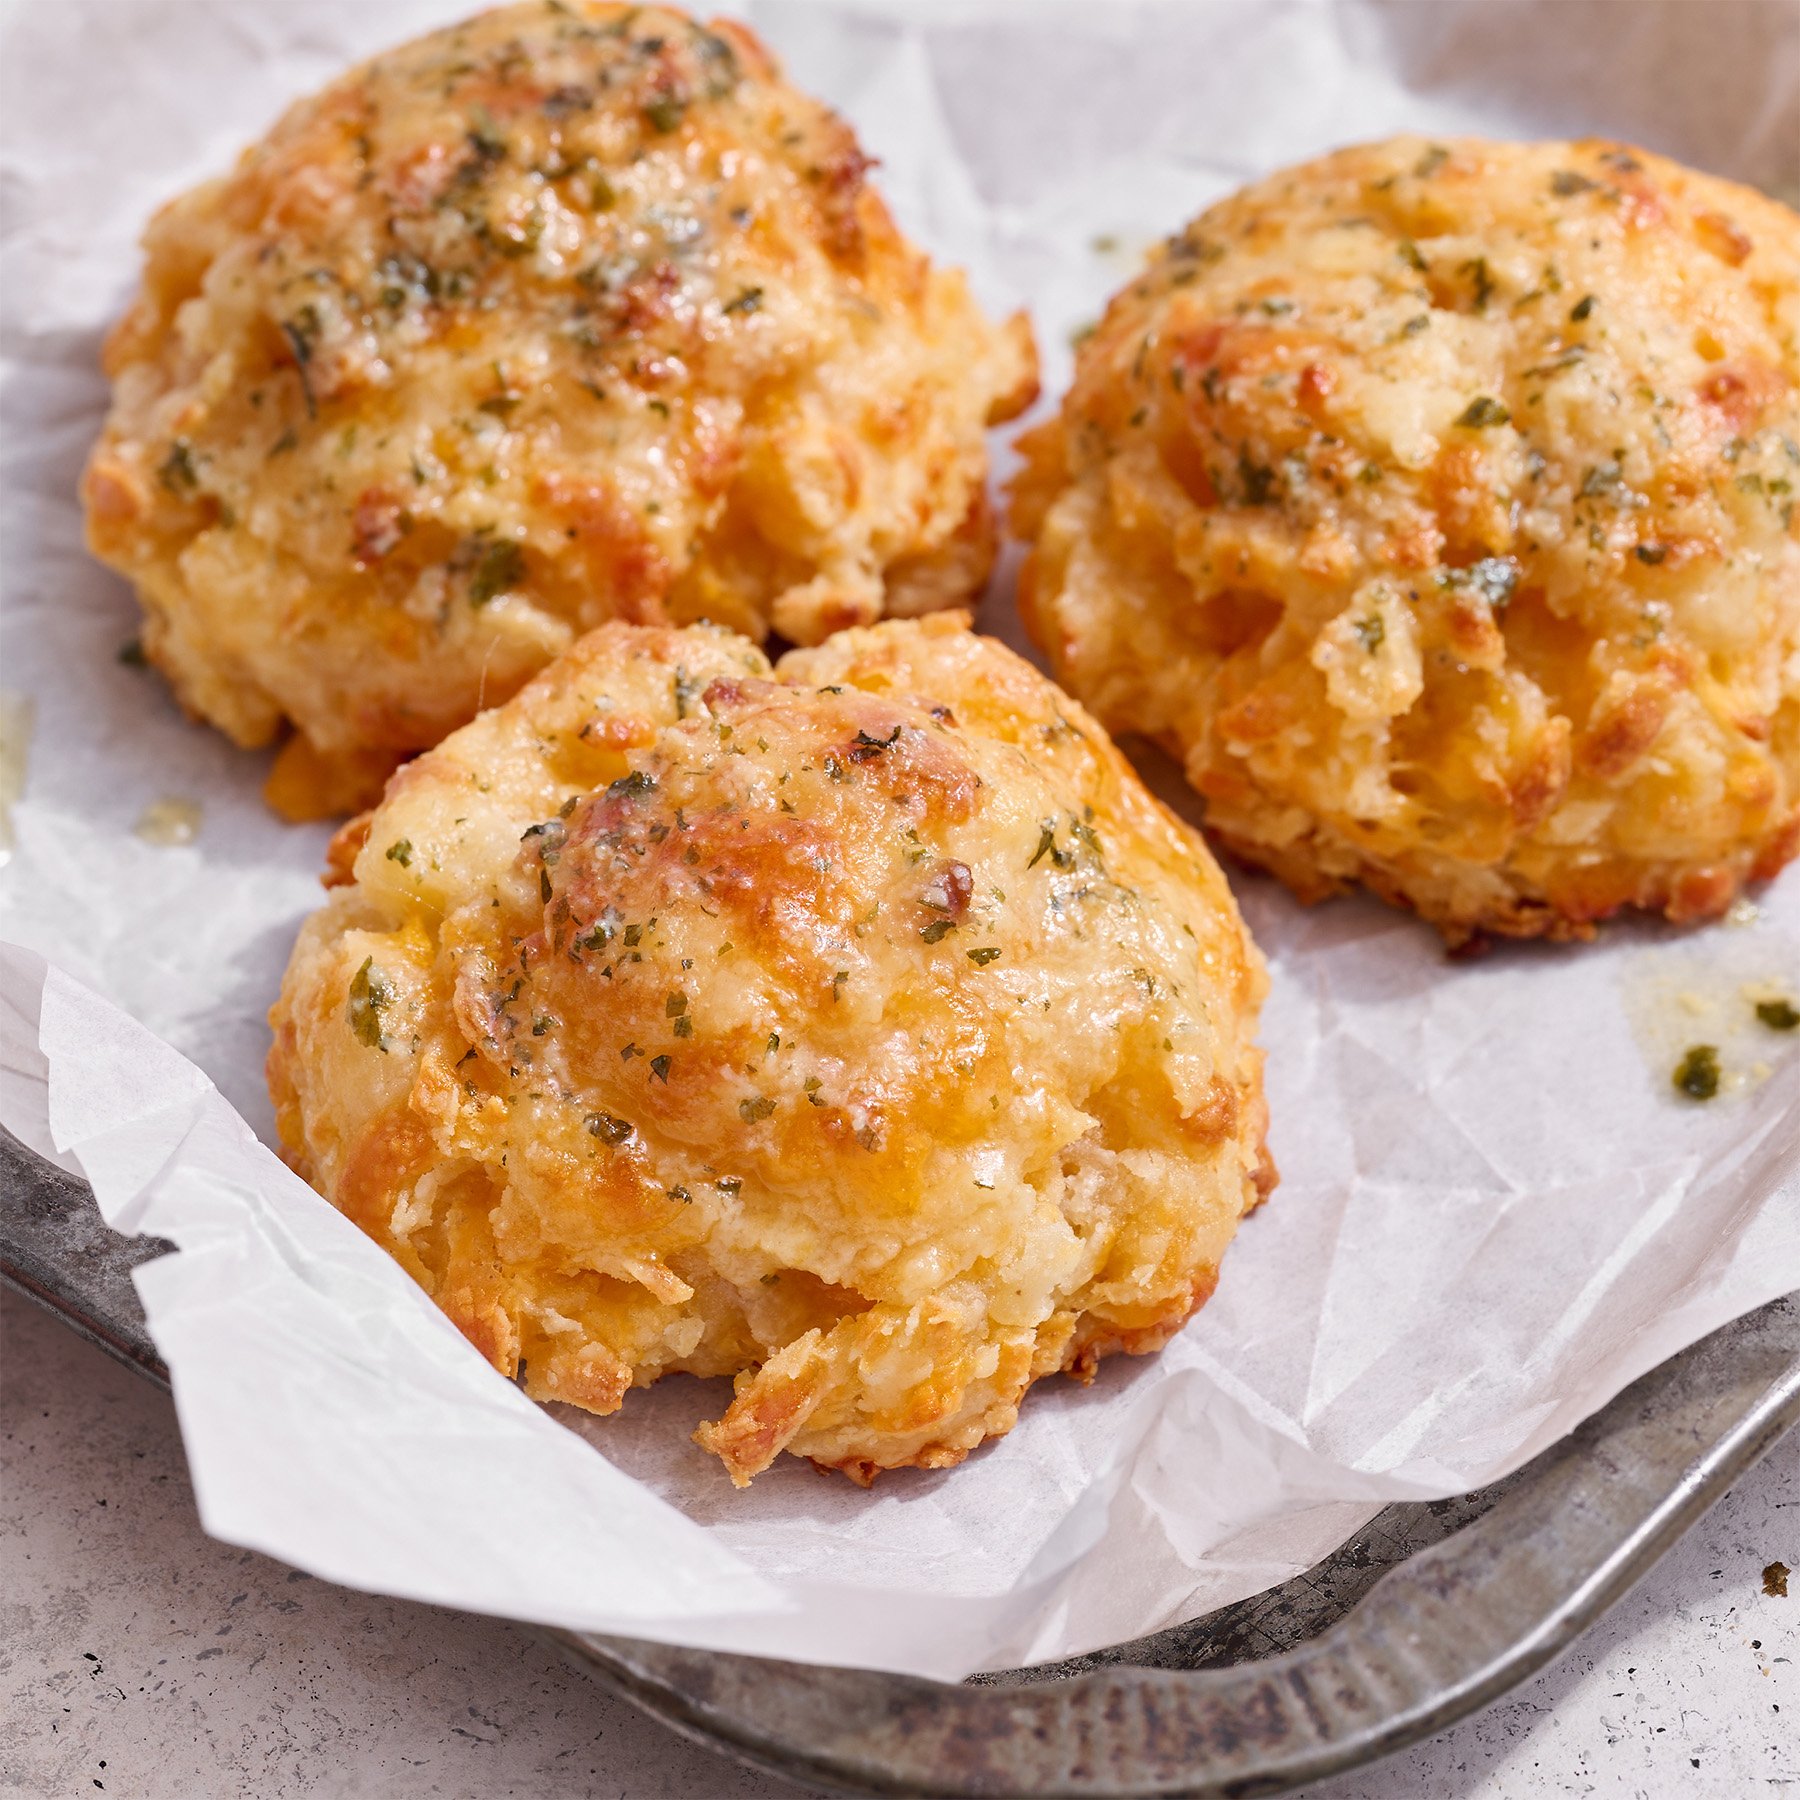
They’re a homemade copycat version of the Red Lobster Cheddar Bay Biscuits, but I think these ones are even better.
I’ve been making these for years. They’re incredibly quick to make and smell like the best thing ever while they’re baking. They’re also super easy to whip up. Probably one of my most favorite copycat recipes ever.
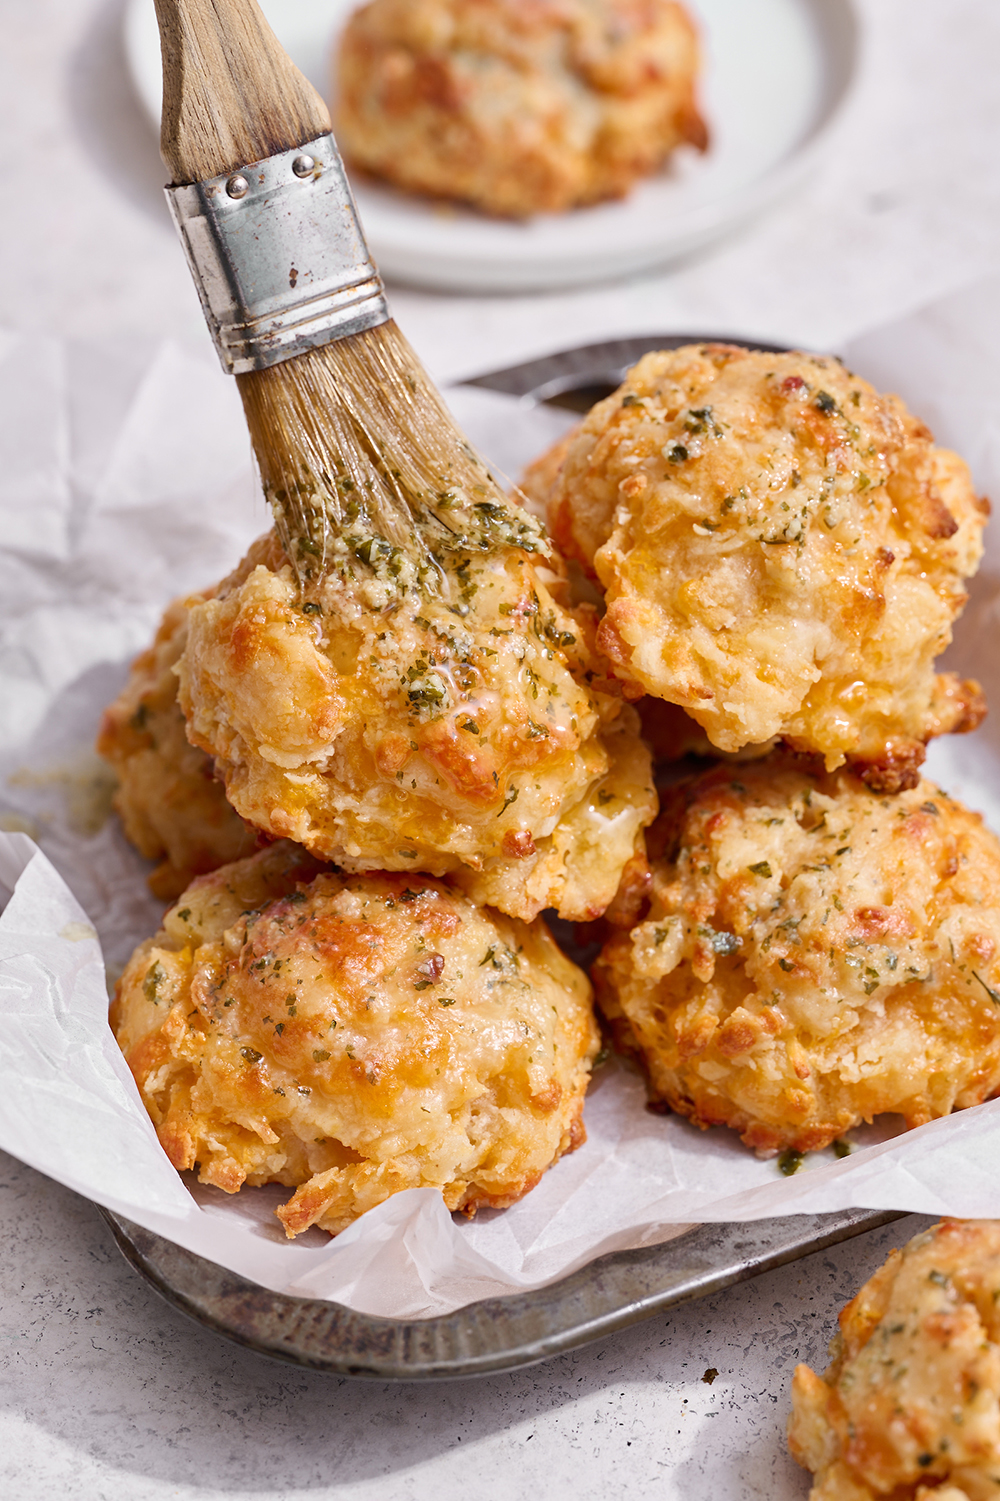
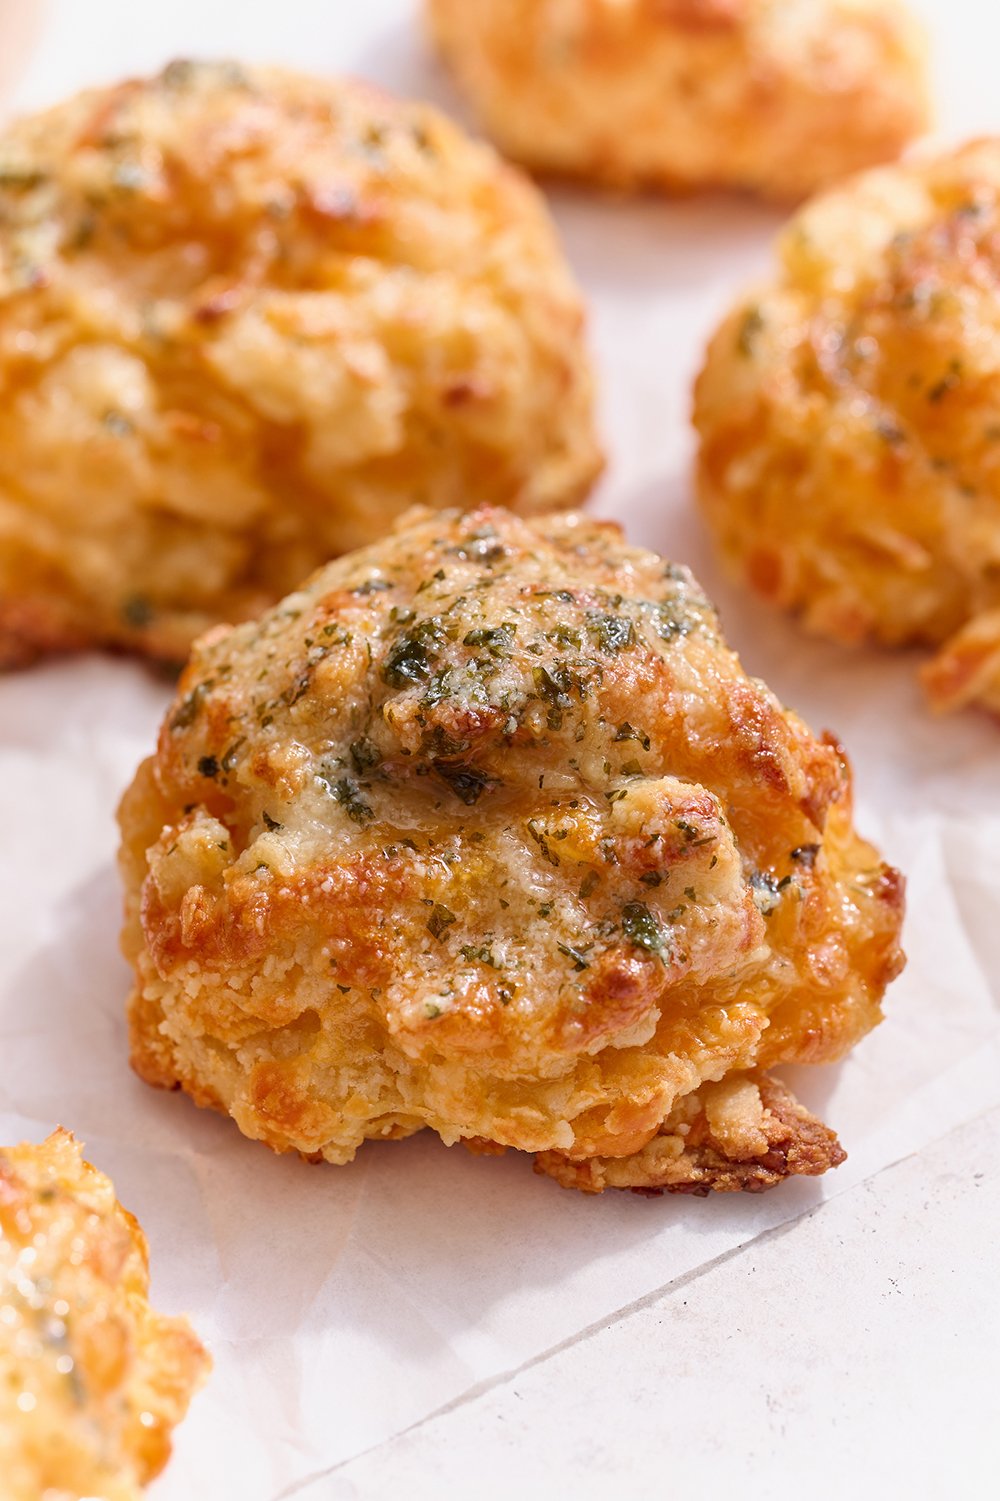
They’re perfectly savory. The biscuit recipe is buttery, flaky, and crisp and is made with shredded cheddar. Then the biscuit gets topped with a butter mixture with the best garlic flavor. SO. GOOD.
I’d much rather enjoy these copycat Red Lobster cheddar bay biscuits at home than at a chain restaurant. I actually have a bad memory attached to Red Lobster.
When I first started carrying around a purse regularly as a tween, I thought I was so grown up. Until I left it behind at our booth at the restaurant and didn’t realize until we had driven 20 minutes home. Oops. Let’s just say my parents made sure I learned my lesson before wasting 40 minutes to get my $10 purse with $5 cash, chapstick, and my school I.D. inside.
This all reminds me of another seafood restaurant story where I saw a woman stuff the biscuits into her purse. I actually have been tempted to stuff some of these homemade Red Lobster biscuits in my purse just to have as a snack for later in the day. They’re that good!

How to Make Copycat Red Lobster Biscuits
Ingredients for Red Lobster Cheesy Garlic Biscuits:
- All-purpose flour – measured correctly! If you add too much flour, you may end up with dense, dry, or crumbly biscuits.
- Baking powder – check out my Baking Soda vs. Baking Powder article to learn about the surprising differences between these two leaveners. A generous amount of baking powder is essential to fluffy biscuits.
- Butter – always use unsalted butter in baking. Make sure you’re working with cold butter so you don’t end up with too warm of biscuit dough which causes biscuits to flatten when baking.
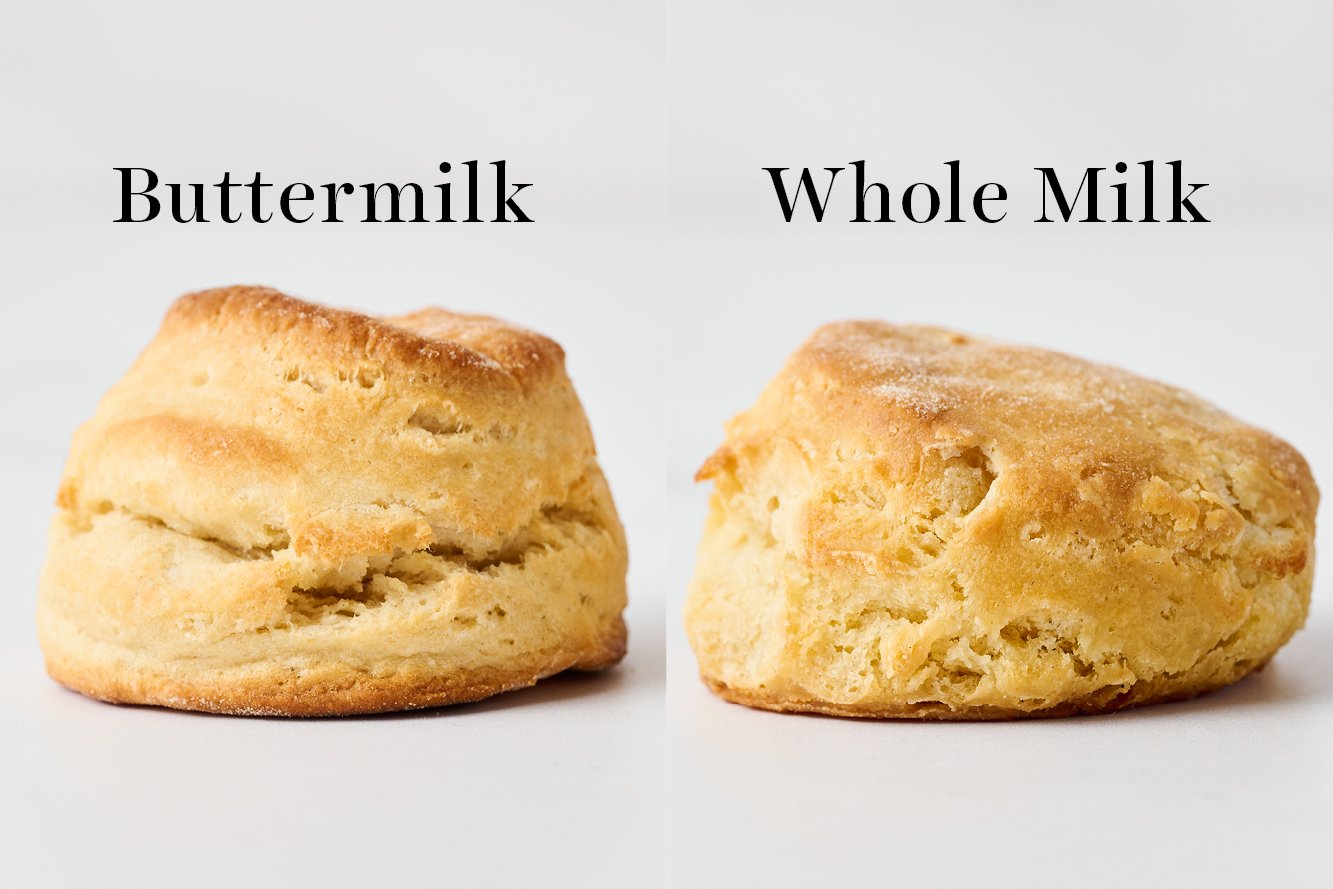
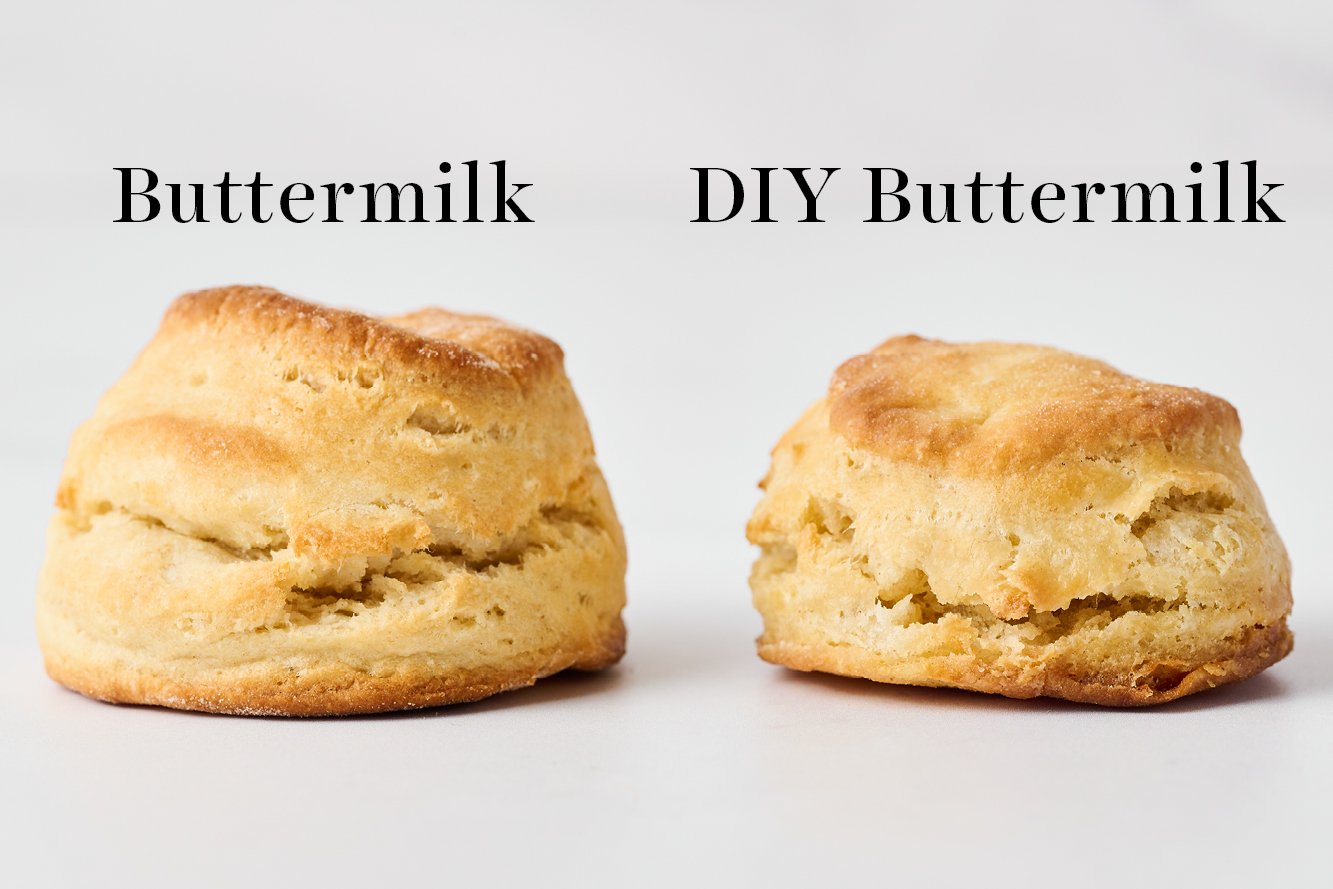
- Buttermilk – I strongly recommend using real buttermilk, instead of a DIY substitute, for the best flavor, height, consistency and more. Read more about why in my Buttermilk 101 article!
- Garlic powder – using garlic powder will mimic the flavor of the original biscuits more than using fresh garlic.
- Salt – I prefer to use fine sea salt but table salt works in a pinch.
- Sharp cheddar cheese – using a sharp cheddar, freshly shredded, will give a strong cheesy flavor, great texture, and mimic the flavor and consistency of the original biscuits.
- Then we make a garlicky butter with more butter (melted this time), more garlic powder and some dried parsley. You can also use fresh, just chop really finely.
Do I have to use buttermilk in biscuits?
To create the best flavor AND texture, yes. I’d highly recommend using real buttermilk in these cheesy garlic biscuits.
I’ve done extensive side-by-side testing on buttermilk vs. regular milk vs. buttermilk substitutes (including powdered buttermilk). Take a peek:
You can read more about my science of baking & buttermilk experiments here: Buttermilk 101.
At the end of the day, I find nothing quite compares to the tangy taste and thick texture of the real thing. If you can’t use real buttermilk, you can use this substitute: 1 scant cup whole milk + 2 teaspoons distilled vinegar or lemon juice – but please be aware that the flavor and tender texture won’t be as good, compared to using the real thing.
Do I need to roll out the dough and cut it?
No! Unlike traditional biscuits or scones, these Red Lobster cheddar biscuits are even more simple as you just portion the dough out and drop it right onto a parchment paper-lined baking sheet. This makes for a more rustic look, making them perfect to bring to a dinner party or Sunday family dinner. This spring-loaded ¼ cup scoop will make this job even easier, but you can also use a measuring cup. If the batter sticks, just spray your scoop or cup with nonstick cooking spray.
How to Make Cheesy Garlic Biscuits:
- Measure out all the dry ingredients into a large bowl. Whisk together.
- Add the butter. Use a pastry blender to cut the butter into the flour mixture until the butter forms pea-sized crumbs.
- Add the cheese. Stir to combine.
- Pour in the buttermilk. Stir until just combined, being careful not to overmix as the dough forms.
- Portion the biscuits. Drop the dough by scant 1/4-cup portions onto the prepared baking sheet.
- Bake the biscuits. Bake at 425°F for 16 to 17 minutes, or until golden brown.
- Make the garlic butter. Melt the butter in the microwave. Combine the melted butter, parsley, and garlic powder.
- Brush the garlic butter on the warm biscuits. Serve right away for the most delicious results.
Tips for perfectly tender, flaky, and soft Cheesy Garlic Biscuits:
- Be super gentle with the dough. Making these biscuits by hand with a pastry cutter, instead of a mixer or food processor, means you’re less likely to overwork the dough – and it’s still super quick and easy. Be sure to mix the buttermilk in gently, and only just until the dough comes together. Overmixing will result in tough biscuits.
- Make sure to MEASURE CORRECTLY. Too much flour will result in dense, dry, and tough biscuits.
- Use real buttermilk. The acid in buttermilk activates the baking soda (baking powder actually contains baking soda) in these biscuits to leaven, lighten and tenderize the end result. A DIY substitute will work, but the results won’t be as tender and tasty.
- Make sure your ingredients are COLD. Your butter and buttermilk must be very cold when mixing. The cold little pieces of butter in the dough will release steam once they hit the heat of the oven. That steam puffs up and helps to create those mouthwatering flaky layers.
Can I make Cheddar Garlic Biscuits in advance?
If you have to prep these ahead of time, I recommend following the freezing instructions below – or making them the day before, and just popping them back in the oven (instructions below) to reheat them, before serving.
How to store Cheesy Garlic Biscuits?
These biscuits are best served the day they are made, but they’ll still taste great for 3 days if stored at room temperature, in an airtight container. Just refresh in the oven (instructions below).
How to reheat Red Lobster Biscuits:
To reheat, wrap in foil and bake for 5-10 minutes at 350°F, or until warmed through.
Do Homemade Cheddar Biscuits need to be refrigerated?
Storing cheesy garlic biscuits in the fridge will dry them out quickly. I recommend keeping these cheesy garlic biscuits in an airtight container at room temperature.
Can you freeze Cheesy Garlic Biscuits?
Yes! Portion the cheesy garlic biscuits out on a parchment paper-lined baking tray and freeze for a couple hours, until solid, and then move to a ziptop bag, freezer bag, or airtight container. Freeze for up to a month.
To thaw, move the biscuits to the fridge overnight, then bring them to room temperature and allow them to get a little puffy before baking. Alternatively, bake as directed straight from the freezer, adding an additional 5 minutes to the baking time, or until golden brown.

More Recipes You’ll Love:
Want to make perfect biscuits every time? Check out my Biscuits Cheatsheet here!
For the biscuits:
-
2
cups
(254 grams) all-purpose flour
-
2
teaspoons
baking powder
-
1/2
teaspoon
garlic powder
-
1/4
teaspoon
salt
-
6
tablespoons
(85 grams) cold unsalted butter,
cubed
-
1 1/4
cups
(6 ounces / 170 grams) sharp cheddar cheese,
shredded
-
3/4
cup
(178 ml) buttermilk, very cold
For the butter:
-
3
tablespoons
(43 grams) unsalted butter,
melted
-
1/2
teaspoon
dried parsley
-
1/2
teaspoon
garlic powder
-
Preheat the oven to 425°F. Line a large baking sheet with parchment paper.
-
In a large bowl, whisk together the flour, baking powder, garlic powder, and salt. Use a pastry blender to cut the butter into the flour mixture until the butter forms pea-sized crumbs. Mix in the cheese. Add the buttermilk and stir until just combined.
-
Drop the dough by scant 1/4-cup portions onto the prepared baking sheet. Bake until golden brown, about 16 to 17 minutes.
-
While the biscuits are baking, combine the melted butter, parsley, and garlic powder. Brush the biscuits with the garlic butter and serve warm.
This post was originally published in 2013 and updated in 2022 with new photos and more recipe tips. Photos by Joanie Simon.


do I have to have a pastry blender because I do not have
Hi Engo! We definitely recommend using a pastry blender, for the reasons Tessa mentions in the pink tip box (above the recipe), but if you don’t have one, you can use a fork or even just your fingertips. Be sure to check out all the info Tessa has in the pink tip box before you begin. Happy baking! 🙂
Absolutely outstanding! I followed the directions exactly and everyone was very pleased with how awesome these are!
made these for dinner tonight and my only complaint is I obviously have no clue what a scant 1/4c is because I got them on the tray and there was only about 6 of them and recipe calls for 12. So I did what any good HTH student does and got out my scale and started over. Each biscuit was about 56g each in order to get 12. Other than that super easy recipe. I dd not have any dried parsley so I just used FlavorGod Garlic lovers blend mixed with the butter and it was perfect.
I’d give this recipe 10 stars if I could! These were absolutely amazing and my husband said that we need to make them weekly, at the very least!!
Years ago I had a different recipe for these biscuits that used ‘light’ Bisquick and powdered buttermilk. There were OK, but these were ingredients I didn’t like to buy or keep on hand.
Now that I have a recipe completely from scratch with no weird ingredients and chemicals, I will be enjoying these much more often. Thank you, Tessa! 🙂
We love hearing that, Andrea! So glad you enjoyed this recipe! 🙂
Can I make these, leave in fridge overnight unbaked and bake next day?
Hi Linda! You’ll find instructions on how to best achieve this in the pink tip box, above the recipe 🙂 Happy baking!
So yummy and easy to make!
Made these to go with a beef stew and my husband said they were the best biscuits he’s ever had. That’s saying a lot for 39 years of marriage! Ha, ha! They were great! I followed the recipe with the exception of the cheese. I didn’t have enough cheddar, so I added some gouda.
I need to repost as i made a typo :). The best recipe we’ve ever tried for these, will never need another! Thank you!
Turned out great!!!!!!!!!! This is my go to recipe now
Making them tonight…let you kno
Very good and easy!!
I recommend cutting a whole head of garlic in half.
drizzle with olive oil and wrap in foil. bake in 350-400f oven until cooked soft.
take roasted garlic cloves and mash them up, mix them in with the dough recipe.
you get a much more flavorful garlic cheddar biscuit this way.
i have nothing against garlic powder, i use it in several recipes.
but a 1/2 teaspoon garlic powder with 2 cups flour for this recipe is not going to produce an intense garlic cheddar biscuit.
It’s delicious!! Wondering what the calorie count is.
Can these biscuits be frozen before baking? If yes, would the same bake time apply?
Thanks,
Sure! Bring them to room temperature before baking and allow them to get a little puffy.
Made these and they were gone before dinner! I didn’t even get them on the table!
Absolutely going to make these again.
OK, these are fabulous. I did increase the garlic some since I am a garlic fanatic. Are used whole milk but next time I’m gonna try buttermilk just for comparison. Family loved them! I’m splitting one in half in the morning for an egg sandwich. That is if there’s one left!
Very good! I added minched Chives from the garden to enhance the flavour
I made this recipe for Christmas Eve dinner. Simply amazing! Everyone loved these. They were gone in an instant!
I’m very happy with these, they’re everything that my wife & I wanted, I do alot of cooking & baking now that I’m retired from truck driving, & the wife just loves the way I cook & bake, and so do the kids & grandkids when they come home to visit… Thank you… Curly
Omg, I’ve been looking for this recipe for a while! These are so cheesy and perfect, they disappear quickly.
Hi!
I made these for the first time and it did NOT last in my house, my bf looooved them. Augh. Making them again tonight!
I made these alfredo chicken
Very good
These biscuits are good with beef and barley, or corned beef and cabbage soup.
I was wondering if you have a meal that you would recommend make with these biscuits as the side.
The biscuits really go well with many meals, but I particularly like to dress up a chicken dinner with these biscuits. Chicken can be a little boring since most of us tend to eat it so often. Here are my chicken recipes: https://handletheheat.com/category/chicken/
It looks sooo good! How long can I store them?
They’re best served right after they’re baked but you can store them in an airtight container at room temp for up to 2 days. Just reheat in a 350°F oven for about 5 minutes.
hello Tessa
first I would like to tell you that I came across your website 3 years ago when I was living alone in Cairo, and its been my favorite since! thanks a lot for this effort and for all your recipes..
I needed to ask you about the recipes containing milk, is it always ok to replace milk with soya milk for lactose free recipes?
thanks
Thanks so much! It’s hard to say if it will always be okay to use soya milk, I don’t have much experience cooking or baking with that. You can certainly try, though!!
Ha! It might had been me that lady!! 😉 lol … Thank you for posting this recipe! 🙂
Hey Tessa – These look divine! What do you like to eat with these (other than seafood)?
Love the videos you’ve been posting lately! You’re great in front of the camera–next stop: Food Network! 😀
Thank you so much, what a lovely compliment!
What a coincidence, because my family and I were talking about these biscuits and how we haven’t had them in forever. I would LOVE to try these out soon. I’m going to pin and forward these to my mom and sister ASAP!
You had me at cheesy! Love these.