This post may contain affiliate links. Read our disclosure policy.
Look out everyone because I have been on a doughnut rampage recently. And the most dangerous part is that indulging in and making doughnuts only makes me want more in return! It’s a vicious cycle, but luckily you seem to enjoy when I post doughnut recipes, so at least I have that as my excuse.
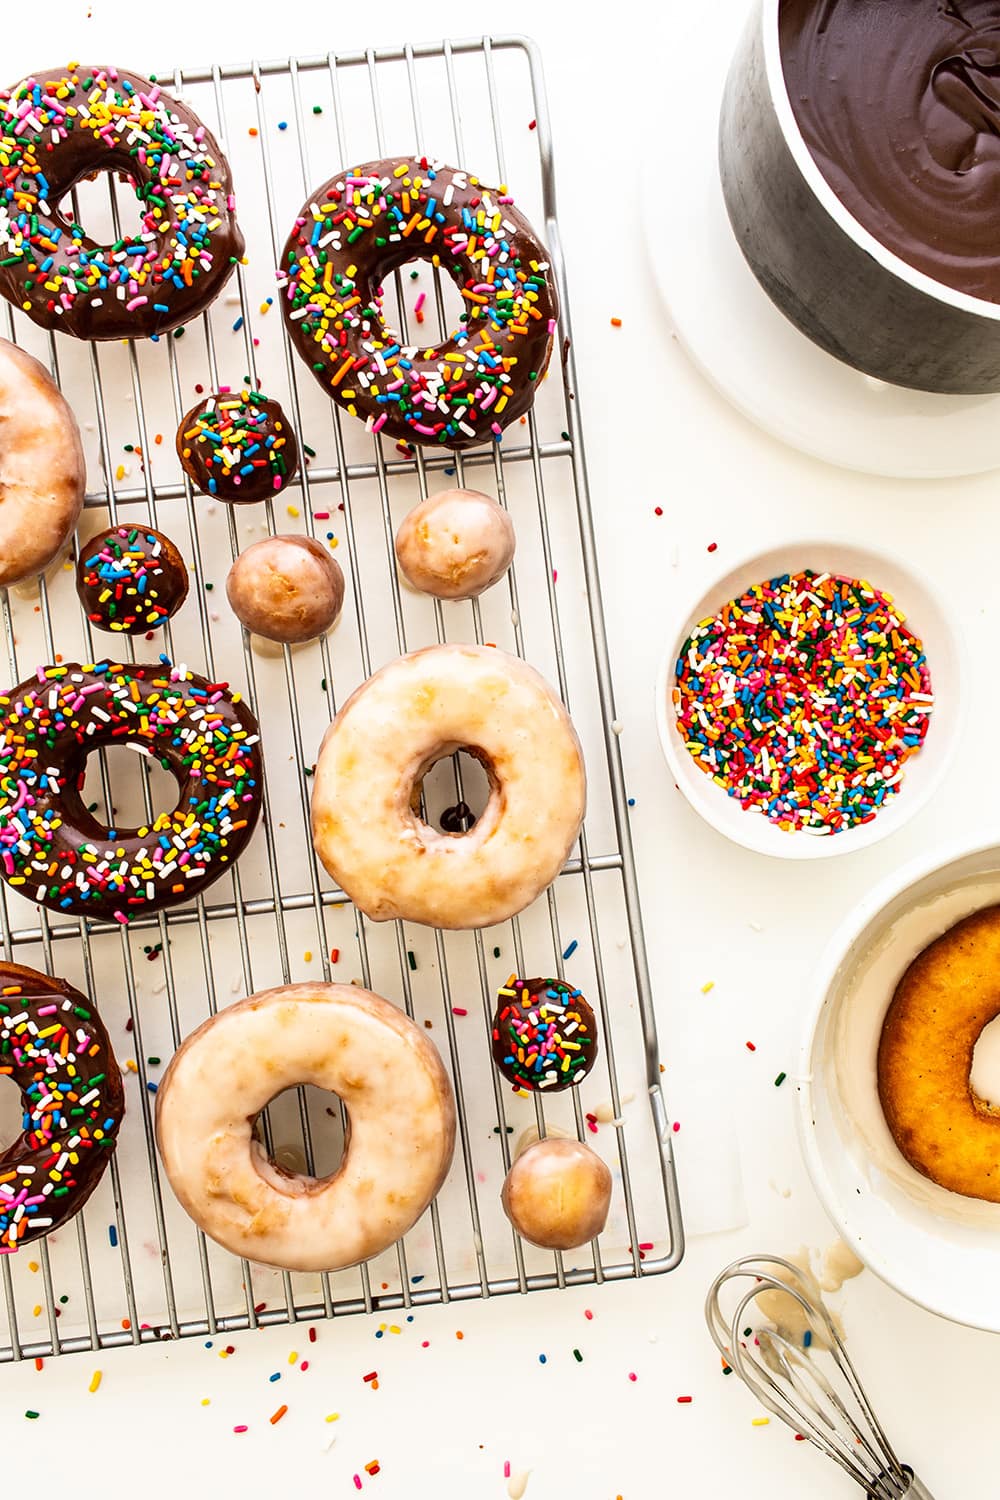
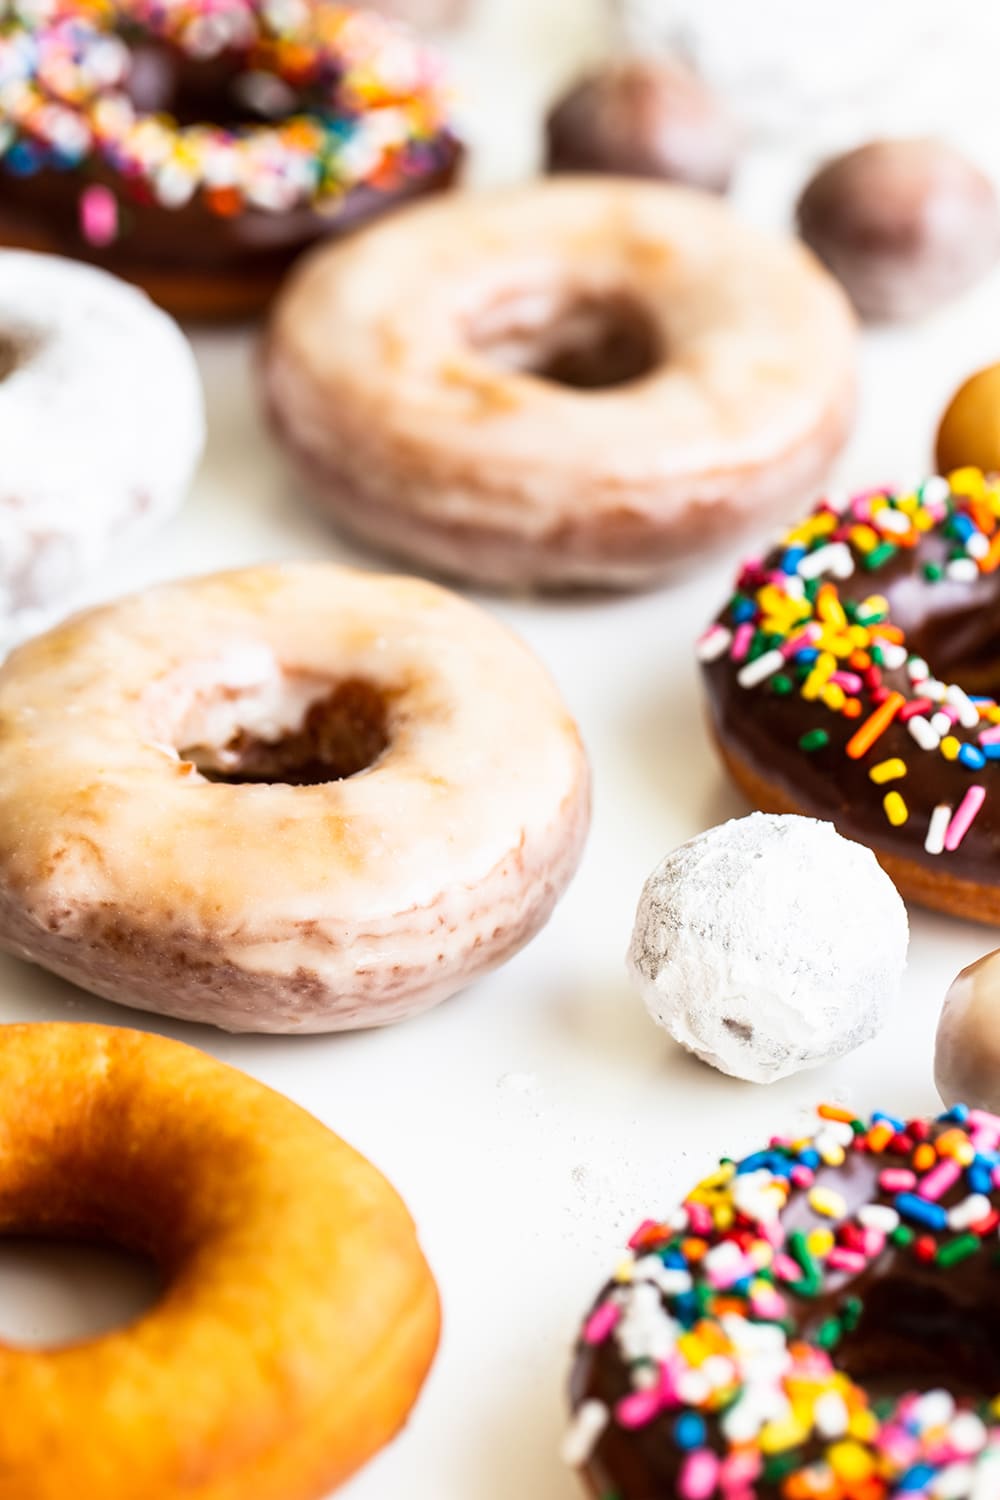
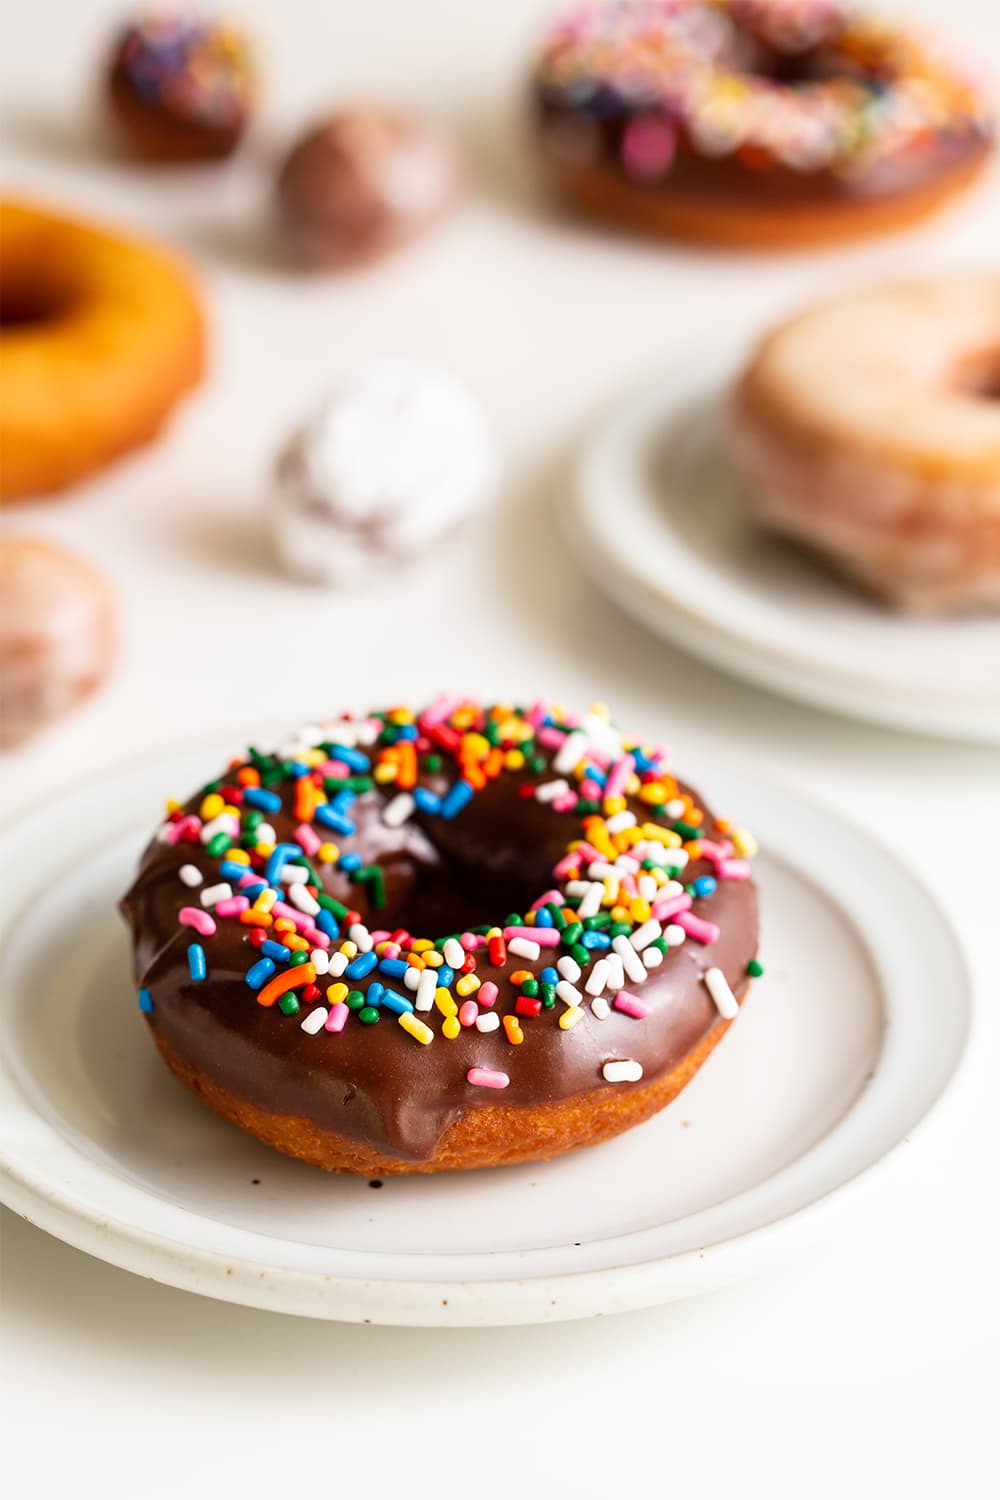
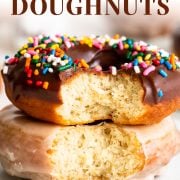
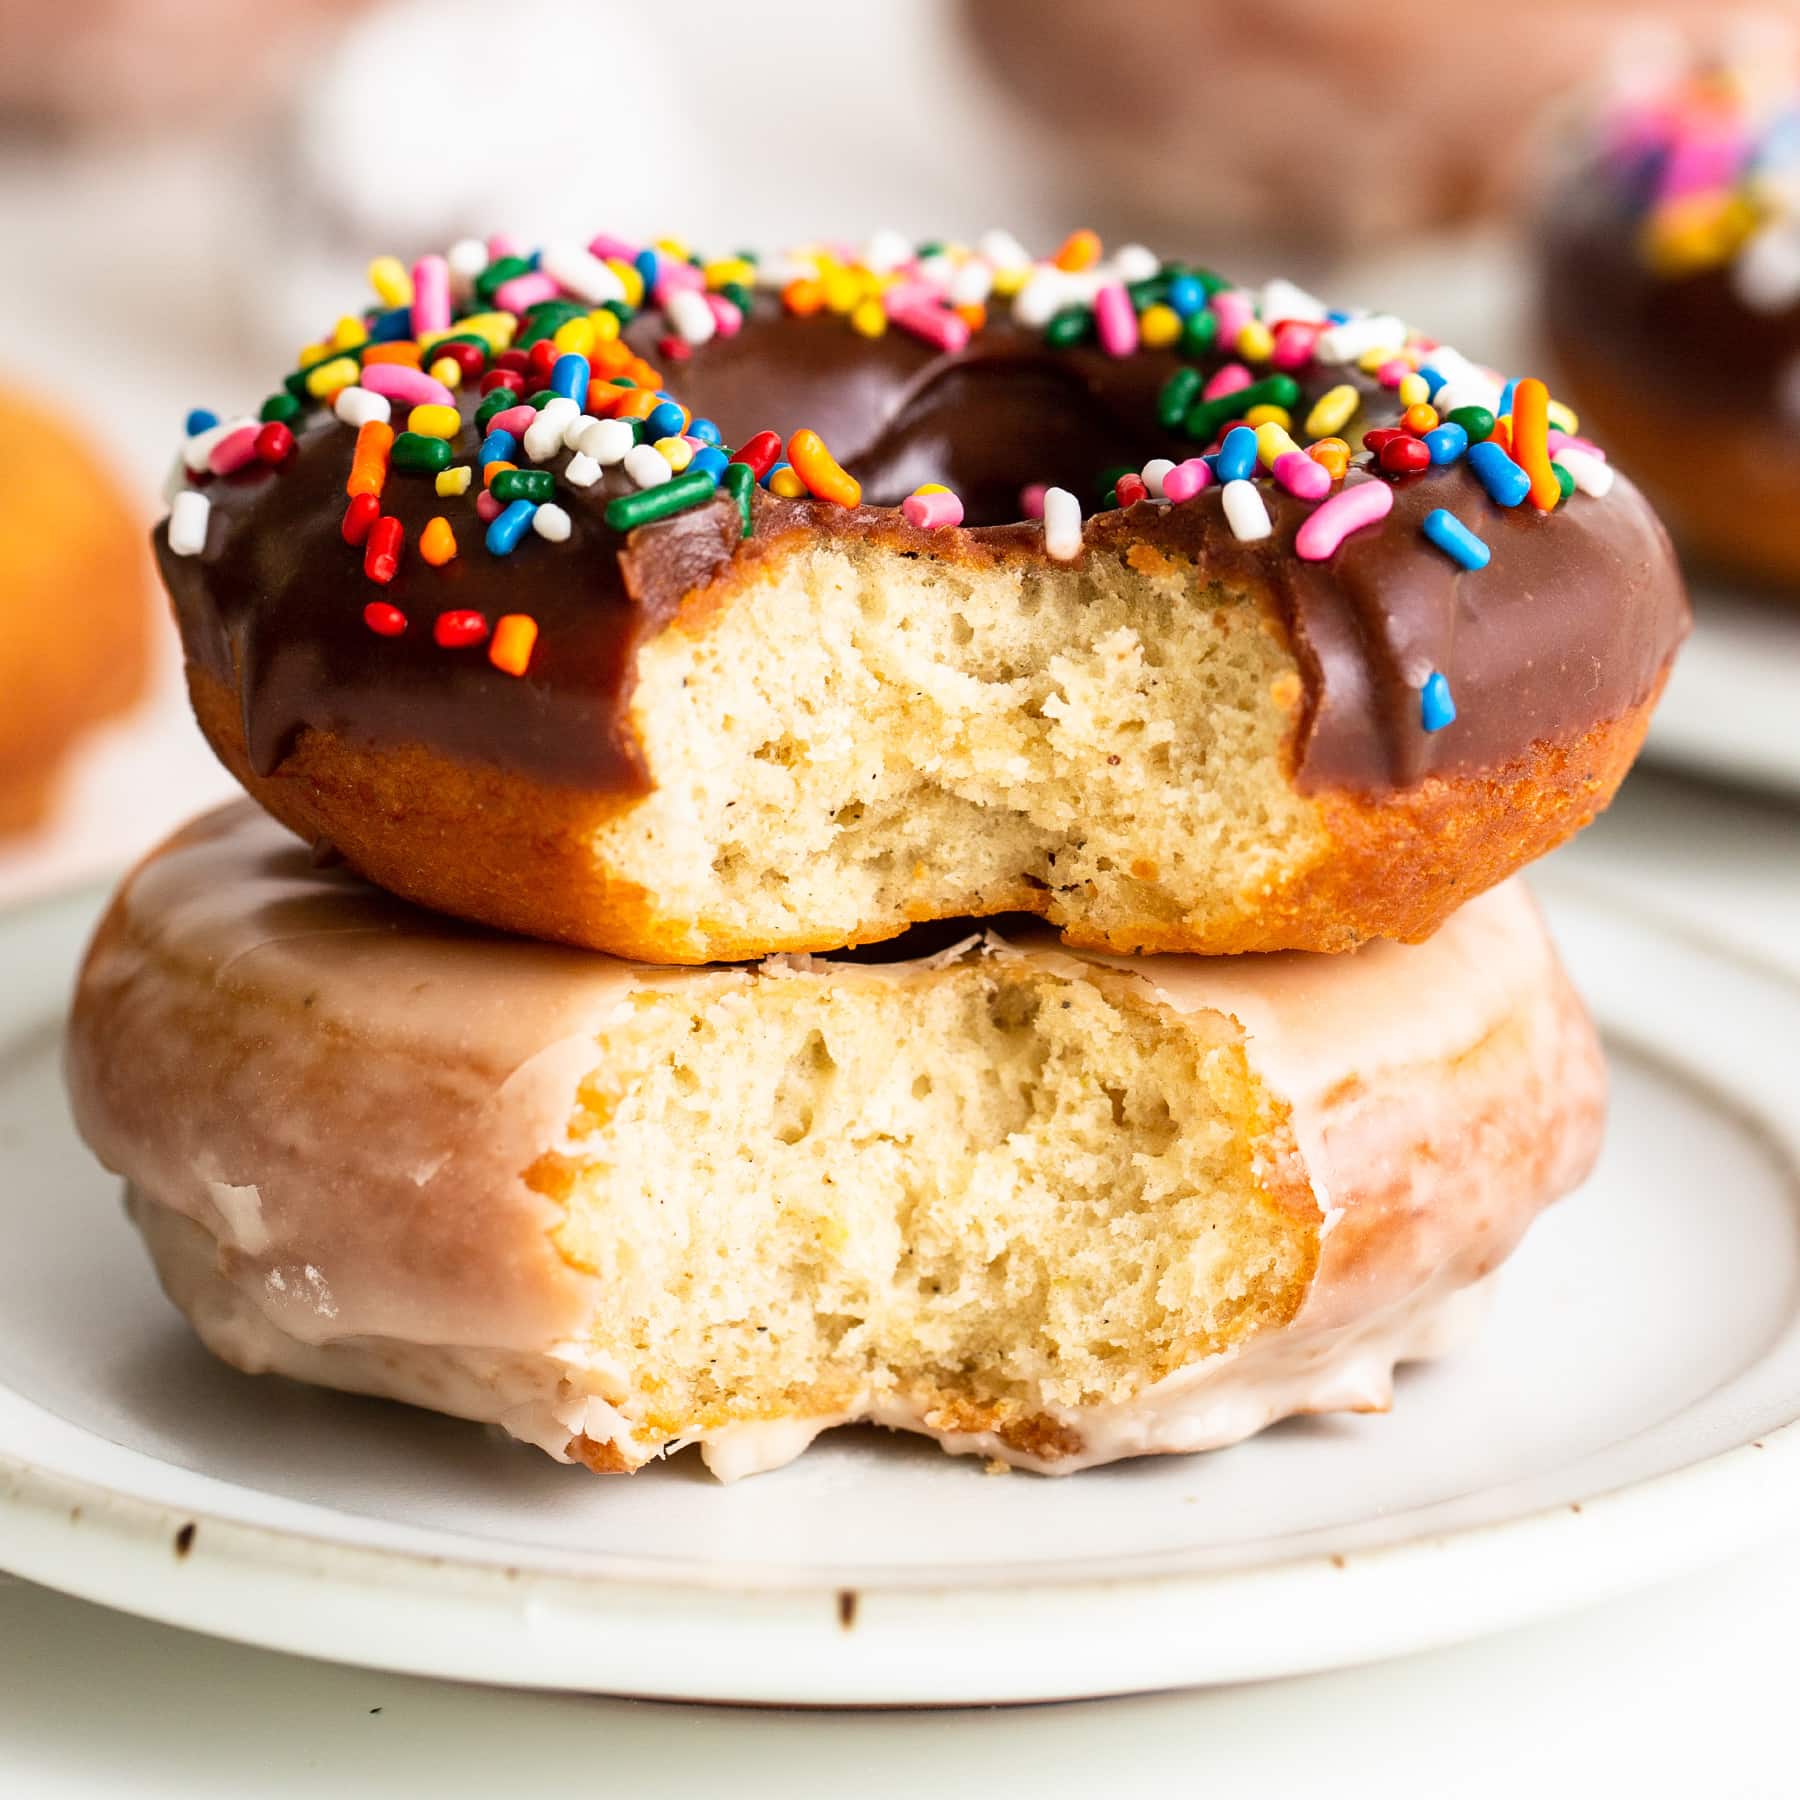
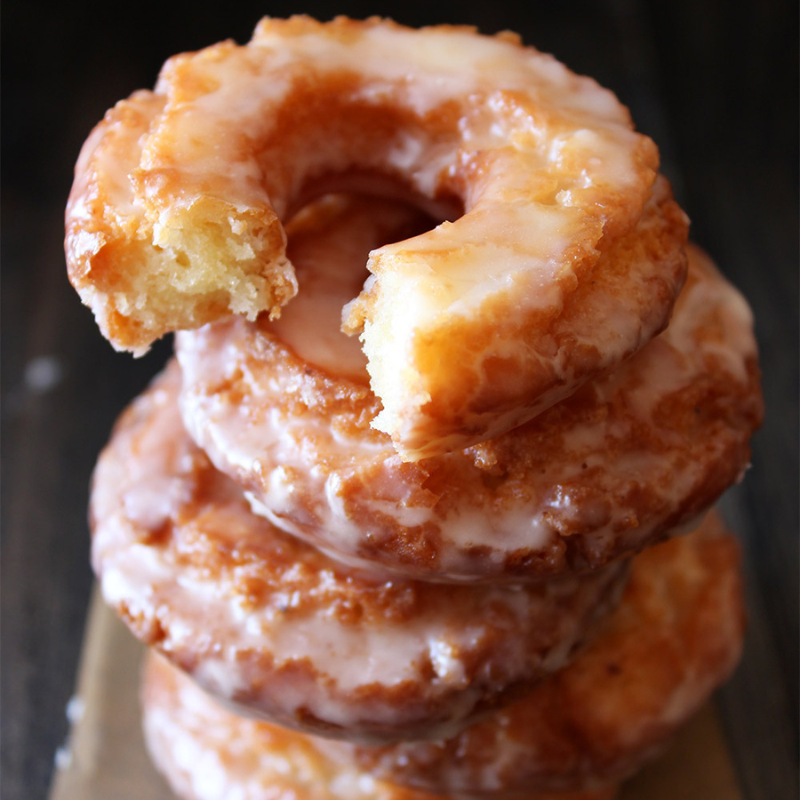
These classic cake doughnuts are absolutely positively delightful, and as a warning, they’re highly addictive. You just can’t beat that fried golden brown crust with that tender, soft, and delicate interior. And then to top it all off with a super rich, chocolaty, and fudgy glaze just takes it to a whole other level.
Make these cake doughnuts for your family and they won’t believe you made them right in your kitchen. They’ll think you went to the bakery to pick these up – they’re that good.
The best part is that cake doughnuts don’t take nearly as long as yeast-raised doughnuts but are just as good. By the way, these doughnuts are deep fried without apology and it’s glorious.
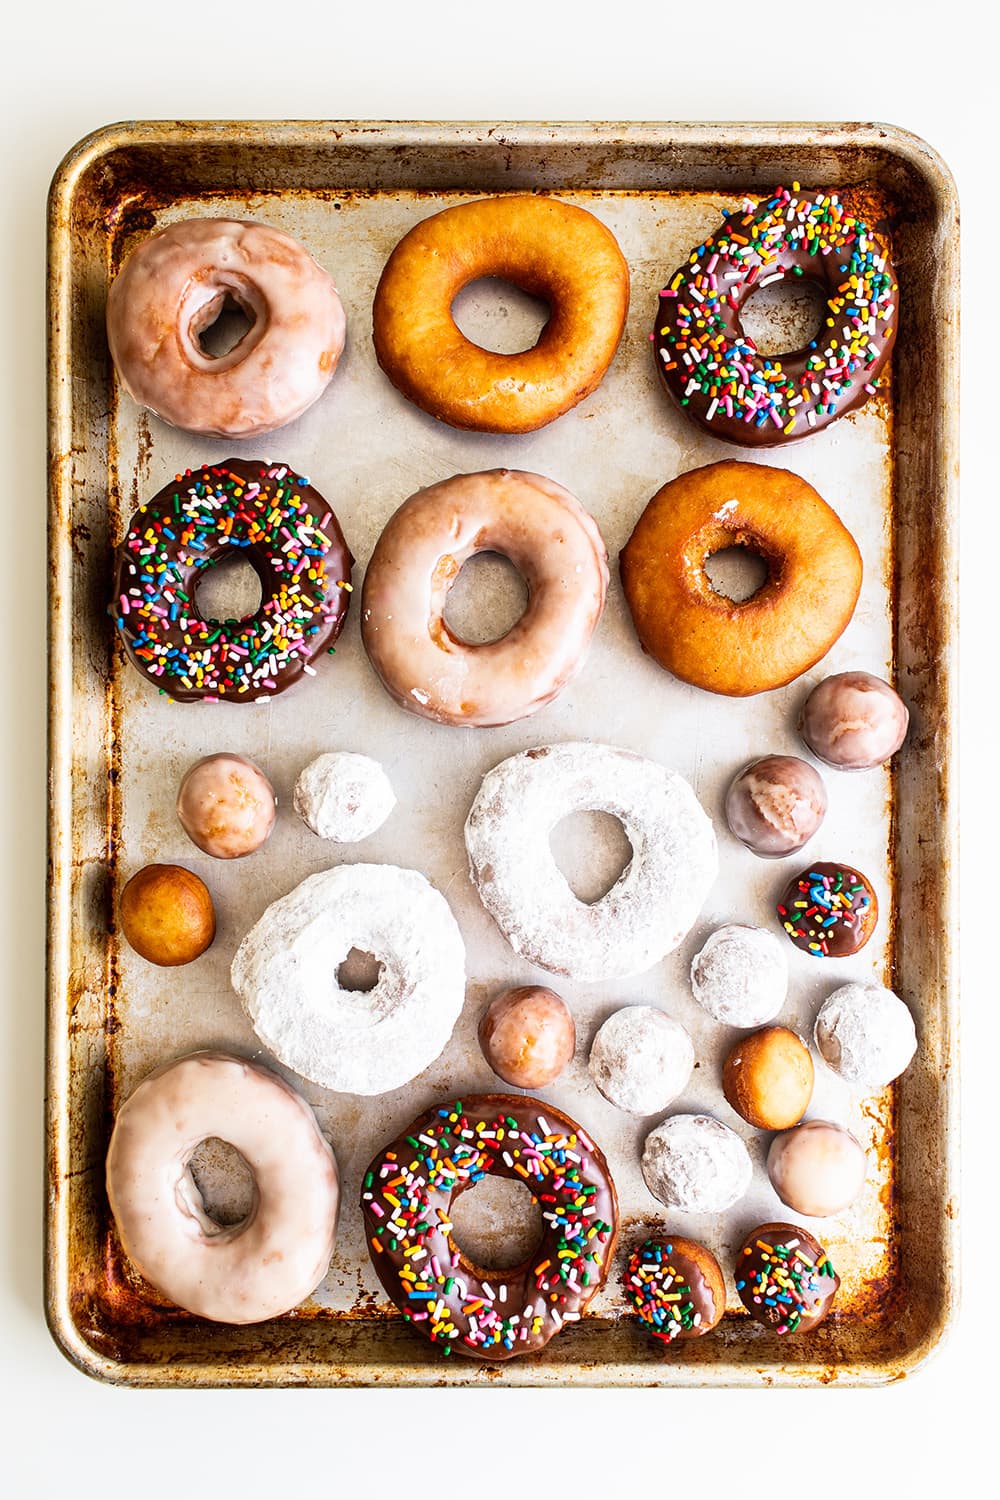
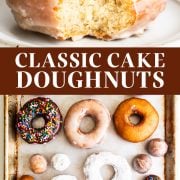
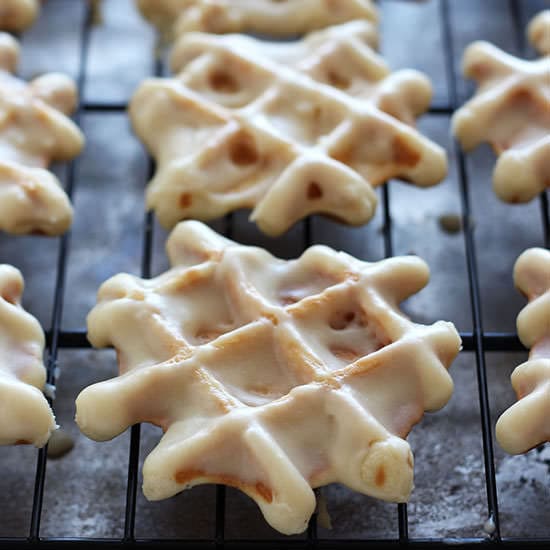
The flavor and customization options with this cake doughnut recipe are limitless. Top with any type of glaze, sprinkles, chocolate chips, powdered sugar, cinnamon sugar – just have fun! Check out all my cake doughnut recipe tips below.
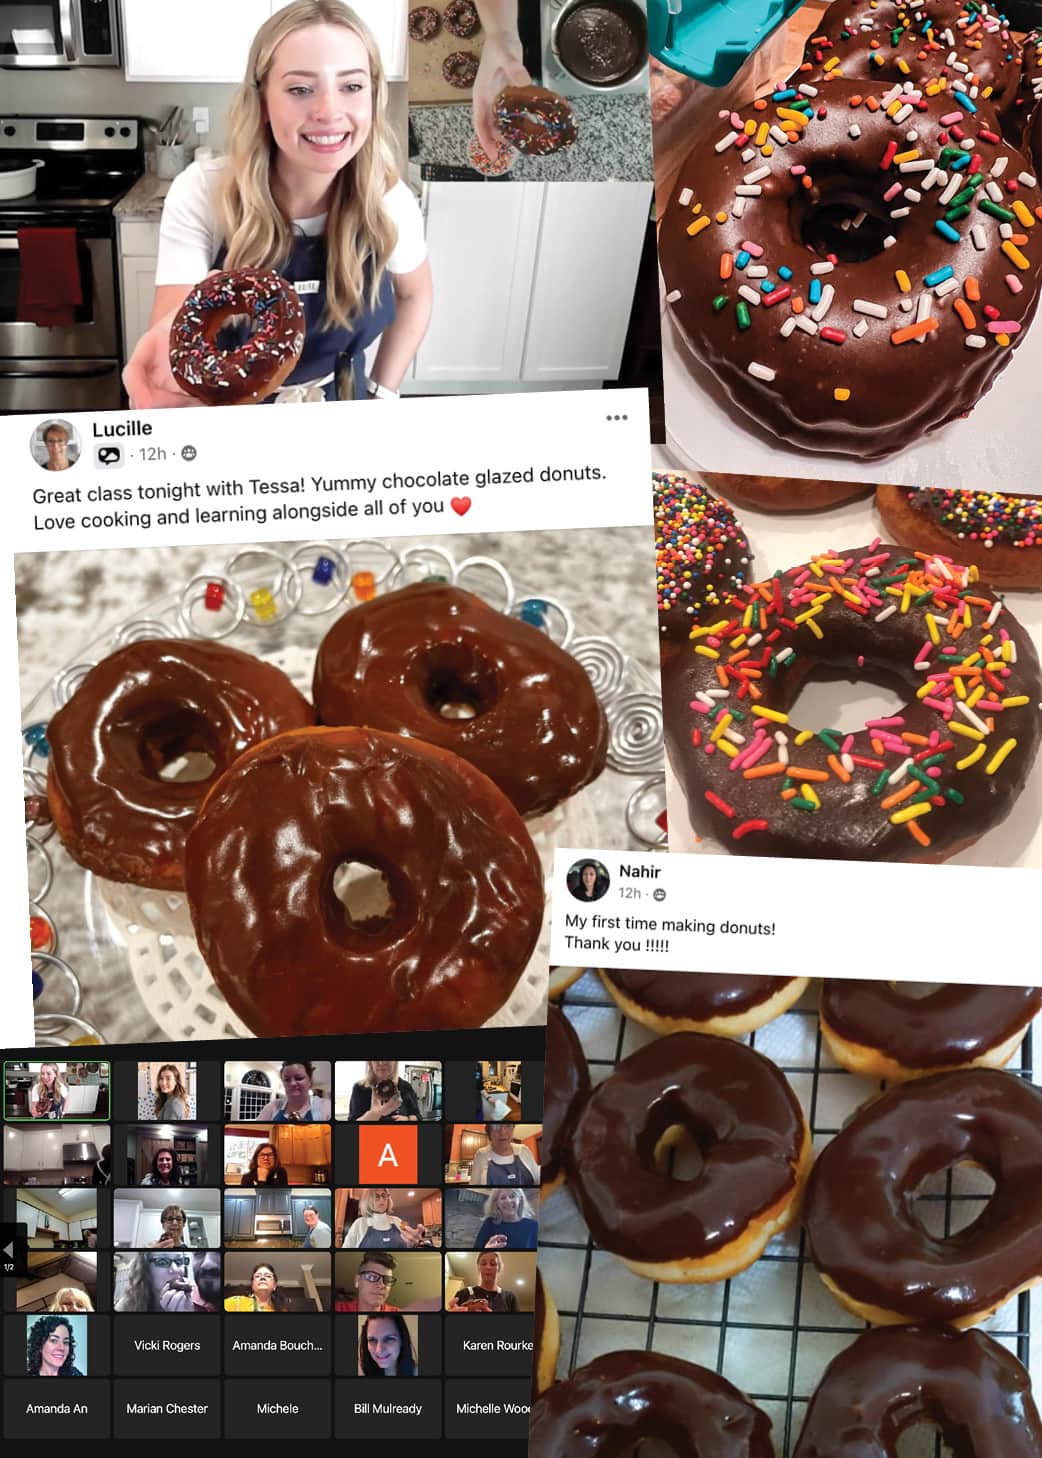
P.S. We actually baked these Cake Doughnuts together with HTH Students on a live Zoom class recently! Take a peek below at how much fun we had as well as some of the doughnuts baked by members during class.
Want to bake with me and a community of the most amazing warm-hearted bakers?! Click here to get on the Baking School Waitlist and we’ll let you know when doors reopen.
How to Make Cake Doughnuts
What is the difference between a cake donut and a regular donut?
Cake doughnuts get their rise from baking powder instead of yeast. Where yeast-raised doughnuts are ultra light and fluffy, cake doughnuts have some more heft to them and are slightly crunchy, but still soft and satisfying. They also still have that hint of nutmeg flavor which is absolutely characteristic of just about any doughnut, but feel free to omit the nutmeg if you don’t like it.
Note: baking powder and baking soda are NOT interchangeable. Learn more about the differences between baking soda and baking powder here.
Tools needed for Cake Doughnuts:
- Stand mixer with paddle attachment
- Mixing bowls
- Plastic wrap
- Rolling pin
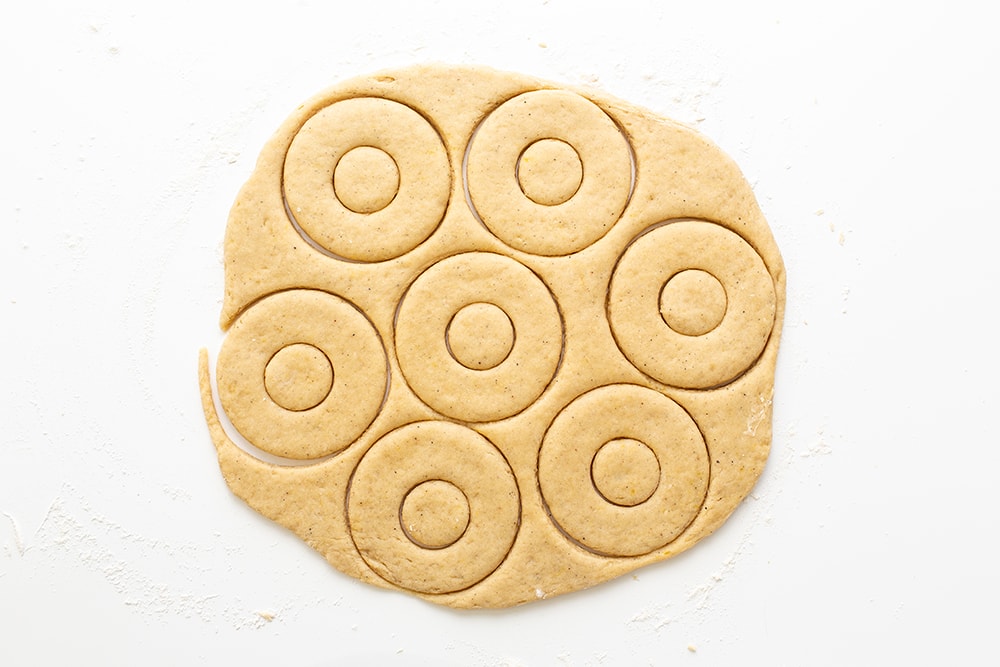
- Doughnut cutter – Don’t have a doughnut cutter? Simply use 1 large and 1 extra small plain round cookie cutter to recreate the doughnut shape. If you don’t have a small enough cutter for doughnut holes, the large end of a piping tip often works well, or even the cap of a bottle from your pantry.
- Pastry brush
- Sheet pans
- Large, heavy pan such as a Dutch oven
- Deep fry thermometer with clip
- Heat safe skimmer
- Paper towels
- Medium saucepan
- Whisk
Can you make cake doughnut dough ahead of time?
Yes! After the dough has been made, you can refrigerate the covered dough for up to 48 hours. Let come to room temperature before proceeding with the recipe as written.
Do you have to use a deep fryer for donuts?
No! You don’t need a special appliance to deep fry. Although convenient, you can simply use a heavy bottomed pot and your stovetop.
What kind of pan is best for deep frying?
I prefer to use either a large but somewhat shallow stainless steel saucepan or a Dutch oven. If a pan is too deep, it makes it difficult to maneuver the doughnuts in and out. If the pan is too shallow, you risk oil bubbling up and splashing and burning. You want at least 2 inches from the top of the oil to the top of the pan. Avoid nonstick pans.
Do I need a thermometer to deep fry?
Yes, for best results and the safest approach, use a deep fry thermometer. This is one that clips onto the side of your pot so you can constantly measure the temperature of the oil.
Can you bake cake doughnuts instead of frying them?
No, this recipe was designed specifically to be fried for best results. An air fryer will also not work as intended for this recipe.
What’s the best oil for frying?
The best oil for frying doughnuts is actually refined coconut oil. Refined means it won’t have any coconut scent or taste. It will emit fewer offensive ‘fry oil’ aromas in your house and because it’s solid at room temperature, it gives fried food a lighter, crisper, and less greasy texture and the doughnuts will stay fresher for longer (compared to doughnuts fried in a liquid oil). You could also use vegetable shortening, which is also solid at room temperature. Purchase a large container in bulk at Costco or online if you can make good use of it often.
Besides refined coconut oil or vegetable shortening, the next best and easiest options are vegetable, canola, or peanut oil because they have high smoke points. Never fry with an oil that has a low smoke point, such as olive oil. Whichever you choose, be sure to give it a quick sniff before using. If it smells off at all, it will impart a rancid taste to your doughnuts. Use a fresh bottle for best results.
Deep Frying Safety Precautions:
- Always monitor the temperature of the fry oil and avoid allowing it to get hotter than 375°F. If your oil begins to omit an offensive smell beyond the normal oil aroma, it’s likely your oil is about to heat up to its smoke point. Not only is this a safety precaution signaling you to turn the heat down, but when oil is heated too high it begins to break down and impart an undesirable flavor onto your doughnuts. Oil that has been overheated must be cooled down, poured into a sealable container, and discarded.
- NEVER add water to hot oil. It will explode and catch fire. If your oil has gotten too hot and catches fire, adding water to ‘put out the fire’ will make it worse.
If the oil begins to smoke or even catch fire, place a cookie sheet on top. You can also (carefully) use baking soda to put out grease fires. Make sure your kitchen is equipped with a functioning fire extinguisher.
- In addition to brushing off any excess flour from the dough before frying, take your skimmer in between frying batches and remove any bits of dough left in the oil. This will prevent those food particles from burning and imparting an acrid flavor to the rest of your doughnuts.
- Always use a skimmer or similar tool to place and remove doughnuts from the hot oil.
- Wear an apron to protect yourself and your clothes from any oil splashes.
How to maintain an even temperature while frying cake doughnuts?
The most challenging part of deep frying is maintaining a consistent temperature. In fact, it’s just about impossible. The key to deep frying is to constantly monitor the temperature and adjust your burners accordingly. Not just reactively, but proactively too. Especially if you have an electric stove.
This takes practice. Notice if your oil begins to creep above or below 350°F and immediately adjust the burner’s heat setting, knowing it will take several minutes for the temperature to begin to rise or drop, depending on your stove and pan.
Don’t overcrowd the pan! This will not only drop the temperature quickly but the doughnuts won’t get an even crispy exterior. This is because deep fry oil’s recovery time is slow, meaning it will take a while for the temperature to recover back to its original 350°F once too much food is added to the pan.
If your doughnuts are pale and greasy, your oil is too cold. If they’re hard and overly browned, even undercooked in the middle, the oil is too hot.
What to do with oil after frying?
Let the oil cool completely. Pour the used oil into a sealable container and dispose of in the trash.
How to store cake doughnuts:
Doughnuts are definitely best served the day they’re fried. They will lose their crisp texture and stale the longer they’re stored. If you do need to store leftover glazed doughnuts, you can do so in an airtight container for up to 2 days.
Doughnut Glaze Recipes
My chocolate glaze is included in the recipe below, but here are a couple other doughnut glaze flavor variations. You can also simply coat your cake doughnuts in powdered sugar! Click here for even more doughnut glaze recipes sent straight to your email inbox.
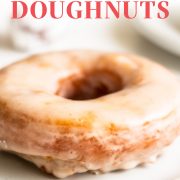
Vanilla Glaze
3 1/2 cups (438 grams) powdered sugar, sifted
1 1/2 teaspoons corn syrup
1/4 teaspoon salt
1/2 teaspoon vanilla extract
1/3 cup hot water
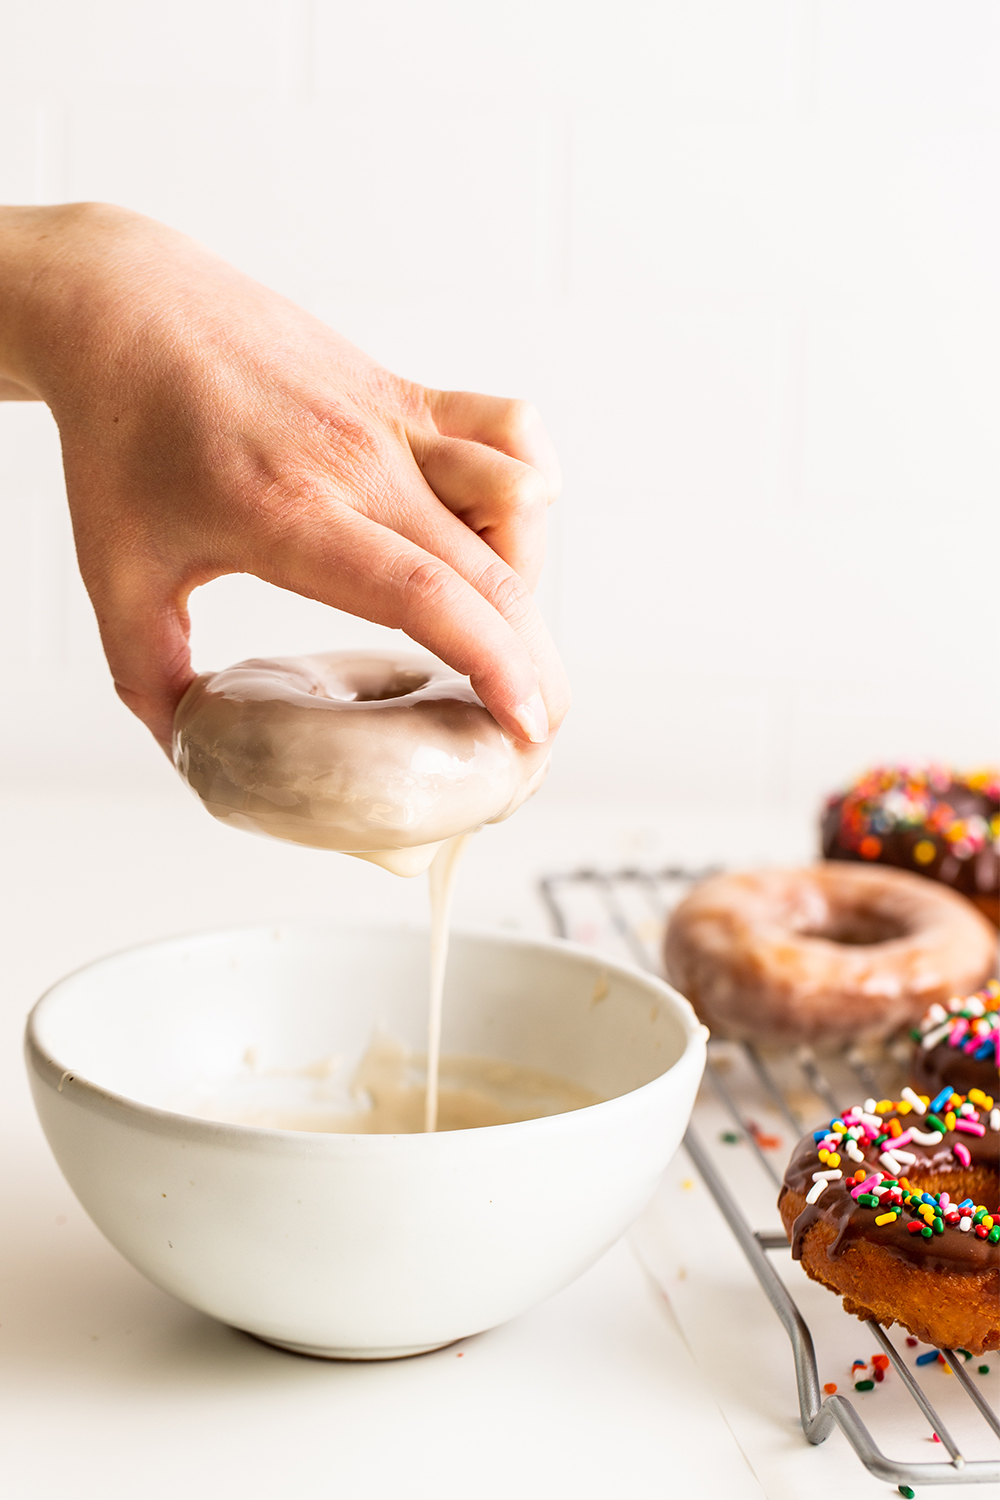
Mix all ingredients in a bowl with a whisk until smooth. Immerse each doughnut into the glaze. Place glazed doughnuts on a wire rack above a lined sheet pan to catch any excess glaze. Let sit for 20 minutes, or until glaze is set, before serving.
Maple Glaze
4 cups (500 grams) powdered sugar, sifted
1/4 cup pure maple syrup
1 1/2 teaspoon light corn syrup
1/4 teaspoon pure vanilla extract
2 teaspoon pure maple extract
1/4 cup hot water
Mix all ingredients in a bowl with a whisk until smooth. Immerse each doughnut into the glaze. Place glazed doughnuts on a wire rack above a lined sheet pan to catch any excess glaze. Let sit for 20 minutes, or until glaze is set, before serving.
More Doughnut Recipes You’ll Love:
For the doughnuts:
-
3
cups
(381 grams) all-purpose flour
-
1
tablespoon
baking powder
-
1/2
teaspoon
fine salt
-
1/2
teaspoon
freshly grated nutmeg
-
3
tablespoons
(43 grams) unsalted butter,
melted and cooled to lukewarm
-
1/2
cup
buttermilk,
at room temperature
-
2
large eggs,
at room temperature
-
3/4
cup
(150 grams) granulated white sugar
-
1 1/2
teaspoons
pure vanilla extract
-
Vegetable, canola, refined coconut oil, vegetable shortening, or peanut oil, for frying
For the chocolate glaze:
-
1
stick (113 grams) unsalted butter
-
1/4
cup
whole milk
-
1
tablespoon
light corn syrup*
-
2
teaspoons
vanilla extract
-
4
ounces
semisweet chocolate,
chopped
-
2
cups
(250 grams) powdered sugar,
sifted
-
Rainbow sprinkles,
if desired
For the doughnuts:
-
In a large bowl, mix together the flour, baking powder, salt, and nutmeg. Combine butter and buttermilk in a small bowl or measuring cup, and set aside.
-
In the bowl of a stand mixer fitted with the paddle attachment, beat the eggs and sugar until thick and pale, about 5 minutes. Beat in the vanilla extract. On low speed, alternately add the flour mixture with the melted butter and buttermilk, starting and ending with the flour. The dough will be soft. Cover tightly with plastic wrap and let sit at room temperature for 30 minutes, or until the dough is firm enough to handle.
-
MAKE AHEAD: At this point you can also refrigerate the covered dough for up to 48 hours. Let come to room temperature before proceeding with recipe as written.
-
Turn the dough out onto a floured work surface. Roll the dough out into just over 1/4-inch thickness and cut with a doughnut cutter or with a large round cutter and a small cutter for the holes. Brush off any excess flour and place the doughnut shapes on a lightly floured parchment lined baking sheet. Cover and let the doughnuts sit at room temperature while you heat the oil.
-
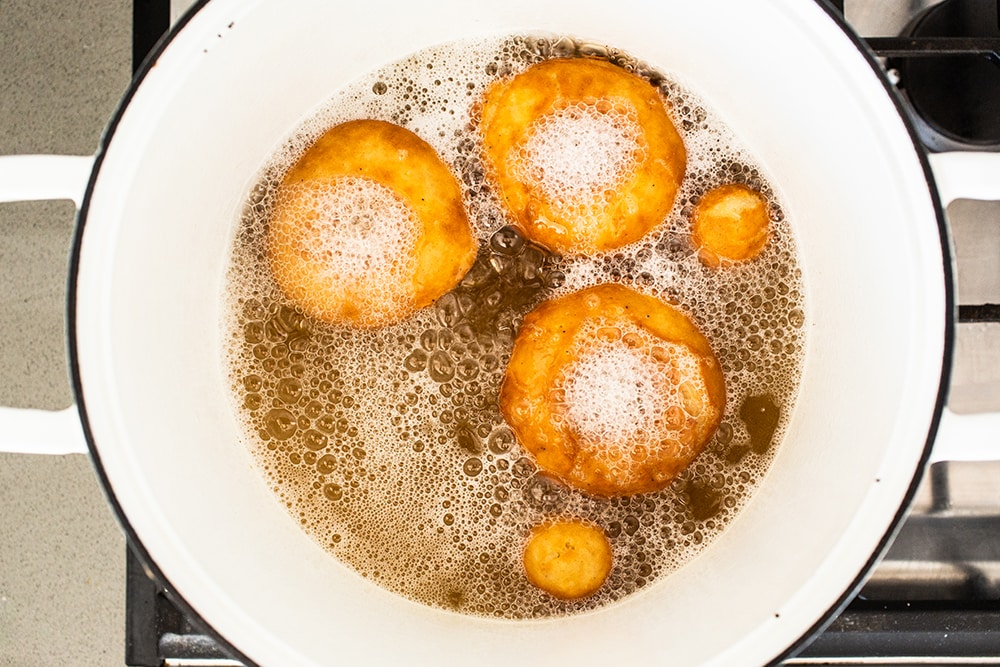
Heat at least 1 1/2 inches of oil in a large and heavy pan to 350°F. Place three to four doughnuts in the oil at a time and fry until golden brown, about 1 minute or less per side (30 seconds for the holes). Do not overcook the doughnuts. Drain on a paper towel-lined plate.
For the chocolate glaze:
-
In a medium saucepan over medium heat, combine the butter, milk, corn syrup, and vanilla and heat until the butter melts. Decrease the heat to low and add the chocolate, whisking until melted. Turn off the heat and add the powdered sugar, whisking until smooth.
-
Immediately dip the doughnuts into the glaze. If the glaze begins to set, return the saucepan to low heat and stir until liquid again. Garnish with sprinkles, if using. Let the glaze set on the doughnuts for 30 minutes before serving.
-
Doughnuts are best made the day they’re fried. However, you can store the glazed doughnuts in an airtight container for up to 2 days.
*The corn syrup in the glaze keeps it nice and shiny and thick, but feel free to omit it if you prefer not to use it.
Adapted from Joy of Baking
This recipe was originally published in 2015 and recently updated with new photos and recipe improvements in 2022. Photos by Ashley McLaughlin.


these were great and it was so fun to see them puff up! I used Crisco and next time I will get that started before rolling and cutting the doughnuts because it took a long time to come to temp. i will also use the full amount of nutmeg called for. The chocolate glaze is incredible!
These didn’t stay crisp even within the same day and tasted quite stale. Quite possible I did something wrong but followed the instructions to a T.
Hi Lindsay! It’s possible that your oil was a little too cool, and/or your pan was a little too crowded while frying. Tessa mentions this the tip box, above the recipe. Also, was your oil fresh? Oil that’s been sitting around for a bit can give off a slightly unpleasant flavor, which could be why you found your doughnuts had a slightly stale flavor. I hope you try these doughnuts again sometime – they really are delicious! Happy baking 🙂
Thank you for your wonderful recipes, can’t wait to try them.
So good! I’m surprised how easily this recipe came together. Your directions are excellent. I was a little intimidated by deep frying, but it all turned out great. Highly recommend having a good thermometer. I noticed my oil getting too hot and was able to adjust it in time. Thanks for pushing me out of my comfort zone!
So glad you enjoyed making these, Cindy!
Can this dough be made in advance before frying? Thanks
I haven’t tried that with this recipe, sorry! You’ve got to be careful refrigerating doughnuts made with baking powder/soda. Yeast doughnuts are a little less of a risky doughnut to refrigerate in advance, can I recommend my Yeast Raised Chocolate Glazed Doughnuts instead? I have details in the comments section there how to make them in advance. 🙂
I omitted the corn syrup from the glaze so maybe that’s why, but the glaze was much too thin to use “immediately” after whisking in pwd sugar. Letting it cool and thicken for about 10-15min yielded much better results. Happy with the recipe otherwise, thanks!
These turned out awesome. I added a quarter teaspoon of ground cloves in addition to the nutmeg. They remind me of the original “dunkin’ donut” that they used to have, with the little handle on the side. Those were my favorite and I miss them, so it’s nice to have this recipe. I used a chocolate ganache glaze instead of your icing recipe, also.
I made these donuts with just a few changes, I made it the original way first but accidentally burn them. The only changes I made was I added 3/4 cups of sugar and 3/2 tsp of nutmeg. Either way the original or my adjustments they taste just like donuts. Thank you so much for the great and easy recipe.
So happy this recipe was a success for you!
The dough is too sticky can I add more flour so I can roll it out?
These were my first-ever try at making doughnuts and they turned out beautifully! Thank you!
Just made these this morning, used the frosting recipe too. Delicious! Donut was exactly how you described (and how I like), crispy on the outside and tender on the inside. I did use nutmeg and halved it…my kids are weird eaters. It’s the secret ingredient that Winchells uses. Thanks so much for sharing!
Maybe too much flour. Did not fluff out very much.
Love the doughnut recipe! When I was young we would buy plain cake doughnuts, but instead of the chocolate glaze part here, we would just buy chocolate cake frosting and heat that in the microwave and spread it on the doughnuts with a butter knife. Sometimes we would add crushed nuts, candy sprinkles or coconut shavings on top.
Delicious and easier than I thought! I was afraid! Lol-at 66 years old I’ve never made donuts! The dough came together nicely and was so easy to roll out and work with. I made the chocolate glaze and also did some with cinnamon sugar-both were delicious! I’m scoring points with the whole family now since we are all donut lovers! Thank you for such a delicious, easy recipe with great directions. Quick question-can the glaze be made before frying the donuts? It was a bit hectic trying to get the glaze done in between frying. Thanks in advance!
These were awesome! Don’t leave the nutmeg out. You don’t taste it. I wouldn’t change a thing. Thanks for sharing!!!
Does cake flour work better for the classic donuts like in the sour cream donut recipe? Just curious because they turned out so awesome. Thanks
These were delicious, thank you for the recipe! My kids had fun cutting them out.
I followed this recipe to the letter. Sorry donuts! The glaze, however, turned out well. 1 star for the donuts and 5 stars for the glaze.
Makes ya wonder what you did wrong if were sorry since everyone else loved them.
This recipe is the best donut recipe I’ve ever found. I used a half cup less flour than listed in the recipe. My thermometer said donuts should be fried at 360 to 375 degrees. I’ll never use another cake donut recipe!
I actually made these! Yummo! Makes more than 14 though! I counted about 25 + the donut holes! Thank you!
I just made these and they are so good! I baked instead of fried, and they still came out great; I would guess the texture is a little more dense than it would have been if I had fried them. The glaze was a little thin, next time I’ll add a little less butter and milk and some more powdered sugar. Other than that these were really great!
I’d tried 3 different plain donut recipes before this one and this one yielded the best results for me. Most recipes I’d tried rendered a dense donut, this recipe yields a light and airy donut that’s good for dunking in cold milk. After setting for a half hour, the dough was extremely user friendly, and much easier to handle vs the previous recipes I’d tried. The batch cooked quickly, and the count was dead on accurate, right down to the 14th donut too. I love fresh nutmeg so I used one whole pod. This is my permanent,go-to, plain donut recipe for life
Km is equivalent to the standard cup flour
question: if the dough is going to be soft, should it be sitting at room temperature, especially for 30 minutes? that just seems like it would only make the dough softer and harder to work with
I see that someone asked about baking instead of frying? Is that possible?
Thank you,
pamela
can I bake them instead of frying?
Made these and just dropped in the grease from the spoon and yummy. great recipe easy too. the chocolate icing was just right too.
I want all of these. They look so delicious.
YUM! OMG YUM!!!
They could not look more perfect, Tessa! And that doughnut cutter is a must. I need to get one!