

How to Knead Dough
This post is sponsored by Red Star Yeast. All opinions provided are my own. Thanks for supporting me in working with brands I love, to bring you new tutorials and videos!
This post may contain affiliate links. Read our disclosure policy.
In my opinion, that’s such a shame. Because baking bread from scratch is an incredibly fun and rewarding process. Once you get the hang of a few key techniques, you’ll be baking bread like a pro.
I’m very excited to be partnering with Red Star Yeast, my favorite brand of baker’s yeast, to bring you this how-to video post.
So in this post I’m going to be showing you how to knead dough by hand. Kneading is surprisingly important to creating a beautiful loaf of bread. In fact, kneading incorrectly can actually ruin your baking project!
What is kneading?
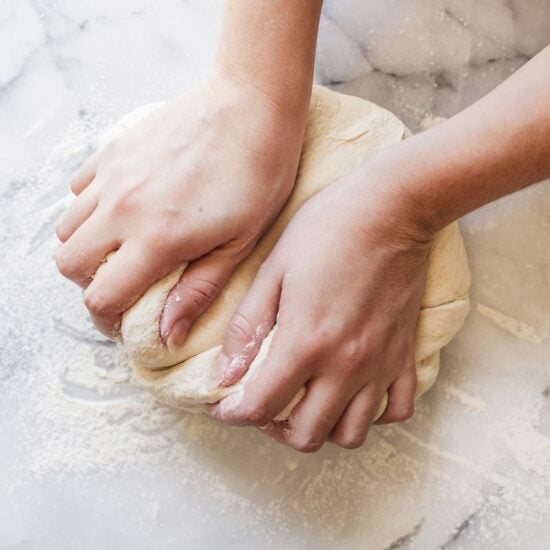
It’s the process of working the dough physically into a smooth ball so that strands of gluten form. Gluten is created when the protein content in your flour is combined with water and physically mixed, stirred, or most of all kneaded.
Gluten provides the essential structure to breads, allowing the dough to stretch and expand as it rises. Kneading can almost always be done by hand, even if the recipe calls for an stand mixer.
Kneading by hand is perfect for those of you who don’t have a stand mixer (or can’t find your dough hook…).
It also allows you to really improve your bread baking skills by developing a sense for how the dough should look and feel during different steps of the bread making process.
How to Knead Dough
Note: this technique will work with just about any bread recipe. Knead until your dough looks and feels the way it’s described by the recipe specifically. If you’re looking for a foolproof recipe you can use to make just about anything, check out my Ultimate Simple Dough recipe!
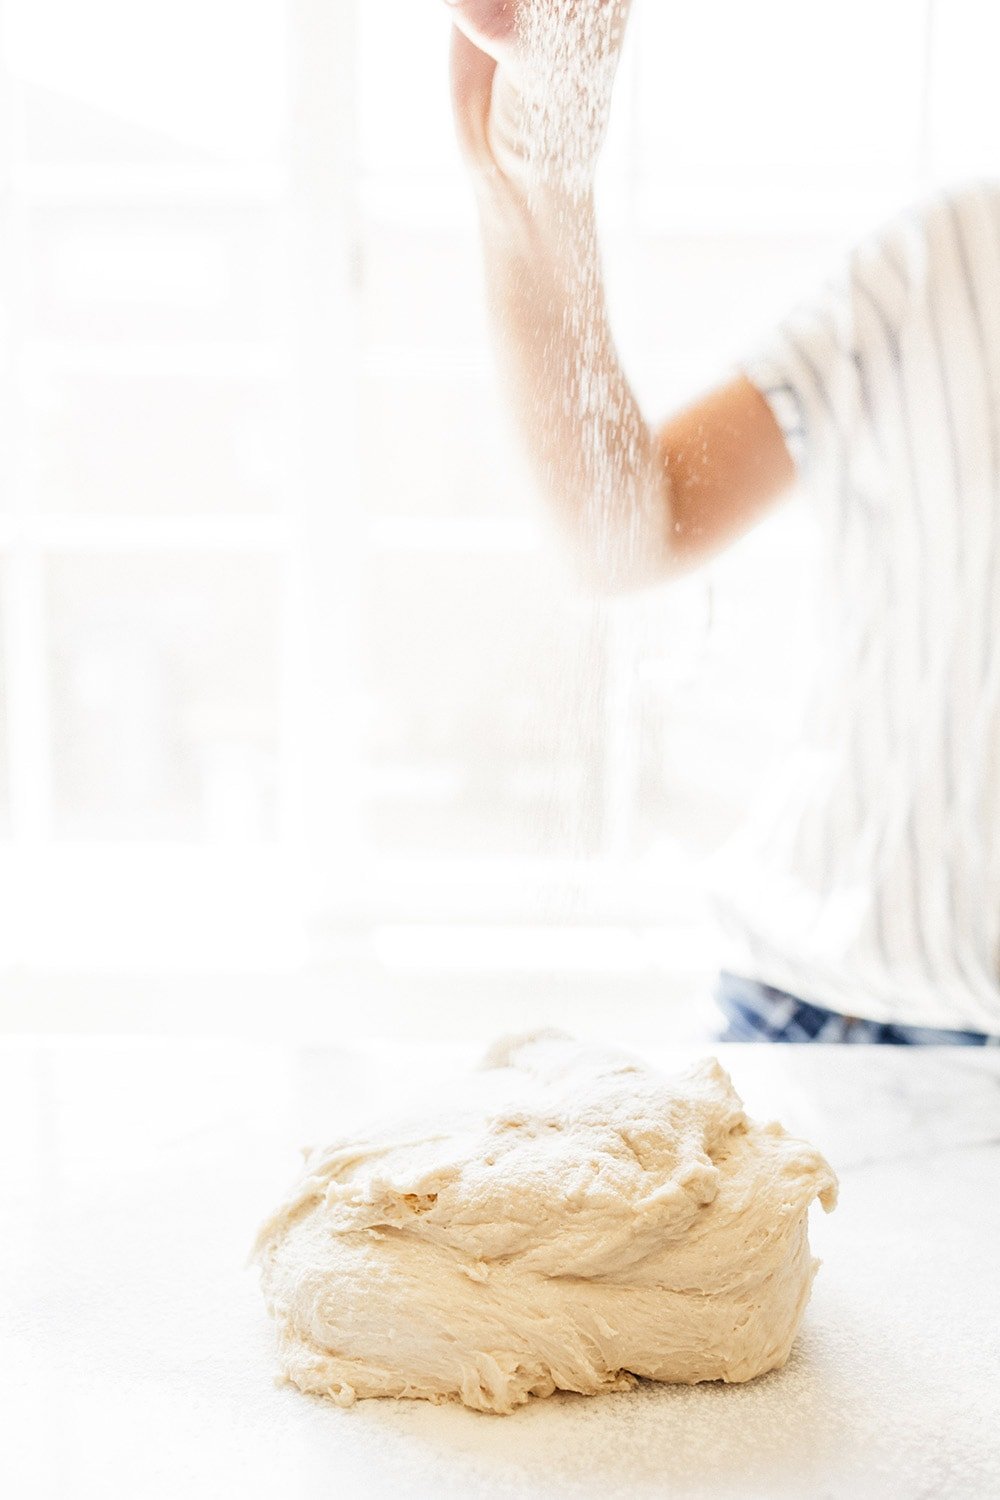
Start in your mixing bowl. Add in half of flour with the other dry and warm wet ingredients. Your liquid should be about 100-110°F. It should feel warm, but not hot, to touch. If the temperature is too hot for you to touch, it’ll likely kill your yeast.
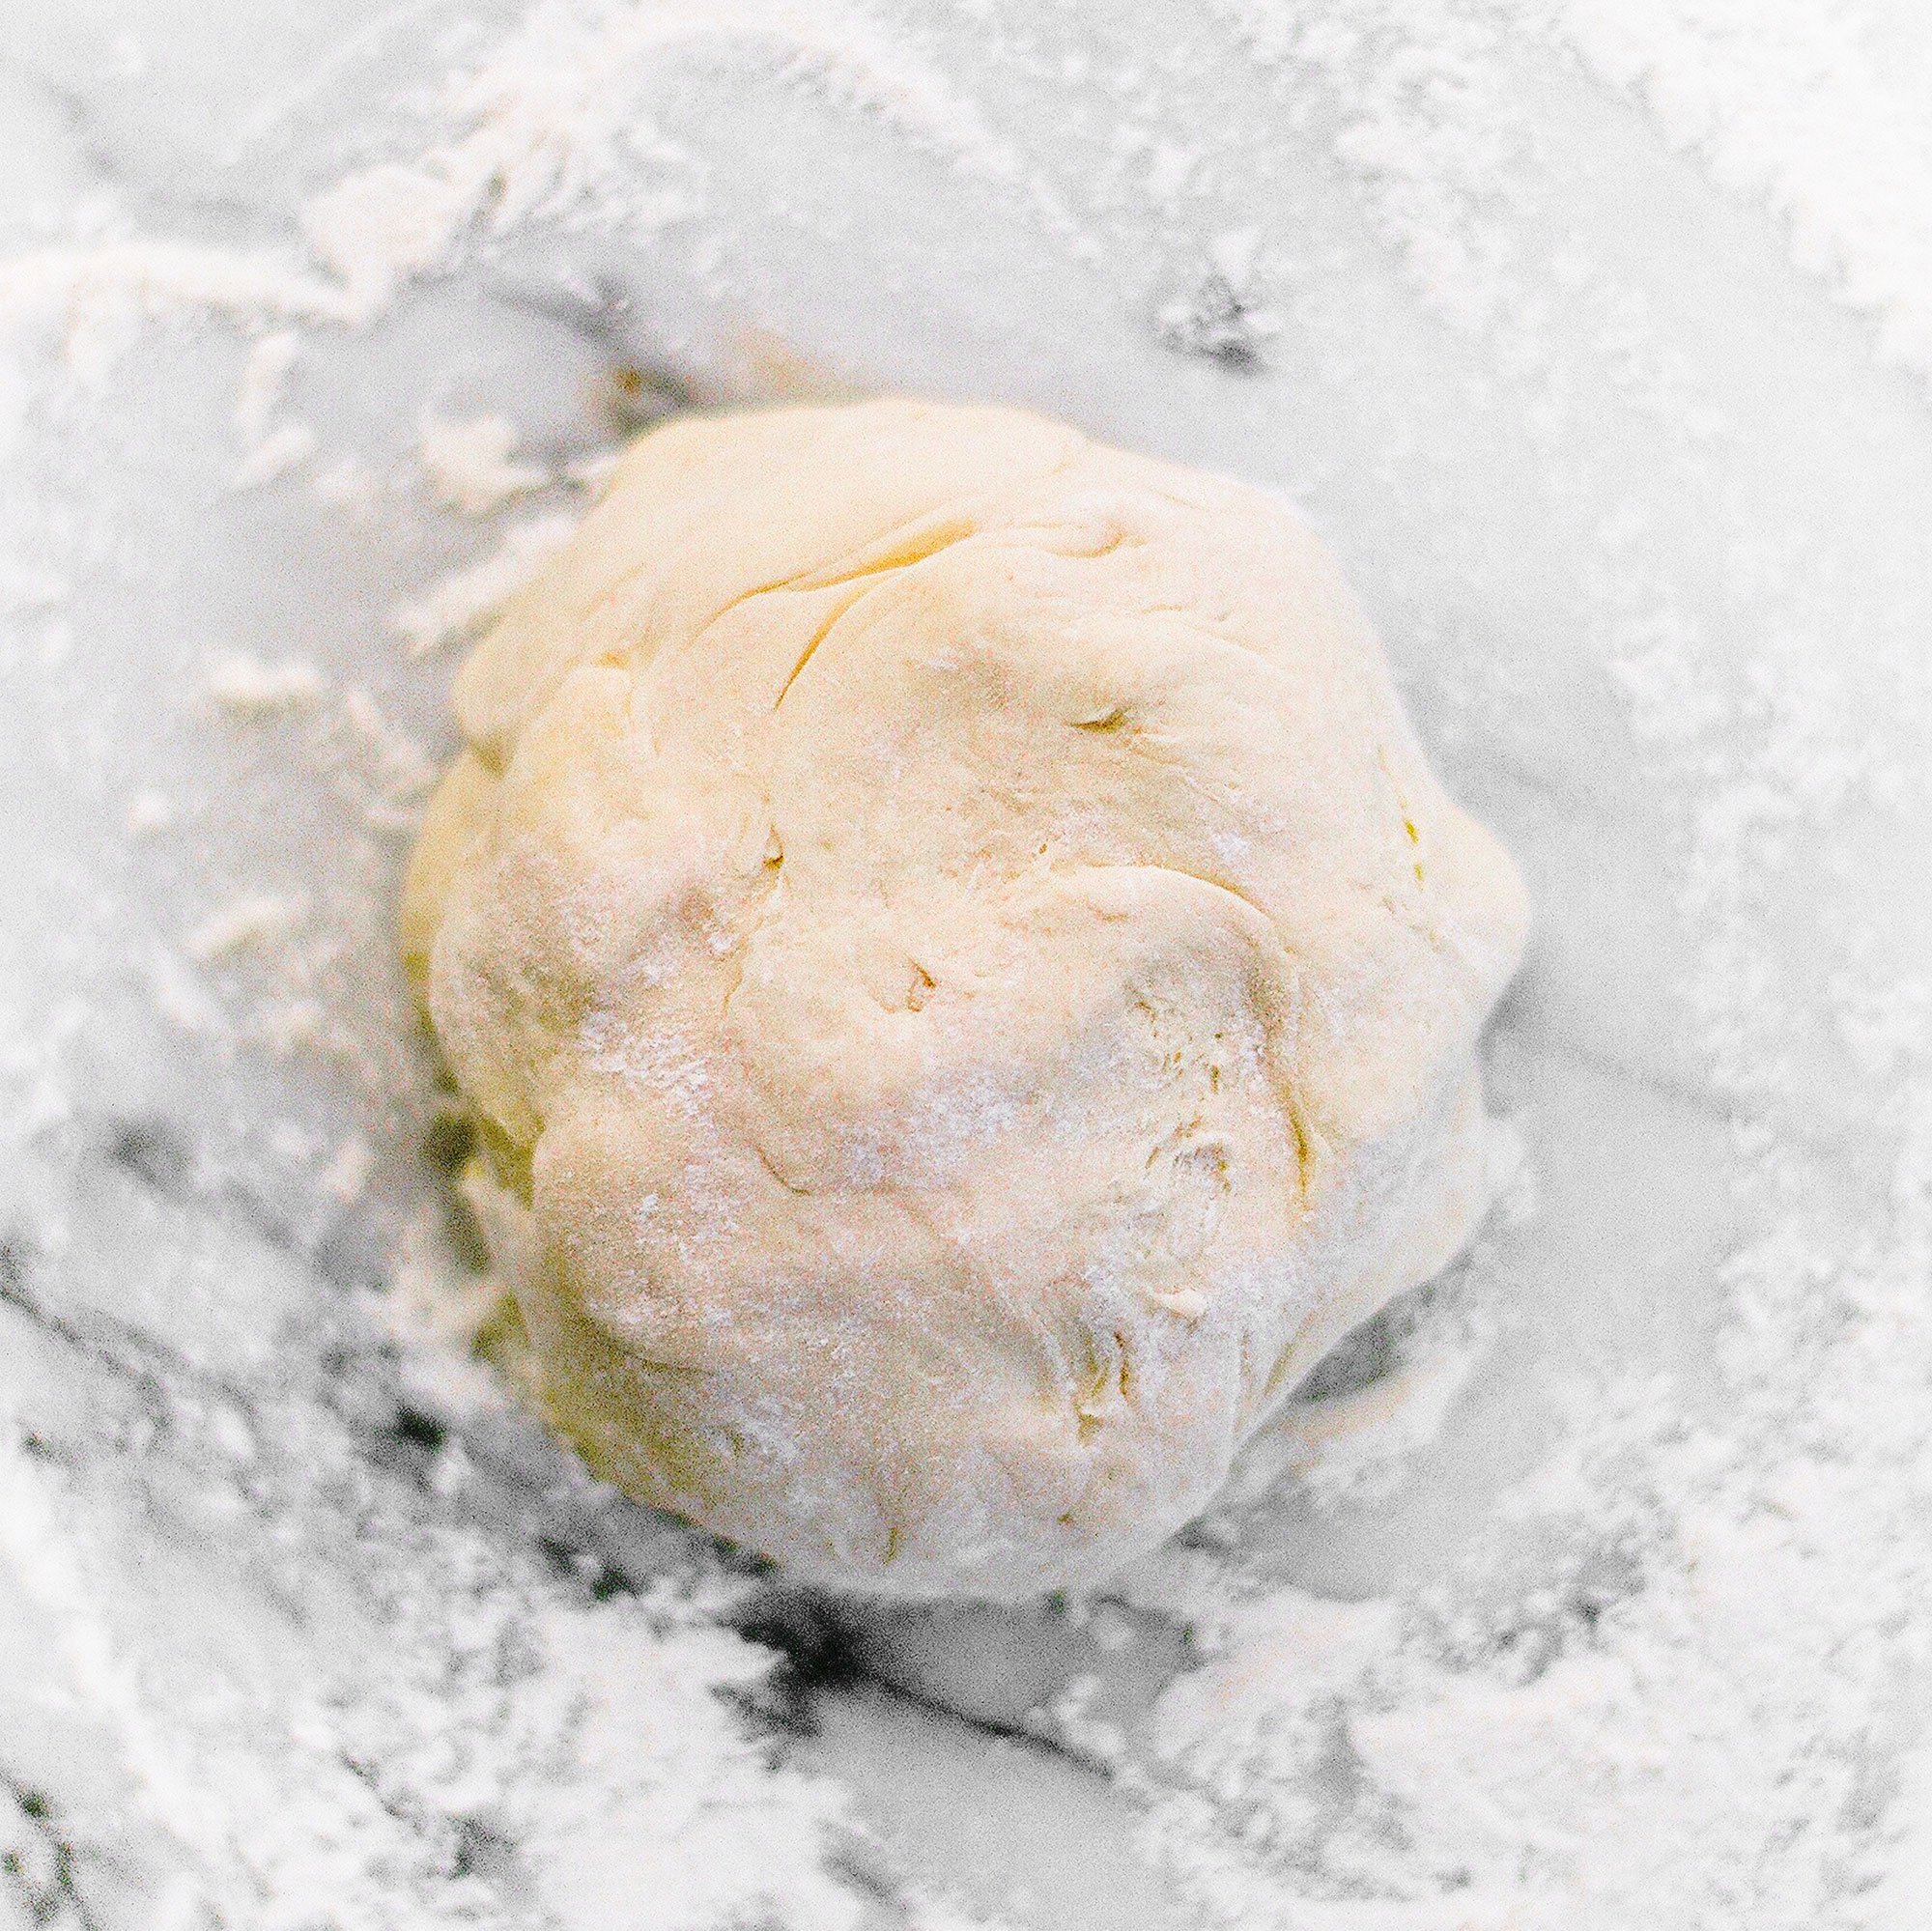
Gradually add in the remaining flour until the ingredients come together into a dough as described by the recipe. Turn the dough out onto a floured surface. Adding more flour as needed, knead until the dough is smooth and elastic. Start by only using the flour called for in the recipe. Avoid adding too much additional flour, which may result in a dry or dense bread.
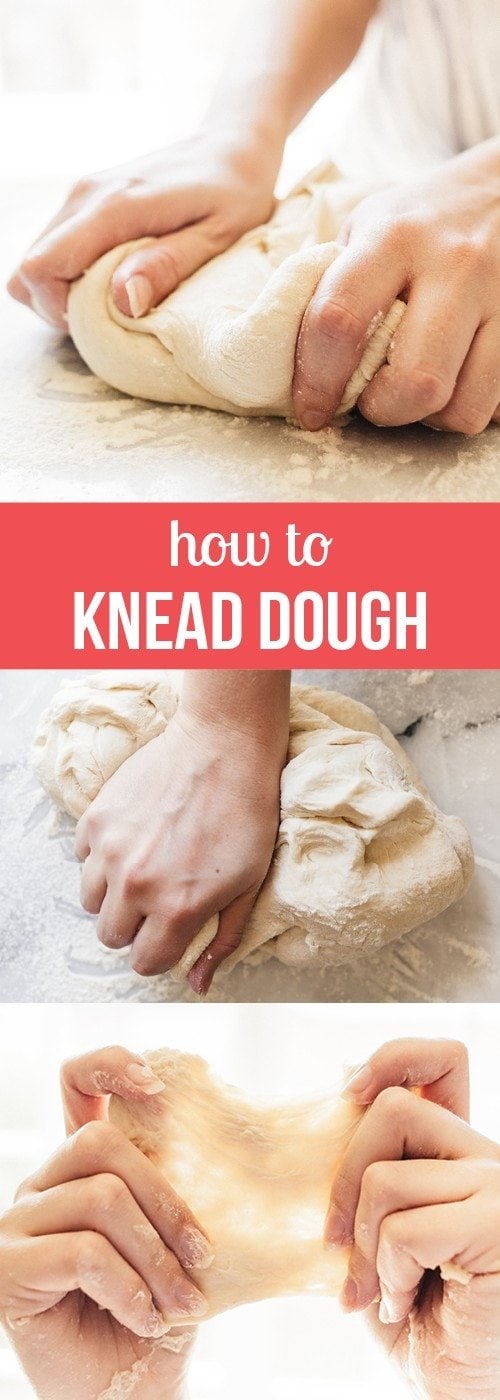
Perform the window pane test
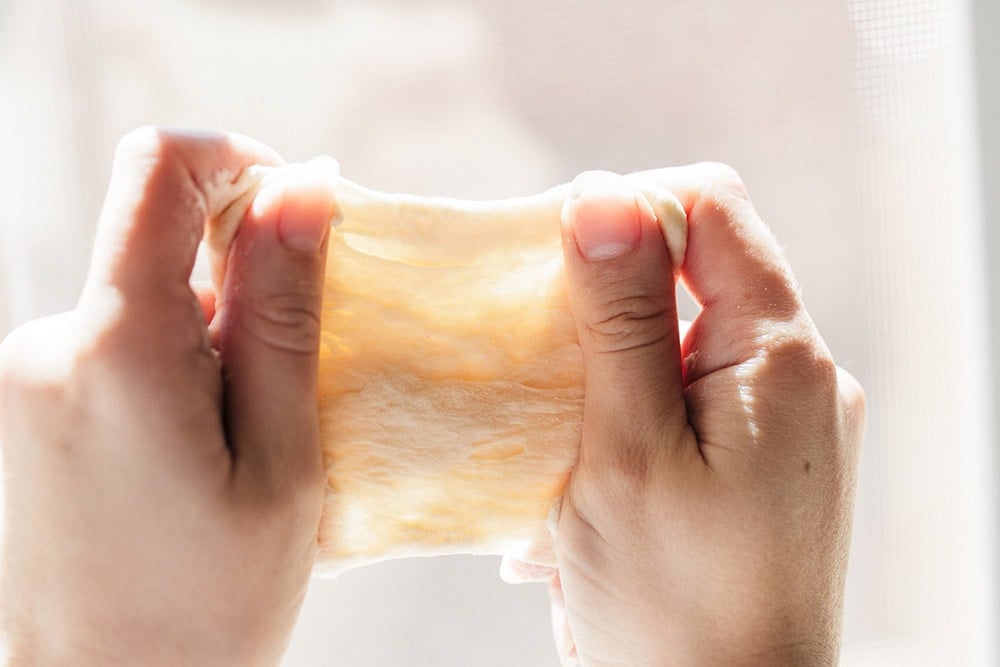
This test allows you to see if the dough is perfectly kneaded and ready to move on to rising.
Simply grab a piece of dough and stretch it out between your hands. If the dough breaks or tears then it needs more kneading. If it holds together and allows the light to shine through so you can see web-like strands like in the above photo, it’s ready to rise.
Remember what the dough feels like when it’s not ready and when it is ready so you can improve your sense for working with dough!
Kneading Can Vary!
Remember, a bread recipe should be viewed as a set of guidelines. You must make it work for all of the variables in your unique kitchen environment. Really use your sense when making bread, that’s half the fun of it anyways! These variables can affect how long it takes to knead, rise, and bake. Here are some examples:
•Type and brand of flour (bread flour has more protein and will develop gluten more effectively)
•Environment (humidity, elevation, etc.)
•Kneading technique (if you’re strong and tall, it may take you less time to knead by hand)
If you’re curious about more bread baking tips and tricks, be sure to visit Red Star’s website. Here’s a helpful article on the differences between active dry and instant yeast, which I mention in the video above.
What are your favorite bread baking tricks?

Author: Tessa Arias
I share trusted baking recipes your friends will LOVE alongside insights into the science of sweets. I'm a professionally trained chef, cookbook author, and cookie queen. I love to write about all things sweet, carb-y, and homemade. I live in Phoenix, Arizona (hence the blog name!)
About Tessa...
I share trusted baking recipes your friends will LOVE alongside insights into the science of sweets. I'm a professionally trained chef, cookbook author, and cookie queen. I love to write about all things sweet, carb-y, and homemade. I live in Phoenix, Arizona (hence the blog name!)
You’ll Also Love
Leave a Comment & Rating
Add a Review or Question
© Handle the Heat - handletheheat.com

As a trained chef and cookbook author, I share trusted baking recipes your friends & family will love alongside insights into the science of sweets. I help take the luck out of baking so you *always* have delicious results! Learn more here.

-
6 Crowd-Pleasing Thanksgiving Recipes


Order your Ultimate Cookie Handbook Hardcopy!

Join the Handle the Heat Community

Instead of digging through cookbooks and magazines and searching the internet for amazing recipes, subscribe to Handle the Heat to receive new recipe posts delivered straight to your email inbox. You’ll get all the latest recipes, videos, kitchen tips and tricks AND my *free* Cookie Customization Guide (because I am the Cookie Queen)!
Kneaded for 40+ minutes and could not get my dough to pass the window pain test. It always broke before beginning to see the light shine through. Wasn’t sure what that meant besides more kneading. My wrists & thumbs are sore and I am feeling discouraged. After 40 minutes I plopped it in the bowl, and let’s hope for the best.
Hi Raeanna! I’m sorry to hear that you’re struggling with your dough. Kneading by hand is always tough, and can take soooo long, especially if you’re not used to kneading. Perhaps your yeast is no longer active? I hope you were still able to get your bread to work!
Hello,
I have a general question about what’s the best kind of surface to knead bread dough on. In the past, I’ve used a wooden cutting board to knead the bread dough on. However, even after flouring the dickens out of the surface, my dough still sticks like crazy to both the surface and my hands. I should also mention I used all-purpose flour for those recipes. Would changing the surface and using bread flour instead of all-purpose make the dough less sticky and more manageable? Any advice would be appreciated, thank you!
Hi Steve! We honestly just knead dough on our counter, and it works perfectly! I wouldn’t suggest substituting bread flour with all-purpose flour unless the recipe you’re baking from specifically calls for it as it can change the texture/outcome of your bread. You want to also be careful adding extra flour to a bread dough, and instead reduce the amount of water used. It’s a lot easier to add more water to bread dough when mixing vs. having to add more flour when kneading, which can result in a very dense dough. Keep in mind that the environment you’re baking in is different than where the recipe was written too! I found a great article that might help you out with future sticky bread dough solving: https://www.busbysbakery.com/how-to-fix-wet-bread-doughs/. I hope that helps! Please let us know how your next bread attempt goes!
I’m watching an instructional video on how to knead bread and when you finally start demonstrating, you say “the technique that you use is not the biggest deal.” ?
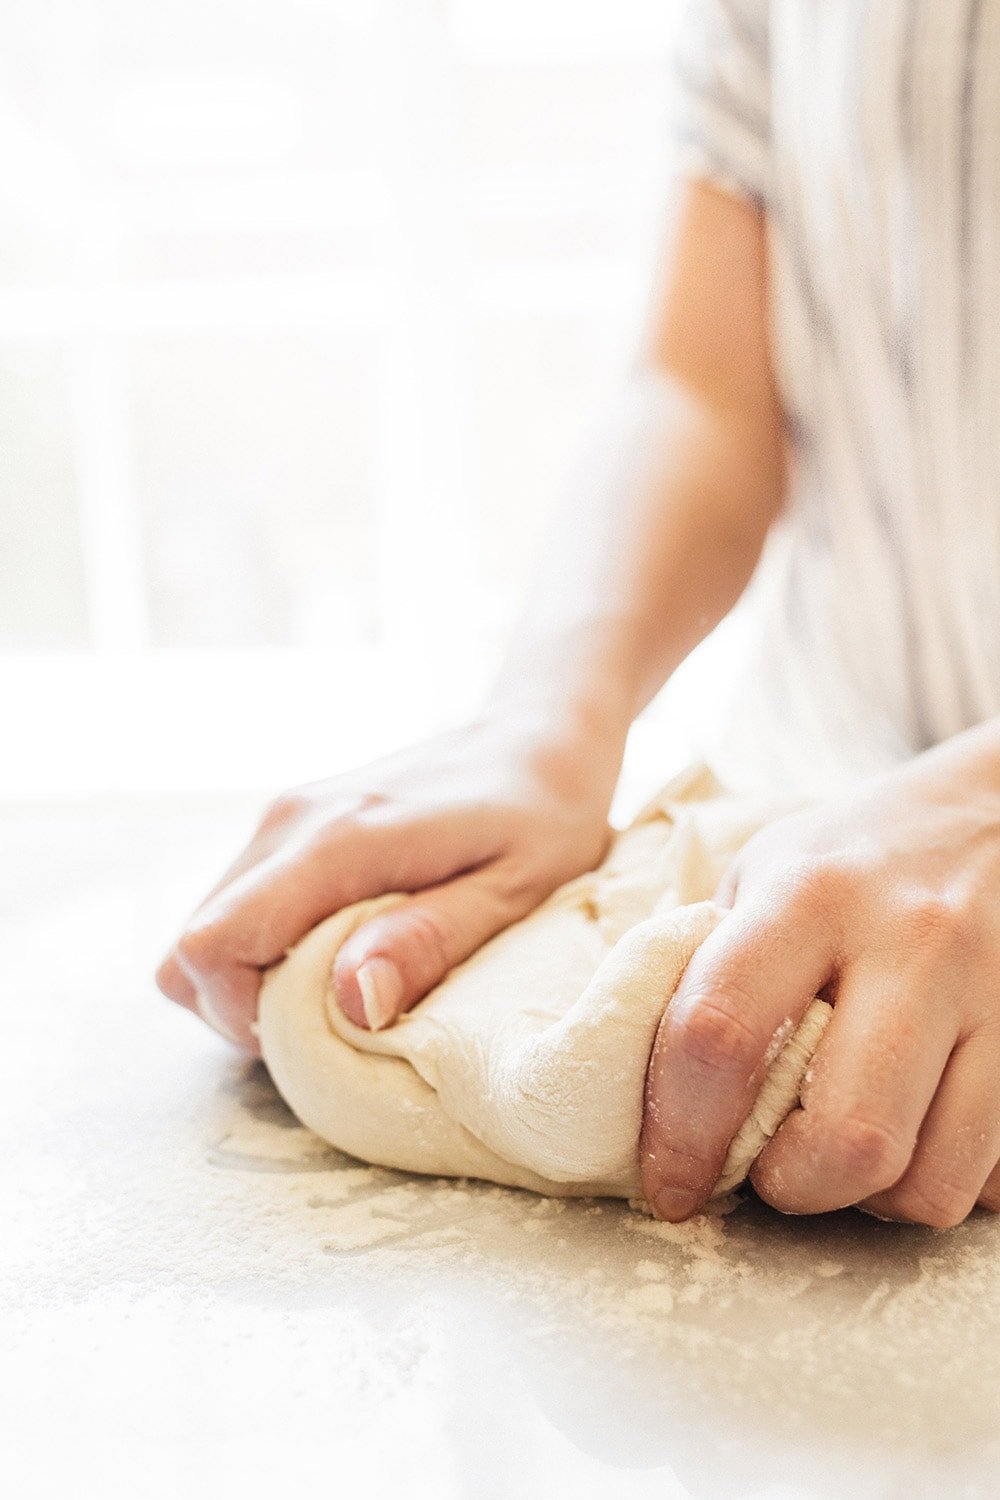
What I meant was how you start pushing down the dough with your hand as bakers have different techniques to their breads 🙂 The best way is to start kneading by using the heel of your hand to push the dough away from you and then fold the dough in half towards you, and continue doing those motions. The key to kneading is the process of using half the flour first with the warm wet ingredients and then gradually adding in the remaining flour, making sure that you stop kneading once the dough is smooth and elastic. Hope that helps clarify! 🙂
Very explicit instructions and told simply enough for even me to think I should try again – after many failures. However, I would have preferred the camera to show more of your hands and more time on the kneading as that was really the most important factor
Olá, amei esta palestra de como amassar . Parabéns!
Abraços,
Rosana/Brasilia/Brazil
Hi Tessa, I always tell people that they need to feel, smell, and taste dough while kneading it! It is a living organism and you need to get comfortable with it. I always knead bread by hand as it is so much easier to check when it is ready. It is amazing to watch people knead bread with their hands the first time around, it always seems to have a calming, yet pleasing aspect to it. My tip is to smell the dough and play with it, if it is stretchy enough and starts playing with you too, you are done!