This post may contain affiliate links. Read our disclosure policy.
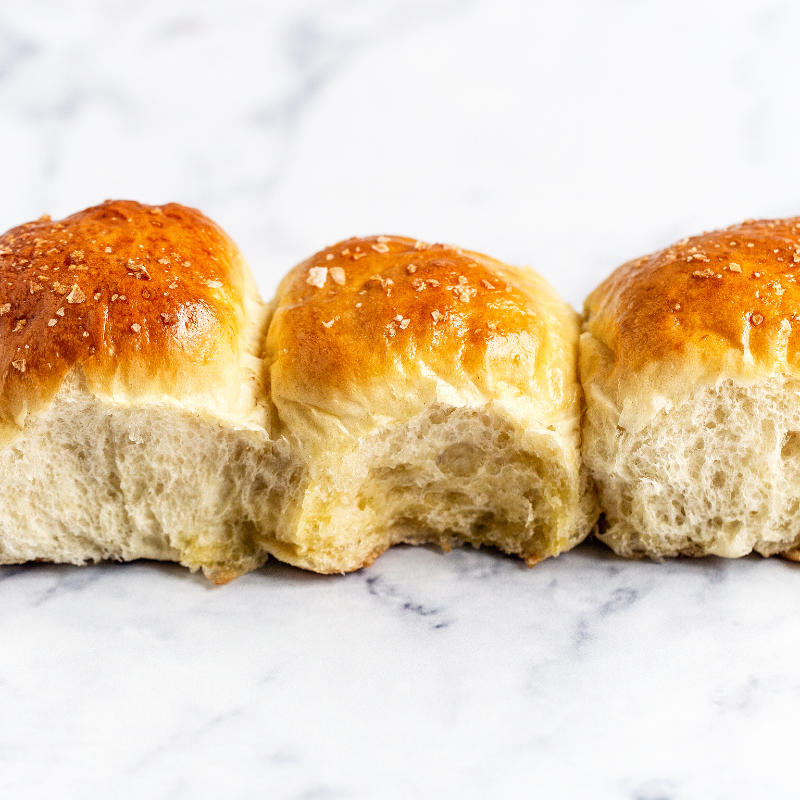
These Soft Butter Dinner Rolls are the perfect reminder that bread is one of the greatest things on the planet.
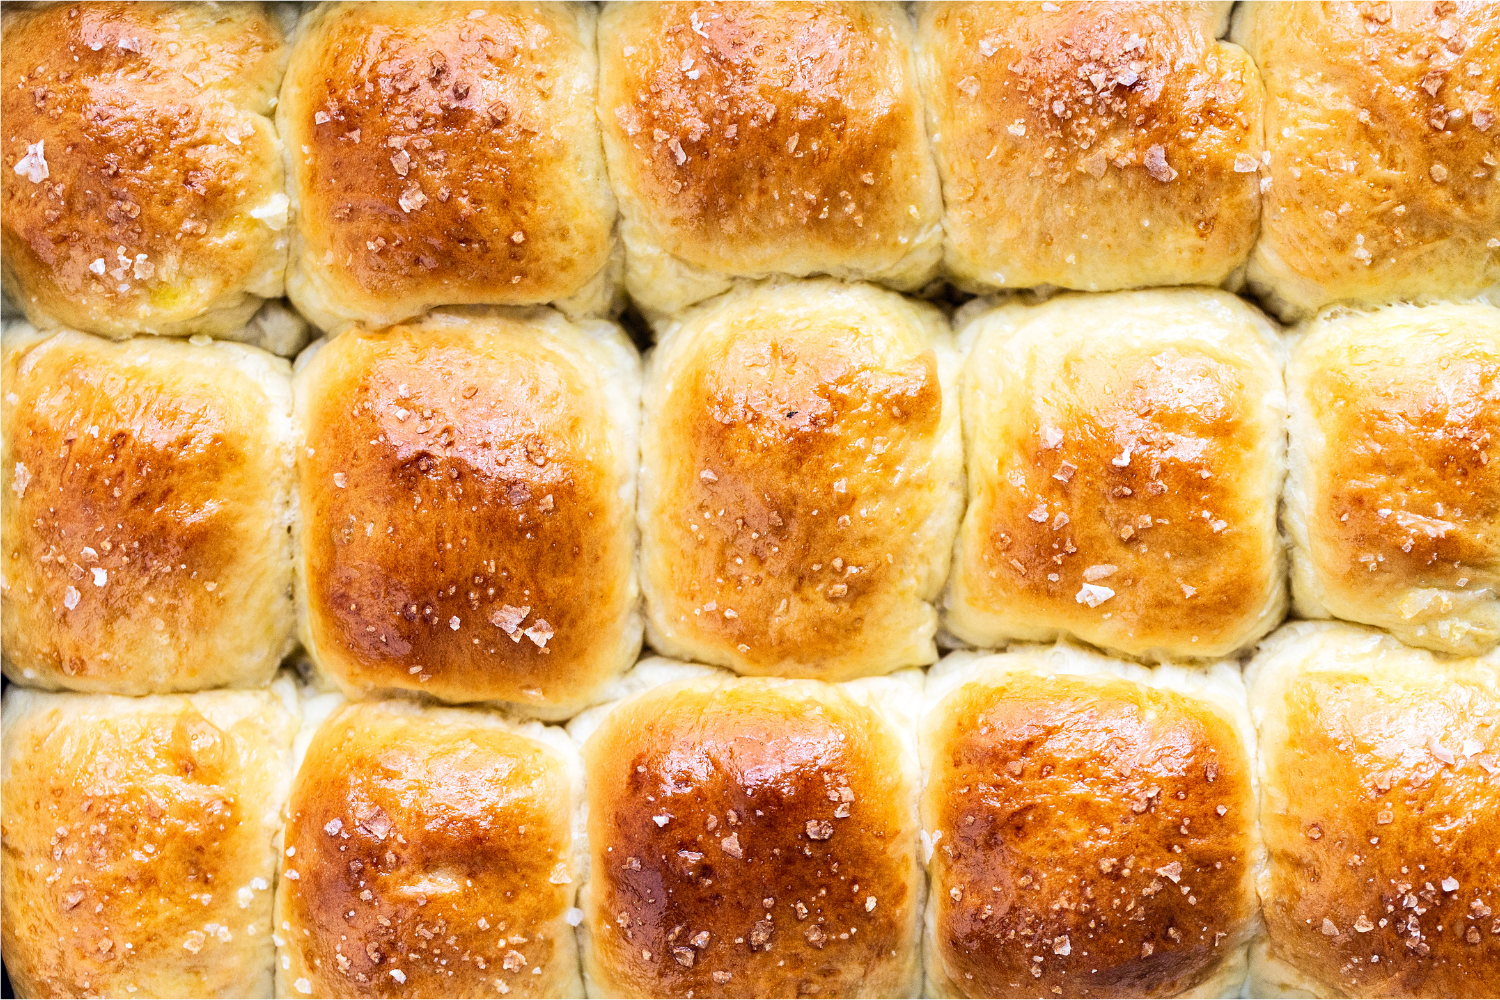
I could never imagine a life without BREAD. Especially the kind that is soft and tender, yet when you pull it apart, it has a little chewy give that makes your mouth water.
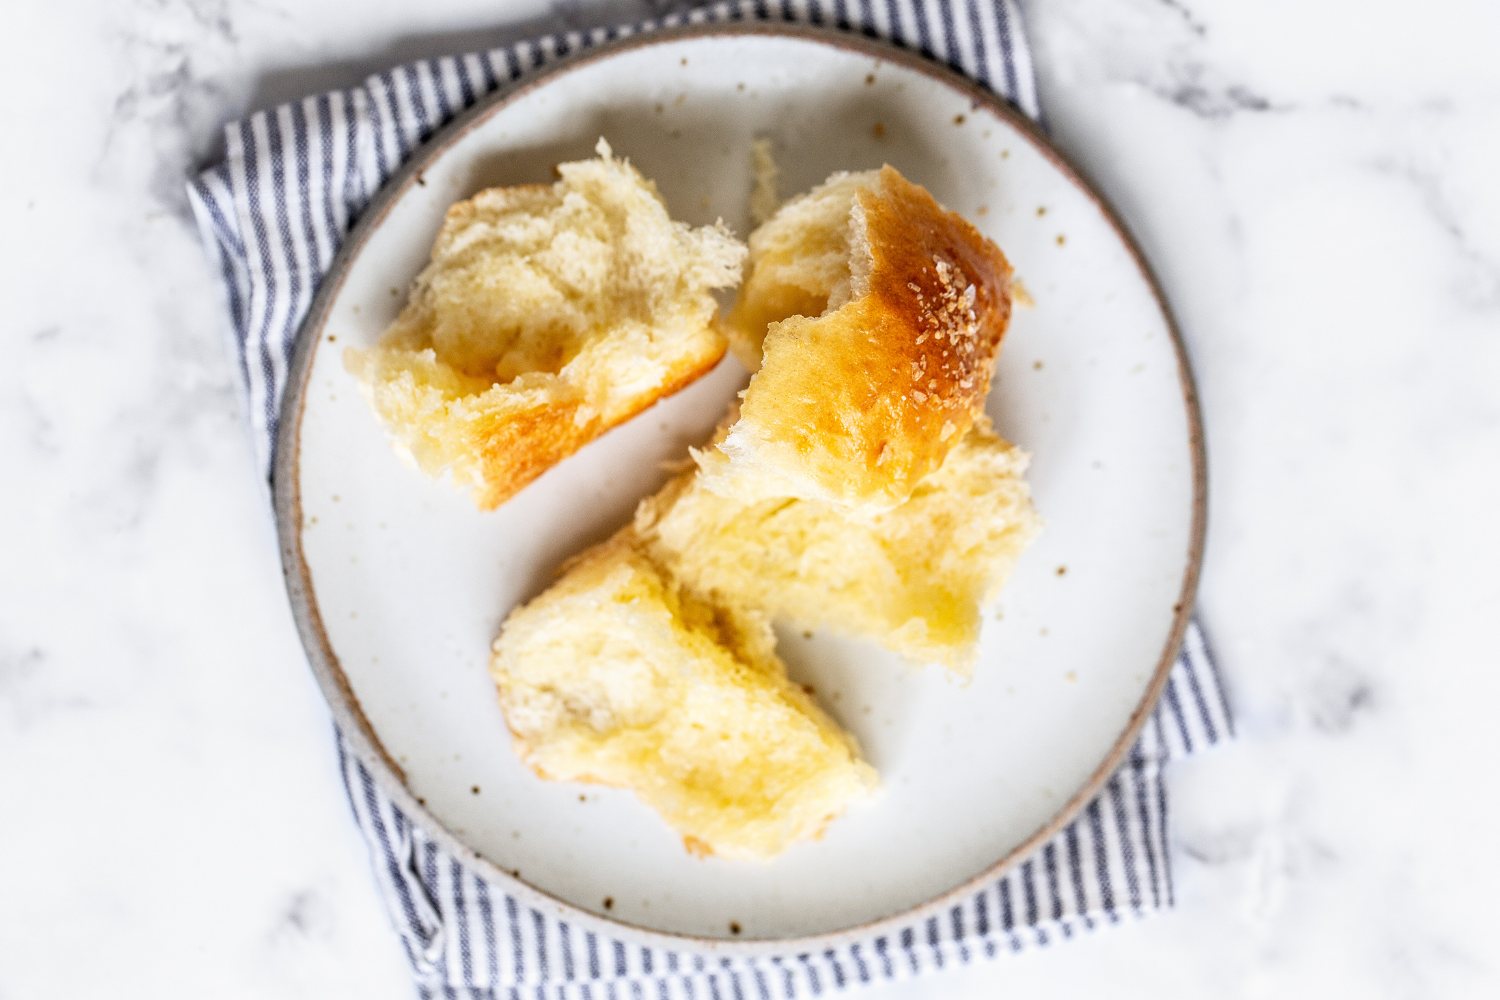
So in my delicious dreams, I imagined a bread roll that didn’t need to be smeared with butter because it was already filled with butter inside. Cue mouth watering.
I believe I saw something similar maybe on Instagram or Pinterest, but now that I’ve searched for my original inspiration I can’t find it.
Either way, I’m just grateful these rolls turned out as deliciously as they did.
You basically mix together butter, sugar, and cornstarch to make the buttery filling. Scoop that filling into balls then freeze them while you make the dough. At first, I thought filling the raw dough with something frozen would completely stop the second rise, but they came out perfectly.
The key was to get the butter filling to hold its shape long enough to make it to the oven. Then, once inside, it melts and becomes a rich, buttery explosion of deliciousness.
Make these rolls for any special holiday like Easter, Thanksgiving, or Christmas, or for a Sunday dinner to wow your family.
How to Make Soft Butter Dinner Rolls
Why Use Instant Yeast?
This recipe utilizes a shortcut ingredient: instant yeast. It’s also sometimes called rapid-rise or quick-rise yeast. These types of yeast are specifically created to allow you to add the yeast directly into the mix with all of the ingredients without a need for proofing (aka the step where you combine the yeast with warm liquid for 5 minutes). You can buy my all-time favorite yeast here on Amazon.
Can I Use Active Dry Yeast Instead of Instant Yeast?
If you don’t have or can’t find instant yeast, you can easily use active dry yeast instead. Simply combine it with the warm liquid called for in the recipe and allow it to proof for 5 minutes before adding into the bowl with the other ingredients.
Top Tips for Fluffy, Soft Butter Dinner Rolls
- Avoid adding too much extra flour to the dough. The exact amount of flour you’ll need will depend on your kitchen environment and even the brand of flour you’re using. Things like humidity and altitude can affect your dough. You may not need all the flour called for in the recipe. You may need a little more. Add it in gradually, just until the dough comes together. Trust me, it’s better to have sticky dough than dense, dry rolls.
- Measure your flour correctly. I highly recommend using a digital kitchen scale for accuracy, but if you don’t have one, be sure to use the spoon and level method to ensure you’re not accidentally compacting too much flour in your measuring cups. Learn more about that here.
- Don’t skip the sugar. There’s just a touch in these dinner rolls, to help make the Soft Butter Dinner Rolls tender, soft, and golden brown. Learn more about sugar’s role in baking here.
Can I Knead the Dough By Hand?
Yes! I call for a stand mixer to make easy work of kneading in this Soft Butter Dinner Rolls recipe, but you can also knead by hand. Be sure to knead the dough properly, until the dough is smooth and elastic, to get rolls that hold their shape and bake up nice and fluffy. Check out my full tutorial on how to knead dough here.
How to Tell When the Dough Has Risen Enough
- After kneading, shape the dough into a ball. Place in a lightly oiled mixing bowl. I like to use glass so I can see how much it’s rising. The dough should be turned over to oil the top so that it doesn’t dry out.
- Cover the bowl loosely with plastic wrap, foil, or a clean towel.
- Let the dough rise in a warm, draft-free location. Ideal rise temperatures are between 80°F and 90°F. Lower temperatures will require more rising time; higher temperatures will shorten the rise time.
- The dough is done rising when it’s about doubled in size and passed the “ripe” test: gently stick two fingers in the risen dough up to the second knuckle and then take them out. If the finger marks remain, the dough is ready for shaping into balls. If not, cover and let the dough rise longer until it is.
- The same finger test can be done again when the rolls are shaped and ready to bake.
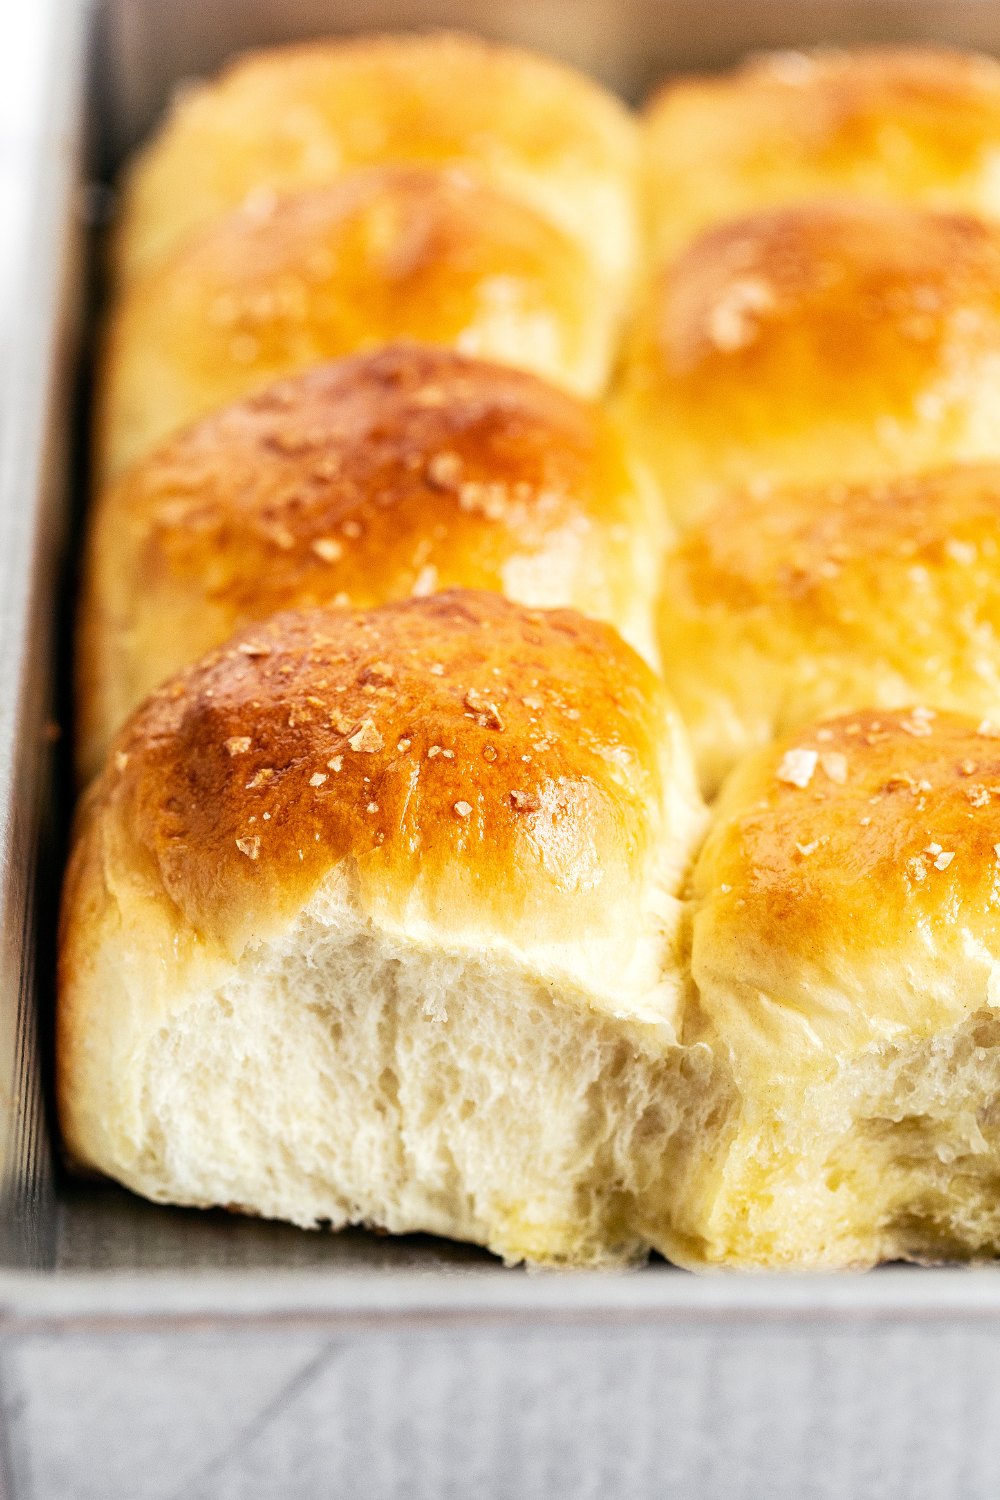
What Pan Should I Bake Soft Butter Dinner Rolls in?
This recipe uses a 9×13-inch baking pan. I like to use a light-colored metal baking pan, like this one. If you use a glass or ceramic baking pan, you may need to increase the baking time, and your rolls may not get as golden brown – learn more about that here.
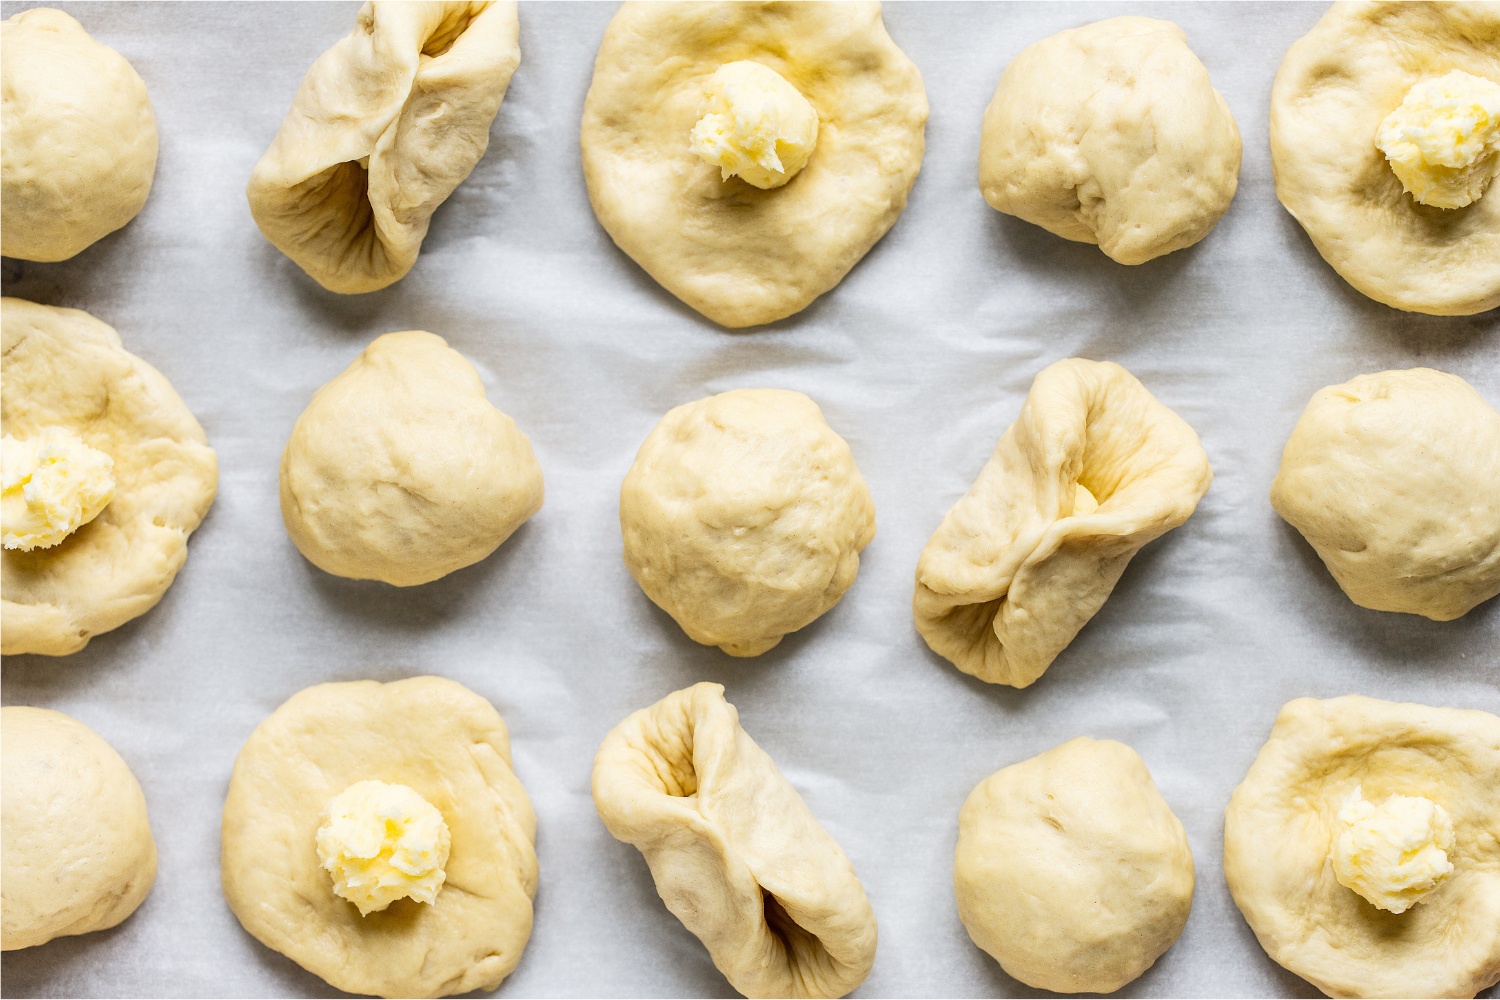
How to Stuff Dinner Rolls with BUTTER
- Divide the dough into 15 equal pieces. You can do this perfectly by weighing the mass of dough with a digital kitchen scale and then dividing that amount by 15.
- Flatten one piece of dough with your hands and place a ball of the frozen butter on it.
- Pinch and wrap the dough around the butter and seal completely by pinching firmly with your fingers.
- Roll into a smooth ball.
- Place shaped dinner roll in the prepared baking pan.
- Repeat with the remaining dough.
- Lightly cover the dough with plastic wrap and let the rolls rise for 1 hour, or until about doubled in size. If some of the rolls show cracks or splits as they rise, don’t worry – they should still bake up just fine.
Do I Have to Egg Wash Dinner Rolls?
Yes! The egg wash brushed on top helps to create rolls that are golden brown in color and shiny in appearance. Don’t skip this step!
How to Make Soft Butter Dinner Rolls Ahead of Time
For this Soft Butter Dinner Rolls recipe, here’s my recommended method:
- Make the dough all the way through to rising once and shaping into rolls.
- Once the rolls are stuffed with the butter mixture and shaped, cover the pan well with plastic wrap and place in the refrigerator for up to 24 hours.
- When ready to bake, bring to room temperature as the oven preheats before baking as the recipe directs.
- If the rolls haven’t doubled in size yet, allow to sit at room temperature until they do. This may take a bit (60-90 minutes) but the exact length of time will depend on your kitchen environment, and how much the rolls rose before being refrigerated.
- The rolls are best served the day they’re baked. However, you can easily reheat the rolls briefly in the oven or toaster oven at 300°F until warmed through to refresh before serving.
- If you need to prep these rolls further in advance, see the freezing instructions just below.
More Dinner Roll Recipes:
For the butter filling:
-
10
tablespoons
(142 grams) unsalted butter,
at room temperature
-
1/4
cup
(50 grams) granulated sugar
-
2
tablespoons
(16 grams) cornstarch
For the rolls:
-
1
cup
warm whole milk (100-110°F)
-
1
tablespoon
(15 grams) unsalted butter,
melted
-
2
whole eggs,
lightly beaten
-
2
tablespoons
granulated sugar
-
2 1/4
teaspoons
(1 packet) instant yeast
-
1 1/2
teaspoons
fine salt
-
4
cups
(508 grams) all-purpose flour
For the topping:
-
1
large egg
-
Flake sea salt,
for sprinkling
Make the filling:
-
In a stand mixer fitted with the paddle attachment, beat the butter, sugar, and cornstarch until light and fluffy, about 3 minutes. Scoop the dough into 2-teaspoon sized balls and place on a parchment-lined baking sheet. Place in the freezer while you prepare the dough.
Make the dough:
-
Combine the milk, butter, eggs, sugar, and yeast in the bowl of a stand mixer. Add 2 cups of the flour and stir with a wooden spoon until absorbed. Attach the dough hook to the mixer, turn to medium-low speed, and gradually add the remaining flour and salt, kneading until a mass of dough begins to form. Only add as much flour as needed to bring the dough together. Continue kneading on medium-high speed for about 5 minutes or until a soft, smooth ball of dough is formed. The dough should feel elastic and slightly tacky to the touch. Only add additional flour if the dough is unbearably sticky.
-
Lightly spray a large clean bowl with cooking spray and place the dough in the bowl. Cover the bowl lightly with plastic wrap. Let rise for about 1 1/2 to 2 hours at room temperature or until the dough is big, puffy, and about doubled in size.
-
Spray a 13x9-inch baking pan with cooking spray. Gently deflate the dough. Use a bench scraper, knife, or pizza wheel to divide the dough into 15 equal pieces. If you have a digital kitchen scale, weigh the entire mass of dough then divide by 15 to get the perfect portion size for each piece.
-
Flatten a piece of dough and place a ball of the frozen butter on it. Pinch and wrap the dough around the butter and seal completely by pinching hard with your fingers. Roll into a smooth ball. Repeat with remaining dough. Place shaped dough in prepared baking pan.
-
Lightly cover the dough with plastic wrap and let the rolls rise for 1 hour, or until about doubled in size. If some of the rolls show cracks or splits as they rise, don’t worry. They should bake up just fine.
-
Meanwhile, preheat the oven to 375°F.
-
In a small bowl, whisk together the egg and gently brush over rolls. Sprinkle with sea salt.
-
Bake the rolls for 20 minutes, or until golden brown. Serve warm. Store leftovers in an airtight container or ziptop bag for up to 3 days.
This post was originally published in 2019 but has been updated with additional recipe tips. Photos by Ashley McLaughlin.


Made these twice for Thanksgiving and everyone raved! Thank you for the perfect recipe!
My husband loves these dinner rolls and is always asking me to make them! So good!!
I’m so happy to hear they’re such a hit! 🙂
Any suggestion for if the butter escaped and now there’s no butter ball in the middle of the cooked rolls?
Hi AnnKate, there won’t be a butter ball on the inside once these are baked, you can see what the inside looks like in one of my above photos. The butter melts and becomes a rich ooey gooey explosion of deliciousness! If your butter completely escaped, next time, make sure you seal the dough completely by pinching hard with your fingers prior to letting it rise that last time.
My family and I are nuts over these rolls. I’ve made them twice and the second time I used a metal pan and they turned out better than the first batch. Solid recipe, you can’t go wrong!
So glad your family is enjoying this recipe!
Hi there, what if I don’t have a stand mixer. Does a hand mixer work the same?
Cheers,
Adam
Hi Adam, you can knead dough by hand! Check out my article on how to do so here.
Heaven on earth. I’ve never found a solid go to roll but these are for sure it! I will be making these for years to come. Dangerously good!
This makes me so happy to hear, Lauren!
Can the rolls be frozen and thawed prior to baking? Thanks!
Yes! I give detailed tips on how to make ahead dinner rolls in my free Make Ahead Guide.
I have made this and my whole family loved it. However, my fillings melted and spilled out all ..when I opened my roll, just a strong flavor of butter but nothing else left there.. How can I ensure the filling will “stay inside” the roll?
Tessa, you are without a doubt the most amazing teacher in the world. I have made at least a dozen of your recipes and every time – PERFECT! Your helpful tips give me everything I need to know.
These rolls are literally the most delicious roll my family has ever had. Easy, clear instructions. Incredible taste, texture and presentation.
Finding you is like finding gold. Thank you for being a shining light and taking the time to teach, explain and do all the behind-the-scenes work to make us great bakers!
Hi
I was wondering if we could use garlic butter instead for the filling?
Thank you!
Sure!
I have made many dinner rolls over the years, but these are the best ever! Made them for thanksgiving and Christmas, they were a huge hit. This is now my go to dinner roll recipe! Thank you Tessa!!
The recipe and the make ahead instructions were easy to follow. I made these for Thanksgiving and everyone loved them! I was not a fan of the butter mixture with the sugar and butter (may have been my fault because I just doubled the filling part for my 2 batches of rolls and probably added too much or too little of something), but I would totally make these again!! Homemade rolls are super fun to make so I am so happy to have found this recipe!
what if you have no paddle attachment, just a hook attachment . Thank you
How did you make you butter balls. I tried many ways of measuring and making the balls but yours look much rounder in your pictures.
Wonderful, Beautiful and so tasty. My husband loved them and I am making them for Thanksgiving. I do have one question regarding the salt 1 1/2 teaspoons of fine salt in the dough recipe. I see it however in the written part of the recipe I do not see the fine salt being added! Just wondering.
Wonderful!! Glad to hear it. Thanks for pointing out that note re: salt. It’s been corrected 🙂
Oh my gosh I have never made rolls before. I did it! They turned out so wonderful and beautiful. My husband loved them and I am making for a family Thanksgiving Dinner. You are amazing. You have encouraged me to try anything now and not be afraid. I do have a questions. In the recipe for the dough it states 1 1/2 teaspoon of fine salt however in the written portion of the recipe I don’t see if being added. Well I am much much older and perhaps I missed it. Thanks again! You are just so sweet!
where is the recipe?? Looks great!
Can you use gluten free all purpose flour to make these?