This post may contain affiliate links. Read our disclosure policy.
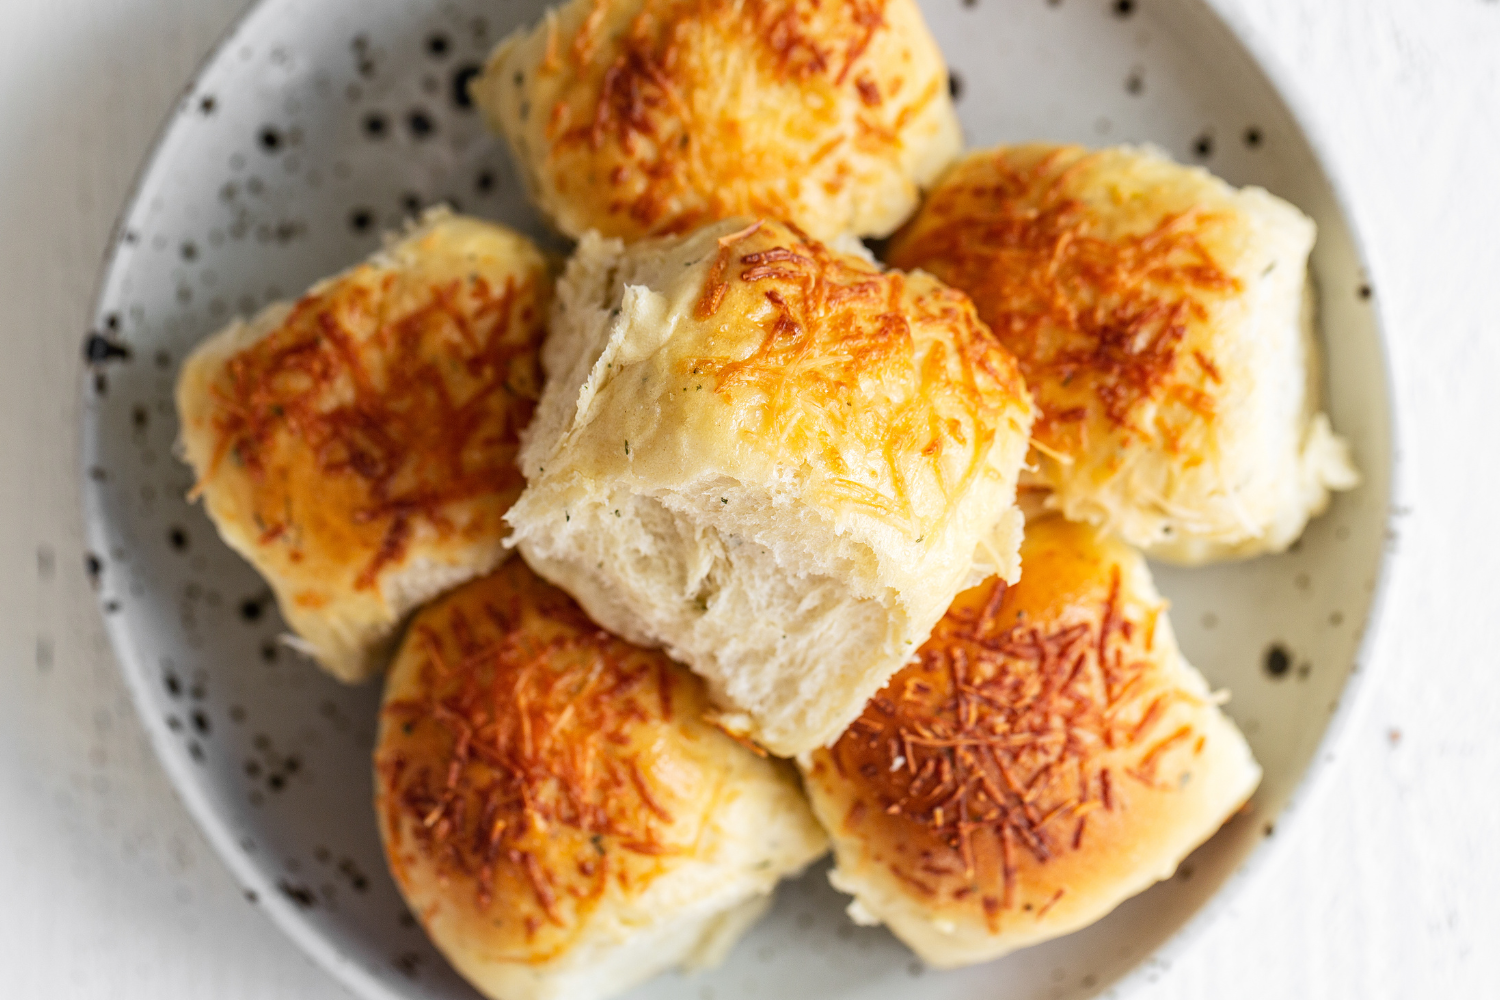
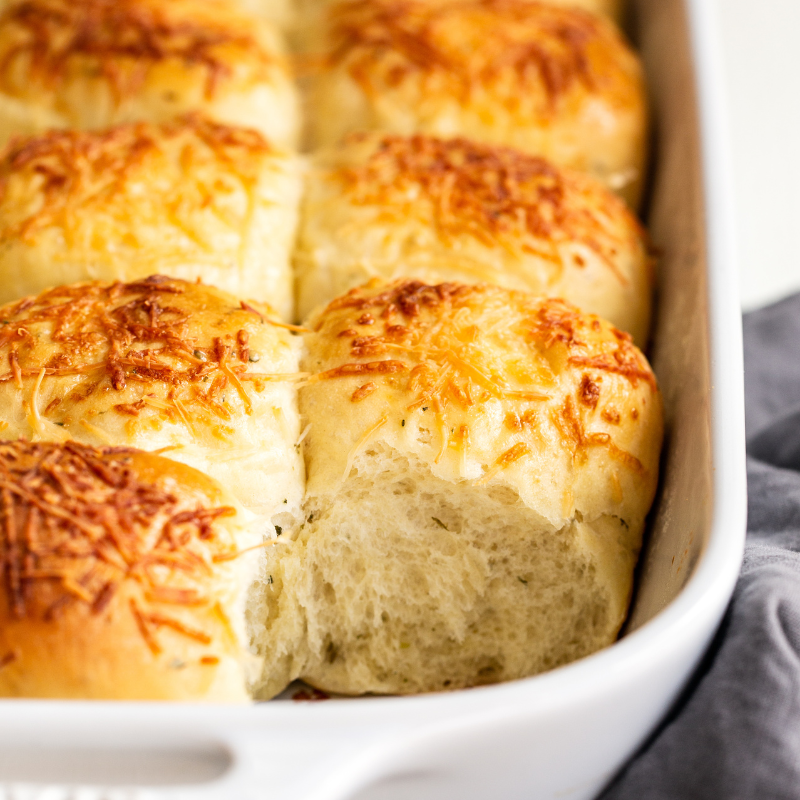
These Garlic, Herb, and Cheese Bread Rolls are the perfect addition to any dinner table.
I love baking bread. I’ve definitely always loved eating it!
I find creating a dough, watching it transform, and then filling your whole house with that wonderful baking bread aroma so enjoyable.
This garlic, herb, and cheese bread roll recipe is super straightforward and simple. No crazy steps, no super long processes – just a beautiful, easy dough.
Even if working with yeast intimidates you, I encourage you to give this recipe a try.
How to Make Perfect Garlic, Herb, and Cheese Bread Rolls
Which Yeast Is Best to Use For Rolls?
- Think of instant yeast as a sort of foolproof shortcut ingredient. It’s also labeled rapid rise or quick rise yeast and is available at most grocery stores
- Instant yeast is formulated to allow you to skip proofing (the step where you combine the yeast with warm liquid for 5 minutes).
- You can buy my all-time favorite instant yeast on Amazon.
If you don’t have or can’t find instant yeast, you can easily use active dry yeast instead. Simply combine it with the warm liquid called for in the recipe and allow it to proof for 5 minutes before adding into the bowl with the other ingredients. Skipping the proof will lengthen the rising period as it will take the yeast longer to get moving.
Tips for Fluffy Garlic, Herb, and Cheese Bread Rolls
- Avoid adding too much extra flour to the dough. This dough is enriched with milk, butter, oil, eggs, and sugar. These ingredients slow down gluten development and can make the dough a little sticky. Your instinct might be to add extra flour; however, any extra flour will create a denser, tougher roll instead of the light, fluffy roll we want.
- Measure your flour correctly. I highly recommend using a digital kitchen scale for accuracy, but if you don’t have one, be sure to use the spoon and level method to ensure you’re not accidentally compacting too much flour in your measuring cups.
- Don’t skip the sugar. There’s just a touch in these herbed dinner rolls, to help make the rolls tender and golden brown. Learn more about sugar’s role in baking here.
Can I Knead This Dough by Hand?
Yes! I call for a stand mixer to make easy work of kneading in this Garlic, Herb, and Cheese Bread Rolls recipe, but you can also knead by hand. Be sure to knead the dough properly, until the dough is smooth and elastic, to get rolls that hold their shape and bake up nice and fluffy. You can see my full tutorial on how to knead dough here.
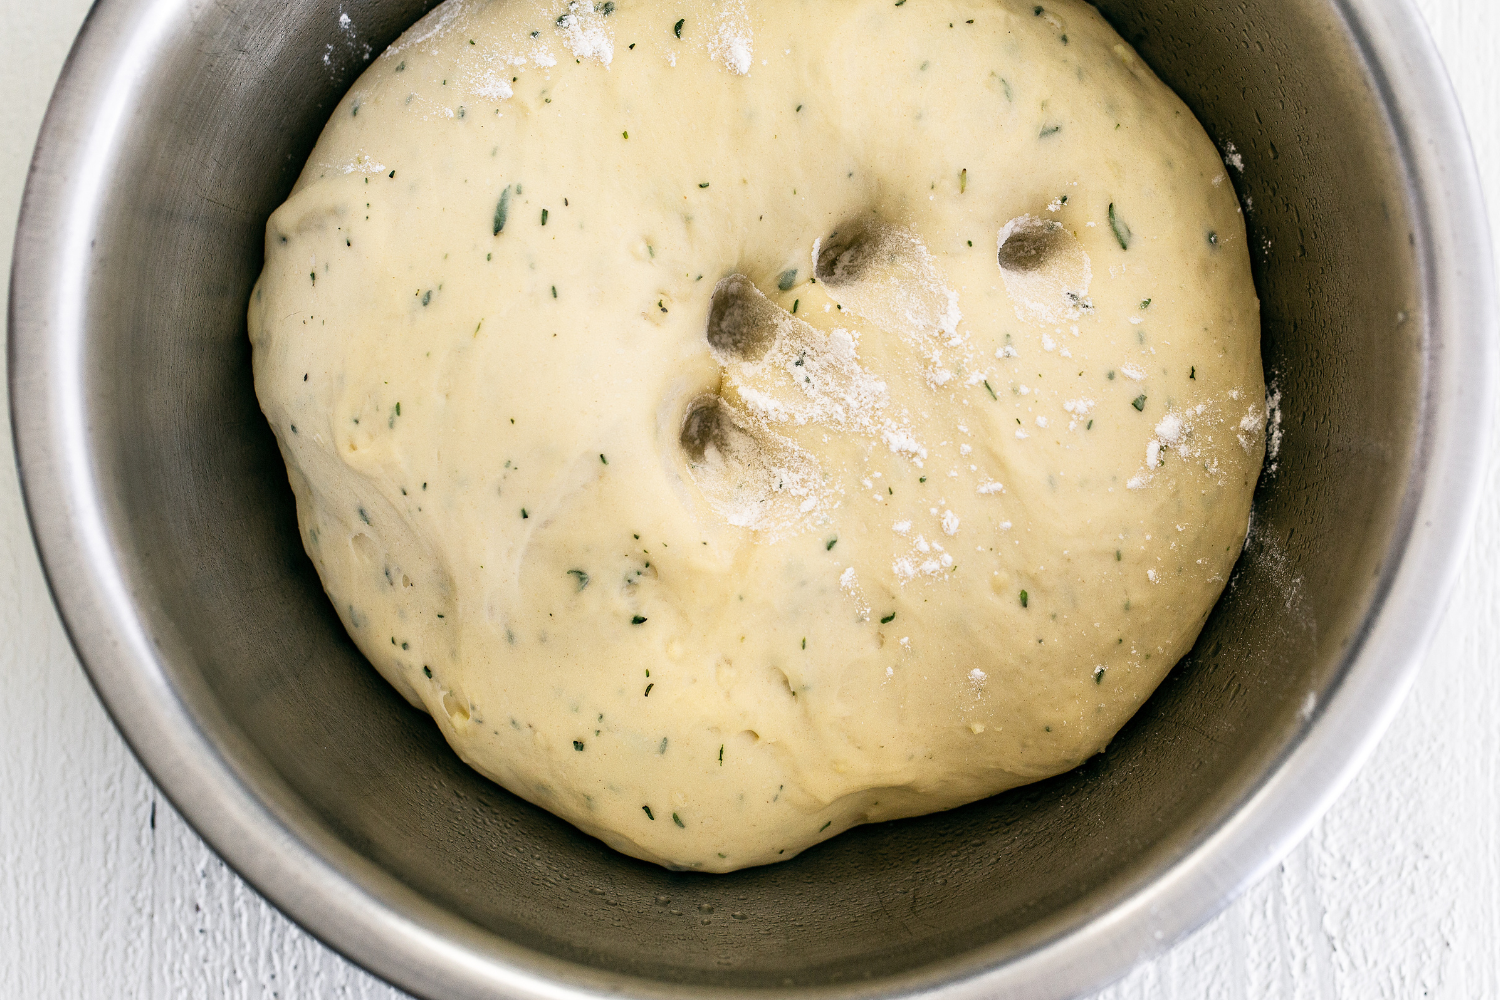
How to Tell When Dough Is Risen
- A lot of factors will influence when your Garlic, Herb, and Cheese Bread Roll dough is done rising and ready to be shaped – particularly the temperature and humidity level in your kitchen.
- Place two fingers in the risen dough up to the second knuckle and then take them out. If the indentations remain, the dough is ready to be shaped. If not, cover and let the dough rise longer until the indentations remain.
- The same test can be done again for the second proof before baking.
How to Shape Bread Rolls
- Once the dough is risen, press it down to gently deflate.
- Place the dough onto a clean surface (not a floured surface).
- Use a bench scraper to section the dough into 12 equal pieces. Don’t worry if they’re not perfectly equal in size. However, if you’re a perfectionist, you can weigh the entire mass of dough, divide that number by 12, and then portion each piece perfectly by weight.
- As you’re shaping each piece into a round, make sure to pinch the dough into one central point to create a tight ball. This will help the rolls rise beautifully. Don’t flour your work surface when shaping the rolls because you want some resistance to roll them into taut balls.
 You can also get creative with the shapes. Check out my video post on 5 ways to shape bread rolls here.
What Type of Pan for Garlic, Herb, and Cheese Bread Rolls?
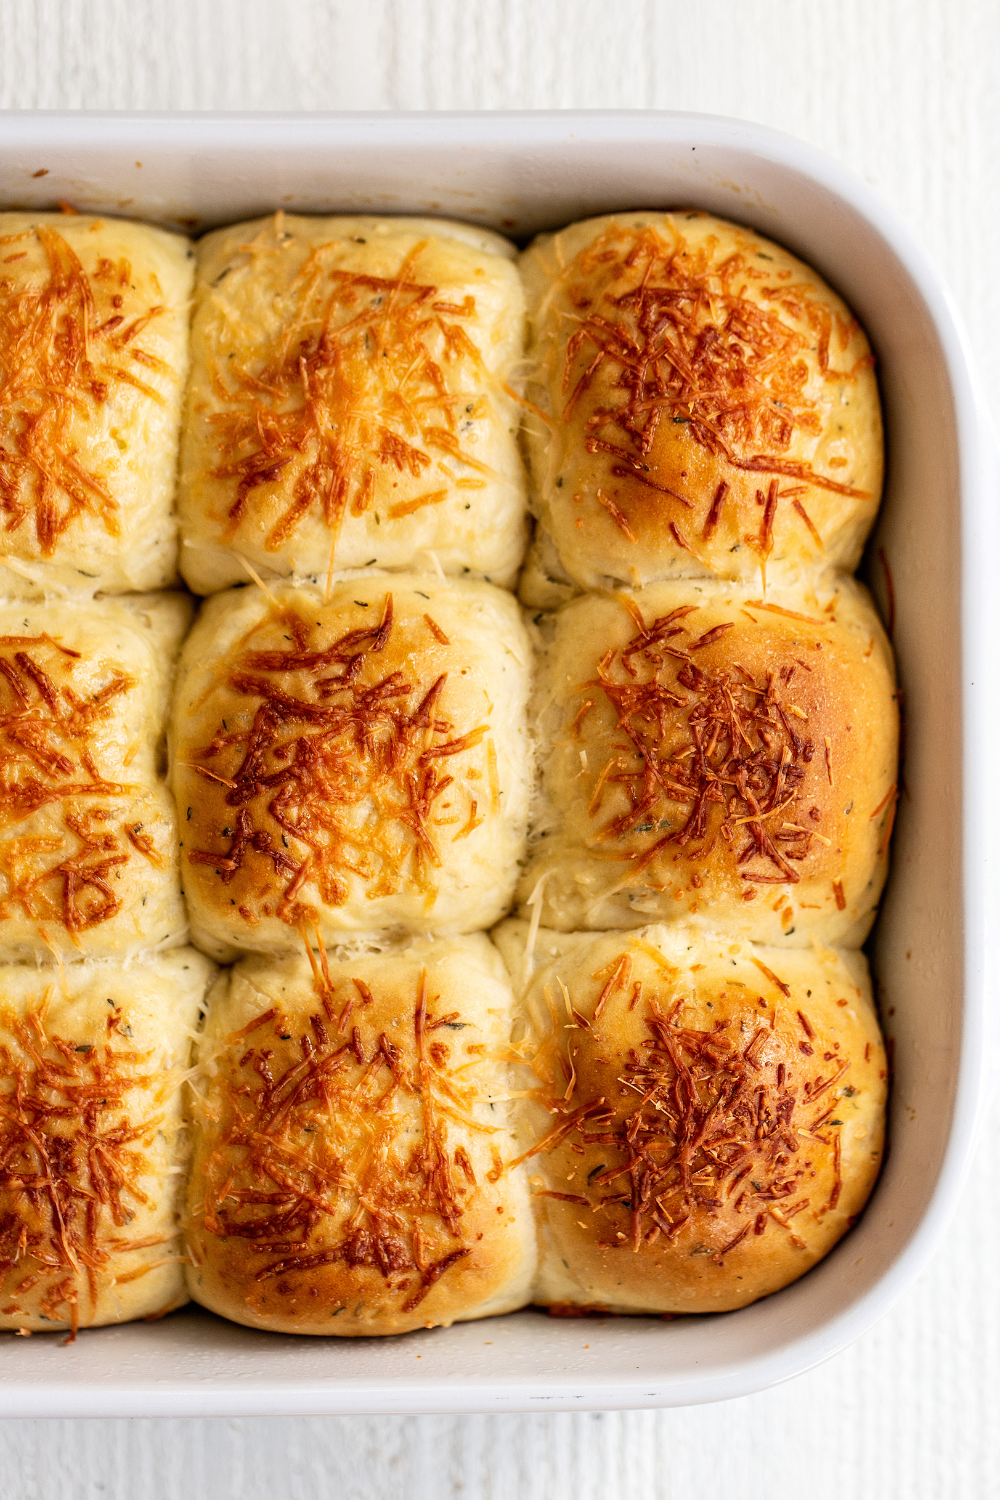
This Garlic, Herb, and Cheese Bread Rolls recipe uses a 9×13-inch baking pan. While I usually prefer metal baking pans over glass or ceramic (learn why here!), I prefer the table presentation ceramic pans offer when making dinner rolls.
How to Make Garlic, Herb, and Cheese Bread Rolls Ahead of Time
- Make the dough all the way through to rising once and shaping into rolls.
- Once the rolls are shaped, cover the pan well with plastic wrap and place in the refrigerator for up to 24 hours.
- When ready to bake, bring to room temperature as the oven preheats before baking as the recipe directs.
- If the rolls haven’t doubled in size yet, allow to sit at room temperature until they do.
- The rolls are best served the day they’re baked.
- Store leftover Garlic, Herb, and Cheese Bread Rolls in an airtight container for up to 3 days.
- Reheat the rolls briefly in the oven or toaster oven at 300°F until warmed through to refresh before serving.

More Recipes You’ll Love:
For the rolls:
-
1
cup
warm milk (100 – 110°F)
-
1
tablespoon
olive oil
-
2
whole eggs,
at room temperature
-
2
tablespoons
granulated sugar
-
1 1/2
teaspoons
fine salt
-
1
teaspoon
garlic powder
-
2
garlic cloves,
minced
-
1
tablespoon
fresh rosemary,
minced
-
1
tablespoon
fresh thyme,
minced
-
2 1/4
teaspoons
(1 packet) instant yeast
-
4
cups
(508) all-purpose flour
For the topping:
-
1
large egg
-
1/3
cup
Parmesan cheese,
grated
-
Combine the milk, oil, eggs, sugar, salt, garlic powder, garlic, rosemary, thyme, and yeast in the bowl of a stand mixer. Add 2 cups of the flour and stir with a wooden spoon until the dough forms a rough, shaggy mass.
-
Attach the dough hook to the mixer, turn to medium-low speed, and gradually add the remaining flour, kneading until a mass of dough begins to form. Only add as much flour as needed to bring the dough together. Continue kneading on medium-high speed for 4 to 5 minutes until a soft, smooth ball of dough is formed. The dough should feel elastic and slightly tacky to the touch. Only add additional flour if the dough is unbearably sticky.
-
Lightly spray a large clean bowl with cooking spray and place the dough in the bowl. Cover the bowl lightly with plastic wrap. Let rise for 1 hour at room temperature or until the dough is big, puffy, and about doubled in size.
-
Spray a 13x9-inch baking pan with cooking spray. Gently deflate the dough. Use a bench scraper, knife, or pizza wheel to divide the dough into 15 equal pieces.
-
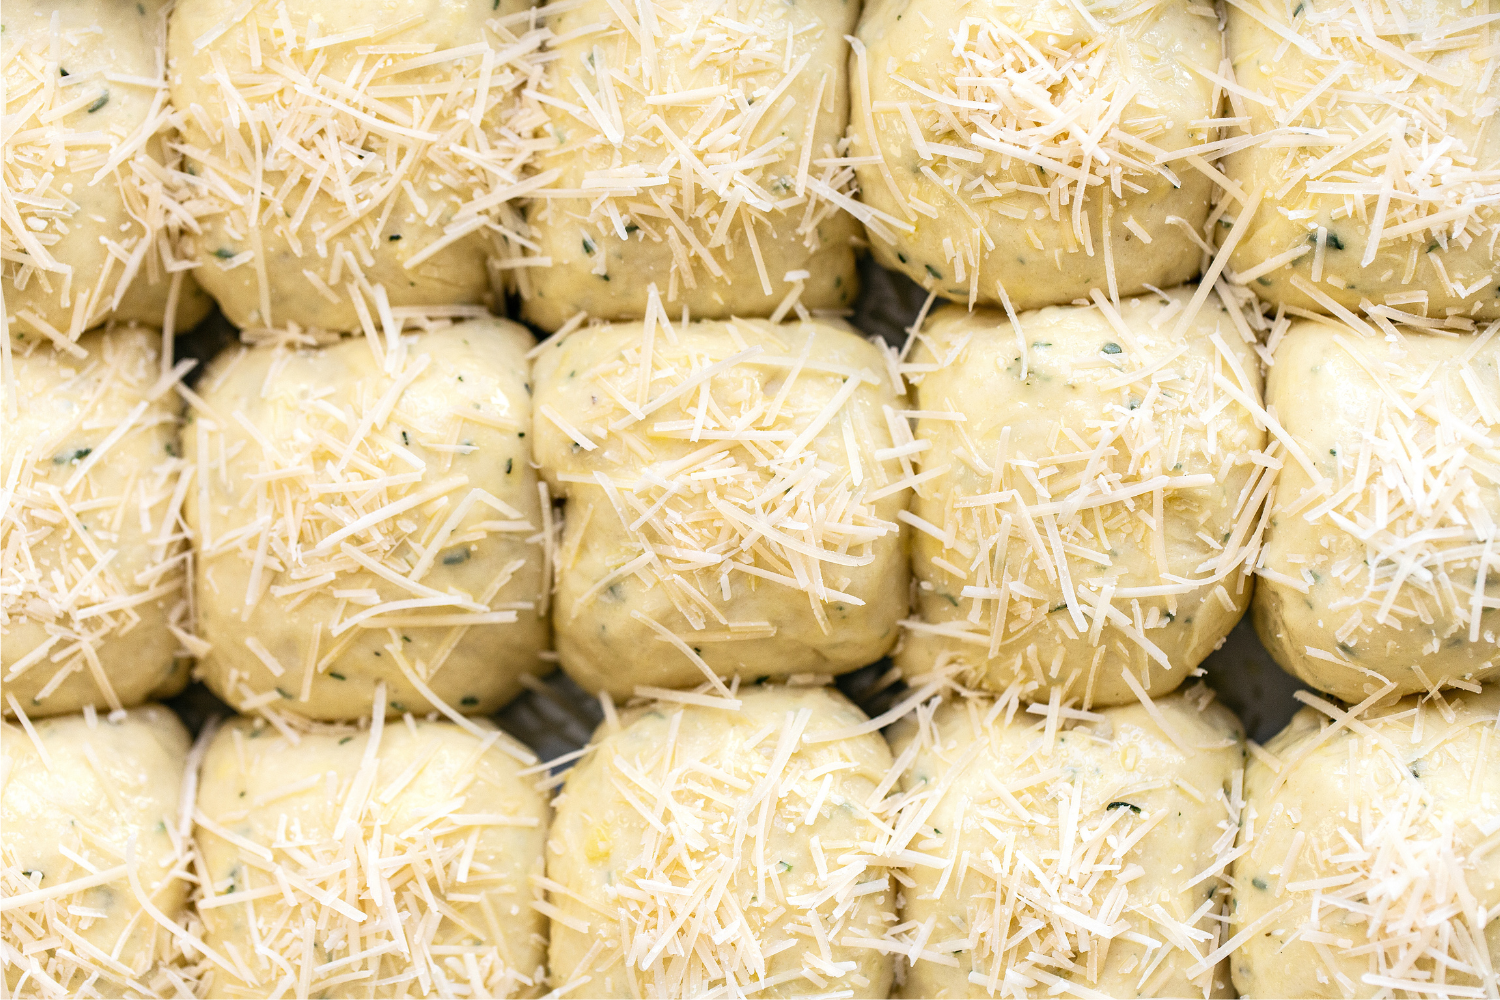
Shape each piece into a tight ball and place in the prepared pan. Lightly cover the dough with plastic wrap and let the rolls rise for 1 hour, or until about doubled in size.
-
Preheat the oven to 375°F.
-
In a small bowl, whisk the egg then gently brush over the risen rolls. Sprinkle the rolls evenly with grated parmesan cheese.
-
Bake the rolls for 20 minutes, or until golden brown. Serve warm. Store leftovers in an airtight container or ziptop bag for up to 3 days.
This post was originally published in 2014 and has been updated with recipe improvements, additional baking tips, and new photos. Photos by Ashley McLaughlin.


Mmmm amazing!
I brushed all the whisked egg over the top which flooded it a bit so put extra cheese on (strong cheddar) and it’s lovely. Also used dried herbs instead of fresh.
So happy you loved these garlic, herb and cheese rolls, Tina!!
Thank you very much, the bread rolls are delicious, great recipe
Can I use bread flour instead of AP?
We haven’t tried that! We always suggest following the recipe as written for best results at least once prior to experimenting so you have something to compare it to. Please let us know how it goes if you give it a try 🙂
These turned out beautiful. They were shiny and perfectly risen. Texture was fluffy with a crisp top.
I thought the sweet dough did not pair well with the garlic and herbs.
I will make this beautiful dough again as a plain roll without the garlic and herbs, and top the egg wash with sea salt. Can’t wait to try it!
Thanks so much for your feedback, Gail!
just made these to use with pulled pork! had a taste test. really yummy! i did add 1 cup of shredded cheddar cheese to the dough!!! yum, yum
thanks for the recipe!
Oooo your dinner sounds fantastic!!
Hello Tessa, I would love to try this recipe but haven’t had success with recipes using Cups and Tbsp/Tsp as measuring equipment differs from country to country. Would you consider using the metric system where all ingredients are listed in grams, including the Tbsp/Tsp ingredients? I’d be really happy if you would consider it. Thank you very much. I follow you on Instagram too and love browsing all your recipes. Thanks for all your inspiring ideas.
Thanks so much, Mandy Marie! You’ll actually see in the majority of my recipes that I weigh all my dry ingredients, except smaller measurements like teaspoons, because it is such a small measurement that it’s hard to mess up. I also don’t use a scale to measure milk, water, or creams because there’s no air inside those ingredients, so they too are hard to mess up when measuring.
I made these for Easter snd they were FABULOUS! I made them the day before. I followed the recipe till the rolls were formed and in the pan. I put them in the fridge overnight to rise then took them out an hour before baking to warm and baked them! They were perfect and easy! Thanks Tess!!
Hooray! I’m so happy these turned out perfectly for you, Sandy!
Followed your recipe and tips to get beautiful bread rolls that disappeared as soon as they were set on table! Definitely a keeper!
I just made these rolls and my kitchen smells amazing! Inspite of not being hungry I had one, yummm!
Love your recipes, thanks!
It’s hard to resist fresh bread rolls 😉 So glad you enjoyed!
i love to cook i cook lot of thing every day Monday and Tuesday and Wednesday and Thursday and Friday and Saturday and Sunday
angel magiera
These rolls turned out great. Very easy and simple recipe. However, I skipped the garlic cloves since it already had garlic powder and reduced the amount of herbs because I didn’t want it too overpowering. I just wish it was more cheesy. Next time I’ll try mixing in the cheese instead of just sprinkling it on the top.
Beautiful and fluffy. Easy to make
Too much info just give me the recipe. Gosh
You know Bob Ross, you can hit the tab at the top, skip the notes and jump right to the recipe if you want, right?? Some like the fact that Tessa gives explanations. Gosh…smh!!
I have read recipe several times and am confused about the 2 portions of Parmesan cheese listed in recipe and when they are added, I can only see right before baking? Also in beginning part of post it says to brush with olive oil and sprinkle with Parmesan and in recipe it says to brush with egg and then sprinkle Parmesan. I could be overlooking it but if you can could you clarify thanks!!
Made these yesterday. They were very tasty and went well with the lasagna that was served. First time I have ever made dinner rolls, very pleased with the results. The guests complemented these dinner rolls. The house was a little cool so it took longer than the recommended time for the rolls to double in size. Definitely worth the wait.
How much water? What do you do with the other 1 Tblsp of oil? I made then and they were good but all the ingredients might make them even better.
hi! I want to make this buns because they look amazing really. But I just want to ask there is water in the directions but I cannot find it in the ingredientsn so I don’t know how much water do I really need to put. And next is there is parmessan in the ingredients of buns but you never put it in the buns? Your reply would be much appreciated coz I want to do this amazing looking buns now for my husband! thank you!
It looks really delicious thanks for the recipe and tips.
https://mutilateadoll2unblocked.us
Your recipe looks really good and I want to try making it. I am a beginner in bread making. As I am reading the recipe, I noticed that you had mentioned combining water, milk, 1 tablespoon of oil etc. However, your ingredient list did not mention the amount of water to be used. Also, in the ingredient list, there is 2 tablespoon of oil but your directions only mentioned using 1 tablespoon of oil. Your clarification is greatly appreciated. Thank you.
Can you make this in the bread machine?
Can this be made with wheat flour?
The beginning of the directions say “water” but water is not in the ingredients list. How much water should I put in the bowl? Thank You!
I please answer where does the water go and how much.thanks
Thanks Tess – just came across this page and made a 1/2 batch to go with our dinner tonight. Easy to make and yummy to eat. Will definitely be trying more of your recipes.
Hi, I found your site recently and tried&bought your cookie book. These look amazing and can’t wait to try. I searched through your recipes looking to see if you had one that incororates herbes, veggies and cheese in a bread. When we lived in Seattle years ago there was a bread we bought that had these items in them. I can’t find a receipe or it anywhere. Could you please come up with one or if anyone knows where one is point me in that direction. Love your videos, recipes and am gong to be making my way through them. I think I will be taking your cooking class soon also! : ) Thank you for the receipts.
Thank you so much for such a delicious and easy recipe. The texture was so soft and fluffy!
Thank you for sharing such a delicious yet fuss free recipe. My family loves it. The dough is perfect! So soft and fluffy even on the 3rd day, especially after warming them up in the oven. The only tweek was I added filling.I pan fried some grated garlic n mixed them with soften butter, spreaded a dollop on each after the 1st proof plus adding some ham inside each of them. Its yummmy! Best part about this bread is that it doesn’t have the smell of yeast like some homemade bread recipes. Definitely a keeper!! Thank u!! 🙂
lovely will try to make it later…thank you
Could I use a bundt tin when the rolls have proved? I would like to make shaped rolls to pull apart.
Higher-protein bread flour helps all loaves—from soft white sandwich bread to whole-grain loaves—rise their highest. You will notice that bread flour has a finer texture. I use it when I make rolls. Eggs and milk in bread recipes offers a more protein enriched bread and heavier. French and Italian breads do not use eggs and milk and you will notice they are lighter in texture.
Just made these and it is so fluffy and and delicious! Thank you for the recipe!
How much water did you use, because there is none listed in the ingredients?
Thanks very much.
Oh, my goodness!!
What is bread flour ?
Thanks for allowing me to join….
I’m new to your blog and happy to have found this recipe. I’ve been looking for a recipe to re-create a childhood memory: garlic rolls served at a local pizzeria. Most recipes I read today have butter and herbs poured on top after it’s baked so this recipe looks like what I need to create my “memory.” Question: does this roll taste like sourdough bread? I hope so ‘cuz that’s what I want…sourdough rolls with garlic. Keeping my fingers crossed!
I tried these the night before our family Christmas–almost didn’t want to leave any for the the next day! I used ~ 1 tsp dried rosemary and thyme and they still tasted great. Thanks for the help with the finishing touches for our holiday meal 🙂
These sound amazing!
One question, would you be able to freeze/refrigerate these before baking them?
I want to try doing these for rolls with Christmas dinner but with everything else there is to do, it’d be a lot easier if I could premake them!
Sure, I would refrigerate or freeze the just-shaped rolls. Bring them to room temperature before baking and allow them to get a little puffy. Merry Christmas!
what can you use instead of milk?
Boy, these rolls look yummy! I have got to try them. My husband loves garlic so it will be a nice surprise for him.
I’ve always steered clear of doughs, aside from quick-breads. But lately I’ve been attempting my own pizza dough and it hasn’t been too bad, so maybe this is next.
It is lunchtime here in Portugal, so opening this post right now was simply a killer… So gorgeous and promising!
I love garlic + rosemary together, especially infused in fluffy rolls. Tessa, these look amazing! I’ve gotta try.
I want these for breakfast, lunch and dinner! So gorgeous!
Hey, Tessa – these look pretty darn good. I may need to give these a try this week next time I make rolls.
A question and a couple of notes…
Question – how big are your rolls? These look like ~2 oz each or just a tad under. Getting each roll the same size is important for a consistent, even bake.
Notes…
1. You CAN get fabulous bread & rolls using SOME whole grain flours without a lot of adjustments to the formula. i.e. you can sub up to 25% whole wheat or (better still) white whole wheat flour for some of the bread flour. You might need to add another teaspoon or two of water, but otherwise, the bread should work just fine. I tend to use white whole wheat on these kinds of rolls as they have less ‘edge’ than regular whole wheat and they don’t change the look of the roll.
Once you’ve made these a couple of times with just bread flour, you can try them again with 25% whole wheat (white or red). Add just enough water to get about the same feel to the dough. Note that whole wheat will soak up a bit more water as the dough develops, so starting out just a little wetter should give you the right dough feel by the time you’re shaping the rolls.
For those not familiar with it, white whole wheat, it isn’t a ‘marketing gimmick’ or anything crazy – it is an albino strain of wheat that is ground up just like regular (red) whole wheat. Turns out the grain compounds that produce the red color also produce that harsh ‘edge’ sometimes associated with whole wheat breads.
2. When giving bread formulas, please consider giving the weights for the ingredients. You’ve done that for the flour, which is among the most important ingredient to weigh – the other is the salt – but really everything should be weighed.
As you know, successful baking is first about finding the proper balance between ingredients and then using good technique (mixing, resting, shaping, baking, etc) to end up with great bread. However, once you’ve ‘gotten it right’, the second trick is being able to make the recipe again & again. Nothing is more frustrating for a new baker that making truly great bread once and then not being able to get the same great results again.
The key to consistent results is weighing the ingredients so you have both the proper amounts and the correct proportions between ingredients. For finely ground ingredients such as flour, ‘scooping’ is about the worst possible way to measure.
I recently did some testing on scooping vs. weighing. The results were shocking. In the most extreme case, I found ‘scooping’ put 25% more flour in the bowl than weighing. In practical terms, that is like measuring out 4 cups of flour but ending up with 5 cups. That’s huge. A difference that large throws off the entire recipe and puts everything out of whack. This is, in my experience, the reason most new bakers fail. It makes baking look like a random, hit or miss process when, in fact, it is the exact opposite.
As it turns out, salt is another big issue with baking. The density of the crystal structure between different types and brands of salt is quite significant. This is especially true with kosher salt and flake salt. As a result, a ‘teaspoon’ of salt can have wildly different amounts of actual salt in the spoon. Weighing out the salt eliminates this issue as well.
The good news is that digital kitchen scales are widely available and very inexpensive. These days, they pretty much all will give you readings in pounds & ounces, ounces or grams, which is all you really need in a home kitchen scale.
I made the switch 2 years ago to weighing all my ingredients and it made a HUGE difference in both the quality and consistency of my baking. I consider my scale to be my most valuable baking tool (even more important than a good stand mixer).
As always, thanks for yet another great post. I love your writing/posting style – very clear, approachable and inspiring.
Garlic and cheese? Sounds amazing, I’ve got to try these.
I’ve actually never made bread before – it’s intimidating! But with garlic and cheese…I feel like these are a must try! Gotta face the fear someday! Pinned