This post may contain affiliate links. Read our disclosure policy.
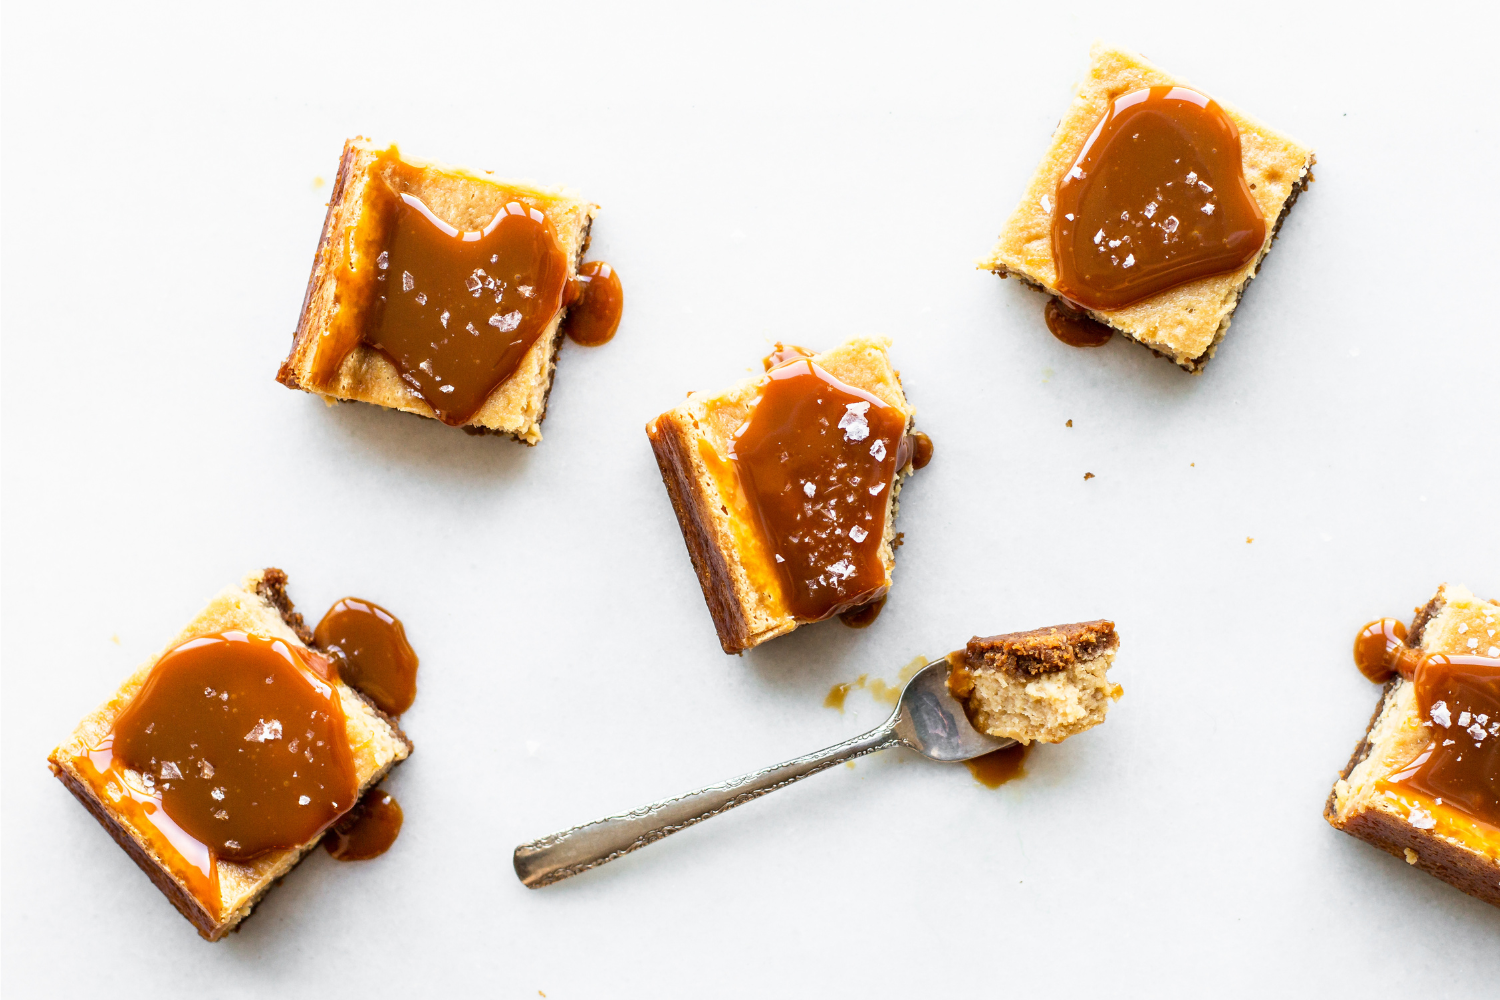
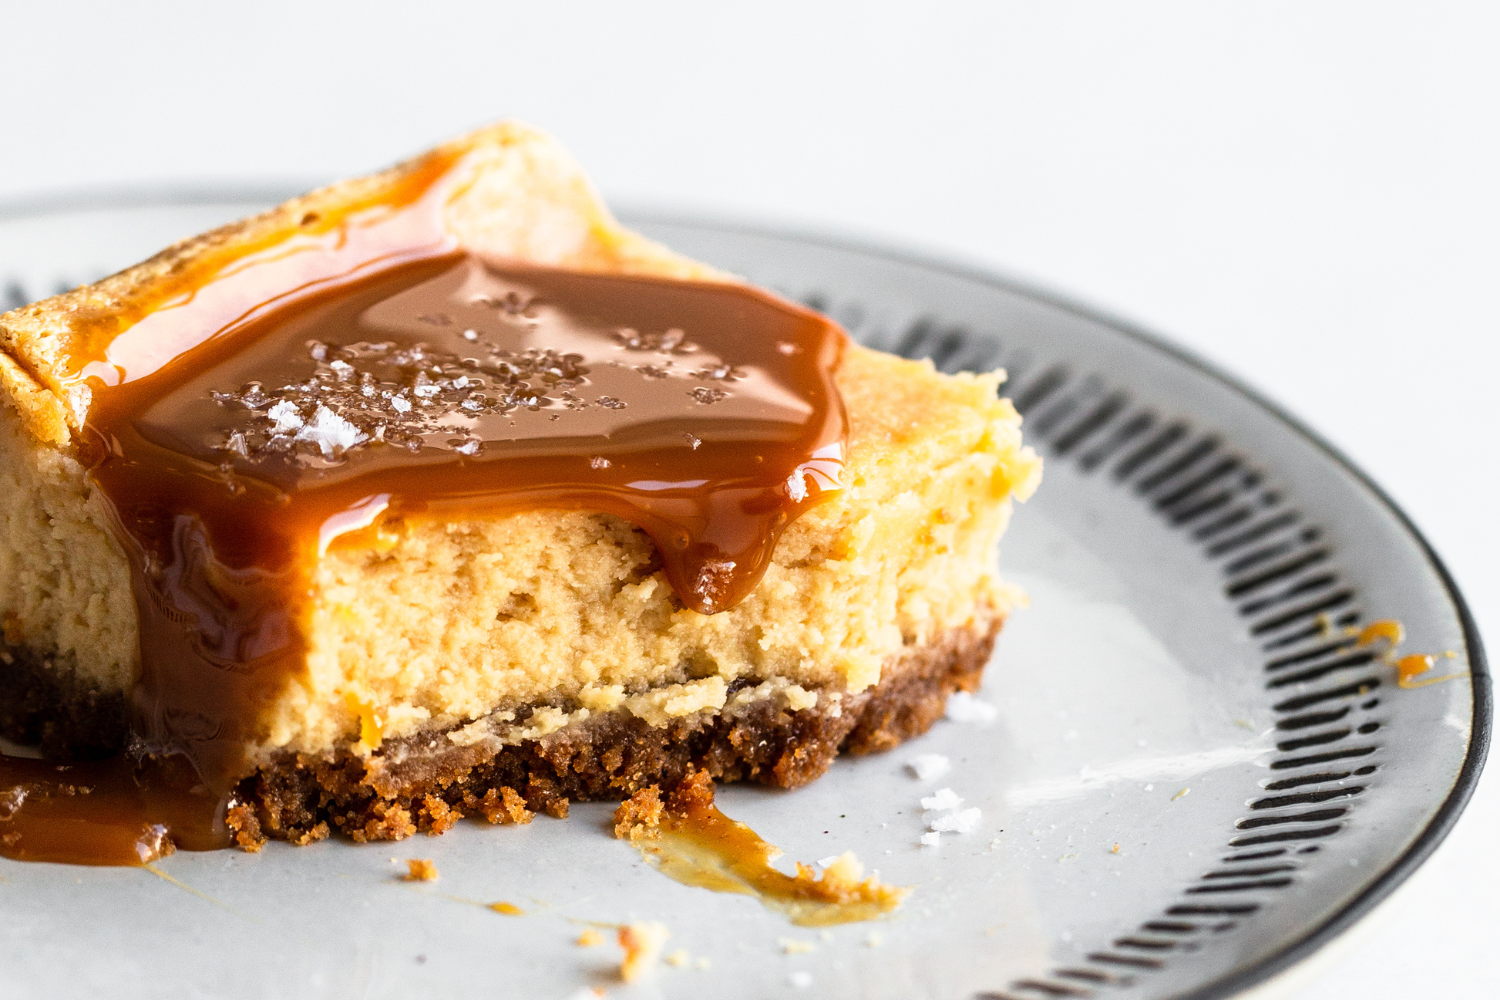
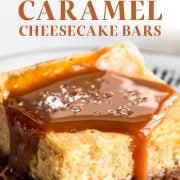
These Salted Caramel Cheesecake Bars are utterly drool-worthy!
As much as I love cheesecake, it can be kind of a pain to make – especially if there’s a water bath involved. Sometimes it’s a wild hunt for a pan big enough to create a water bath.
Then there’s the long baking time and even longer chilling period. It’s definitely not a recipe to make when you want an instant sweet craving satisfied.
That’s why I’m so in love with cheesecake bars.
They’re SO much easier. No water bath. Short baking time and shorter chilling time. So much easier to transport and serve.
And when you add salted caramel to the mix? Well, basically this is the perfect crowd-pleasing recipe.
I hope you’ll give these Salted Caramel Cheesecake Bars a try- maybe even as a pie alternative for Thanksgiving!
How to Make Salted Caramel Cheesecake Bars
How to Make Rich & Creamy Lump-Free Cheesecake
- Make sure all of your cream cheese is completely at room temperature. If it’s a cold day, then the cream cheese will need to sit on the counter for several hours or you may need to nuke it in the microwave until it’s completely soft.
- To ensure there are no lumps, be sure to scrape down your mixing bowl thoroughly after adding every ingredient – even if you have a beater attachment that scrapes as it goes. Scrape down the sides and especially the bottom of the bowl. Use a spatula with a pointed angle to get every little nook and cranny.
- If lumpy cheesecake is a common issue for you, try running your mixing bowl under warm water, then dry thoroughly, before mixing your cheesecake batter.
- Use high-quality bricks of full-fat cream cheese for cheesecake (not the tubs of cream cheese meant for smearing on bagels).
How to Avoid Overbaking Cheesecake
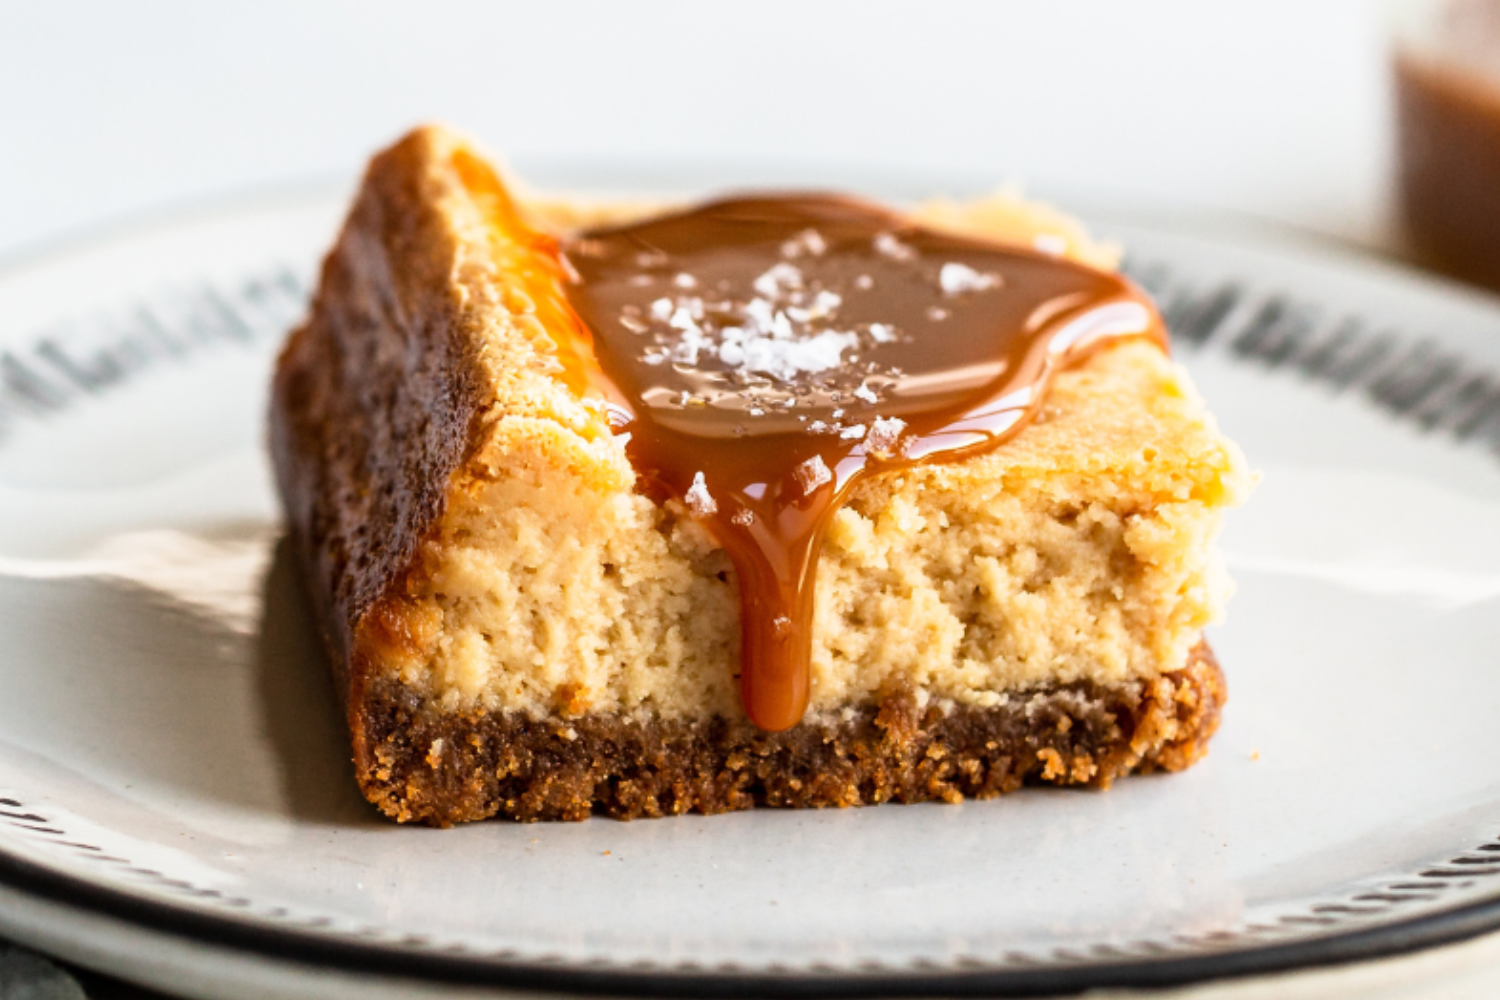
You’re looking for the edges of the cheesecake to be just slightly golden and for the top of the cheesecake to look dry. However, the key is for the center to remain slightly jiggly.
In this recipe, you’ll see that after the cheesecake has baked we turn off the oven but allow the the cheesecake to remain inside with the oven door just cracked open for 30 minutes. You can stick a wooden spoon in to keep the door open just a little. This not only helps to finish off the cheesecake baking without overcooking, but the gentle cool down also helps to prevent cracks.
However, if cracks form in this recipe, it’s no biggie. Caramel makes the best crack concealer!
Do I Have to Use Homemade Caramel?
No! Even though I love my easy caramel sauce recipe, you could easily use store-bought instead. Trader Joe’s is my favorite brand.
Use a Metal Baking Pan for Cheesecake Bars
Can I Double This Salted Caramel Cheesecake Bars Recipe?
Yes! Simply double all of the ingredients and bake in a 9 by 13-inch baking pan, checking for doneness at 45 minutes.
Graham Cracker Crust Variations
This Salted Caramel Cheesecake Bars recipe calls for an easy graham cracker crust with a little added cinnamon, which I think compliments the caramel beautifully. If you don’t prefer graham crackers, or can’t find any, you can use the same amount by weight of digestive biscuits, vanilla wafers, Biscoff cookies, or any crunchy cookie you’d like! Please note that Biscoff cookies are a little richer than graham crackers (which are drier), so add just enough butter until it holds together when pressed.
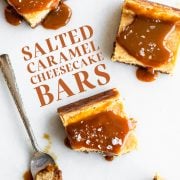
How to Perfectly Slice Cheesecake Bars
- Make sure your caramel cheesecake bars are completely chilled and then slice with a large, sharp knife.
- Avoid dragging the knife through the bars when slicing, as this is when things get messy!
- Run your knife under hot water and carefully wipe clean in between every slice.
- Add your salted caramel sauce to each slice after slicing, for the best presentation.
How to Store Caramel Cheesecake Bars
Store Salted Caramel Cheesecake Bars in an airtight container in the fridge for up to 3 days.
Can I Freeze Salted Caramel Cheesecake Bars?
Yes! The untopped bars can also be frozen for up to 1 month. Top with the caramel then allow to thaw in the fridge overnight.
More Cheesecake Recipes:
For the crust:
-
9
(135 grams) graham crackers
-
1/4
teaspoon
ground cinnamon
-
6
tablespoons
(85 grams) unsalted butter,
melted
For the filling:
-
16
ounces
(454 grams) cream cheese,
completely softened to room temperature
-
3/4
cup
(150 grams) granulated sugar
-
1/2
cup
caramel sauce,
homemade or store bought
-
1/4
cup
(57 grams) sour cream or plain yogurt,
at room temperature
-
3
large eggs,
at room temperature
-
2
teaspoons
vanilla extract
-
1/4
teaspoon
fine sea salt
For the topping:
-
1/3
cup
caramel sauce,
homemade or store bought
-
Flaky sea salt,
for sprinkling
Make the crust:
-
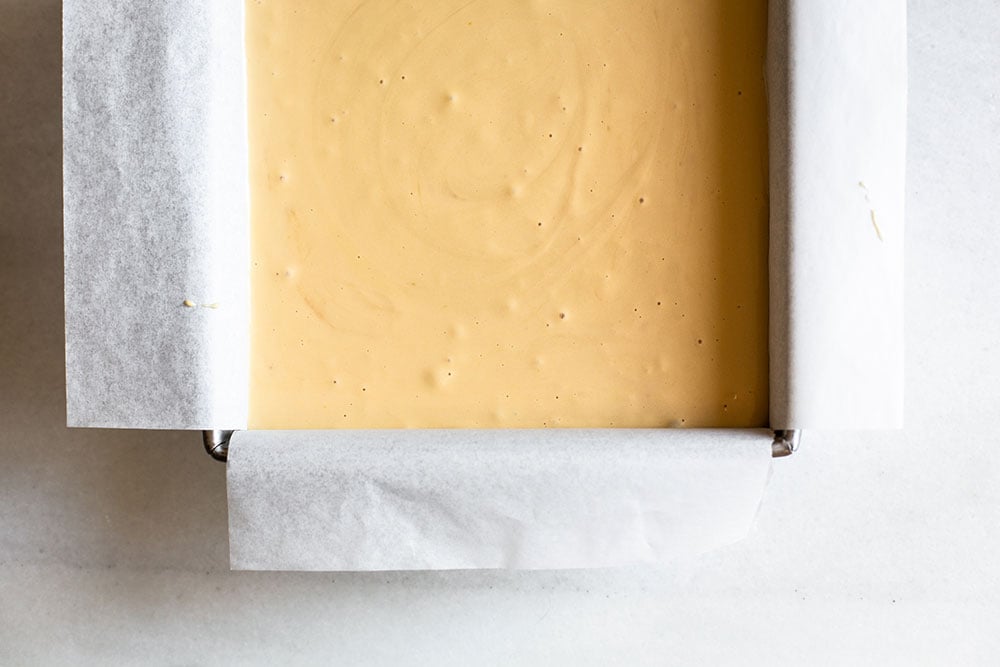
Preheat the oven to 350°F. Line an 8 by 8-inch metal baking pan with parchment, leaving an overhang.
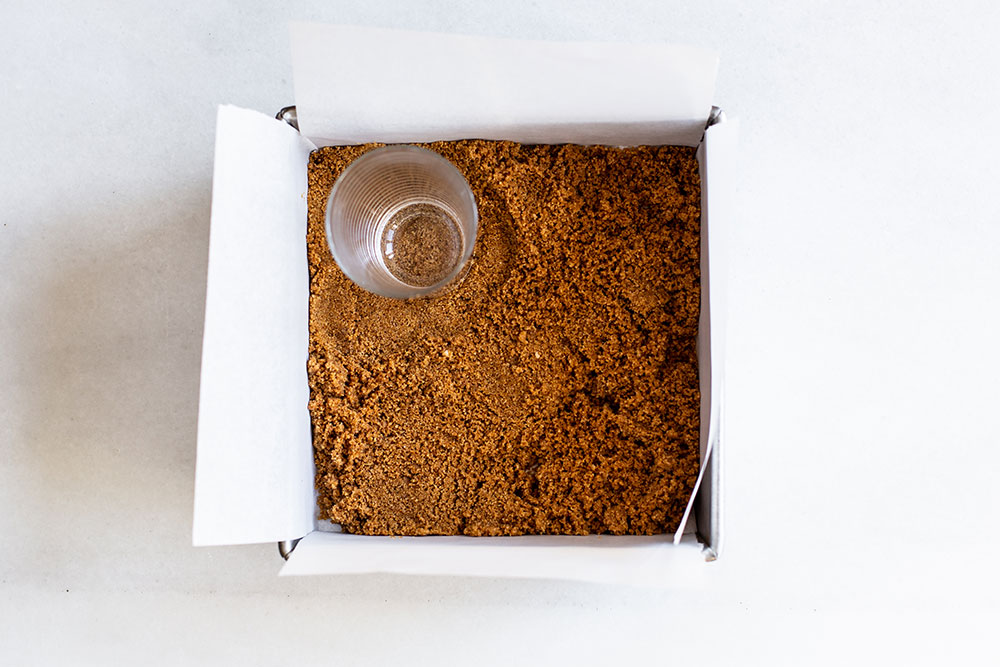
-
In a food processor, pulse the crackers until finely ground. Add the butter and pulse until moistened. Press the crumb mixture into the bottom of the prepared pan using the bottom of a measuring cup or glass. Bake until fragrant, about 10 minutes. Place on a cooling rack to cool completely. Reduce oven temperature to 325°F.
Make the filling:
-
In a large bowl, use an electric mixer to beat the cream cheese, sugar, and caramel until smooth and creamy, scraping down the sides and bottom of the bowl regularly. Add the sour cream, then the eggs one at a time, blending after each addition. Add in vanilla and salt and blend until just combined. Don’t over-mix.
-
Spread batter evenly over cooled crust. Bake at 325°F until just set in center and edges are puffed and slightly cracked, about 40 to 45 minutes. Turn off the heat and crack the oven door and allow the cheesecake to cool in the oven for 30 minutes. Transfer to rack to let cool completely.
Make the topping:
-
In microwave-safe bowl, heat caramel in 10-second intervals until melted. Spread evenly over cooled cheesecake. Refrigerate until chilled, about 4 hours or overnight.
-
The cheesecake can be made and refrigerated 2 days ahead of time. Sprinkle bars with flaky sea salt before serving, if desired.
This recipe was originally published in 2020 and updated with recipe tips and information. Photos by Ashley McLaughlin.


Excellent recipe! I can’t wait to try. I’m going To put my own twist on it! I will let you know how it turns out.
Thank you,
Cristi
Love this recipe and have made it a few times the past couple of years. It is always a hit. I’m wondering if I made mini cheesecakes or cheesecakes in muffin tins, how long would I bake them for?
So happy to hear how much you love this recipe, Shaelynn! We haven’t tried this recipe in miniature size, but you’re welcome to compare the instructions from other mini cheesecake recipes, like our Mini Turtle Cheesecakes, and go from there to experiment. Good luck!
Do you have any tips for cutting into the squares? Do you add the topping before or after you cut into squares?
Hi Julie! Make sure your cheesecake bars are very, very cold (even pop them into the freezer for 10-15 minutes or so), and then slice with a large, sharp knife. We recommend running the knife under hot water for a few moments, to heat it up, then carefully wiping the knife dry, before cutting. Repeating this step in between each slice will give you crisp, clean slices. Avoid dragging the knife through the bars when slicing, as this is when things get messy! Add your toppings to each slice after cutting, as you serve, for best results 🙂
This was very straightforward to make and was so delicious. I thought the caramel taste was strong enough that I didn’t use any as a topping, just whipped cream. It held up great and surprisingly looked a lot like the picture. I was pretty nervous since the center didn’t seem like it was going to ever set but it all worked out in the end. Great recipe!
Yay! So happy to hear that these cheesecake bars were delicious, Tori!
made this a few times now (plus the salted caramel sauce). delish!
Delicious! I love all things cheesecake and this salted caramel variety did not disappoint! I will admit, mine did not come out nearly as pretty as the pictures here, but it tasted AMAZING.
These are so good and so easy! They even turned out when my father-in-law turned off the oven halfway through!
Hello Tessa.
I love the idea of no water bath for this cheesecake bars!!! 🙂 May I ask you, what would you recommend to use instead of caramel please?
Lenka
I honestly don’t recommend anything but caramel to be used for these Salted Caramel Cheesecake Bars. Anything else, and you’re making an entirely different cheesecake! 🙂
Can I make these in a cupcake or muffin tin? I want to give them as a gift for a wedding and want it to be easy for everyone to just grab one and eat.
I haven’t tried that personally, but other reviewers have had success. You would just need to alter the baking time. Good luck!
Is the gram measurement on the sugar accurate (3/4 cup at 250g)?
Nope! It should be 150g! Thank you for bringing that to my attention, it has been corrected!
Hello Tessa,
thanks for the free ultimate guide on cheesecake
I have a query though,
how come the side part of my cheesecake look rough instead of having a smooth surface?
These bars are just divine. I was using up some leftover salted caramel so I only had enough for the filling and just a light drizzle on top after baking, but there’s enough caramel flavour in the bars themselves that they could totally hold their own with no topping. So, so good.
This was one of my first times making cheesecake so I was a bit nervous about when to turn off the oven and crack the door. Mine needed the full 45 minutes of baking to match the description given in the recipe. Once they’d finished cooling, the middle was a pale, even yellow whereas the edges were a speckly white, so I was a bit worried I had done something wrong… but then after chilling them in fridge overnight, the appearance and texture was absolutely perfect!
For the crust, I only had pre-ground crumbs on hand. So I (perhaps naively?) assumed the weight measurement would be the same for both. It turned out that with only 135g of crumbs it was super wet and nowhere near enough to fit into an 8 inch pan, so I kept adding more and more until it reached a consistency I was familiar with for a graham crust. Sadly I forgot to measure how much extra I added, but if you’re working with crumbs from a bag, just be aware that you might need more than 135g!
Anyway, in short: these bars are AMAZING and I will definitely be making them again and again. Thank you Tessa!!
Do you have nutritional information for these?
the first cheesecake I have ever made and the best cheesecake I have ever eaten. I love this recipe so much.