This post may contain affiliate links. Read our disclosure policy.
It wouldn’t be Thanksgiving without apple pie, right?
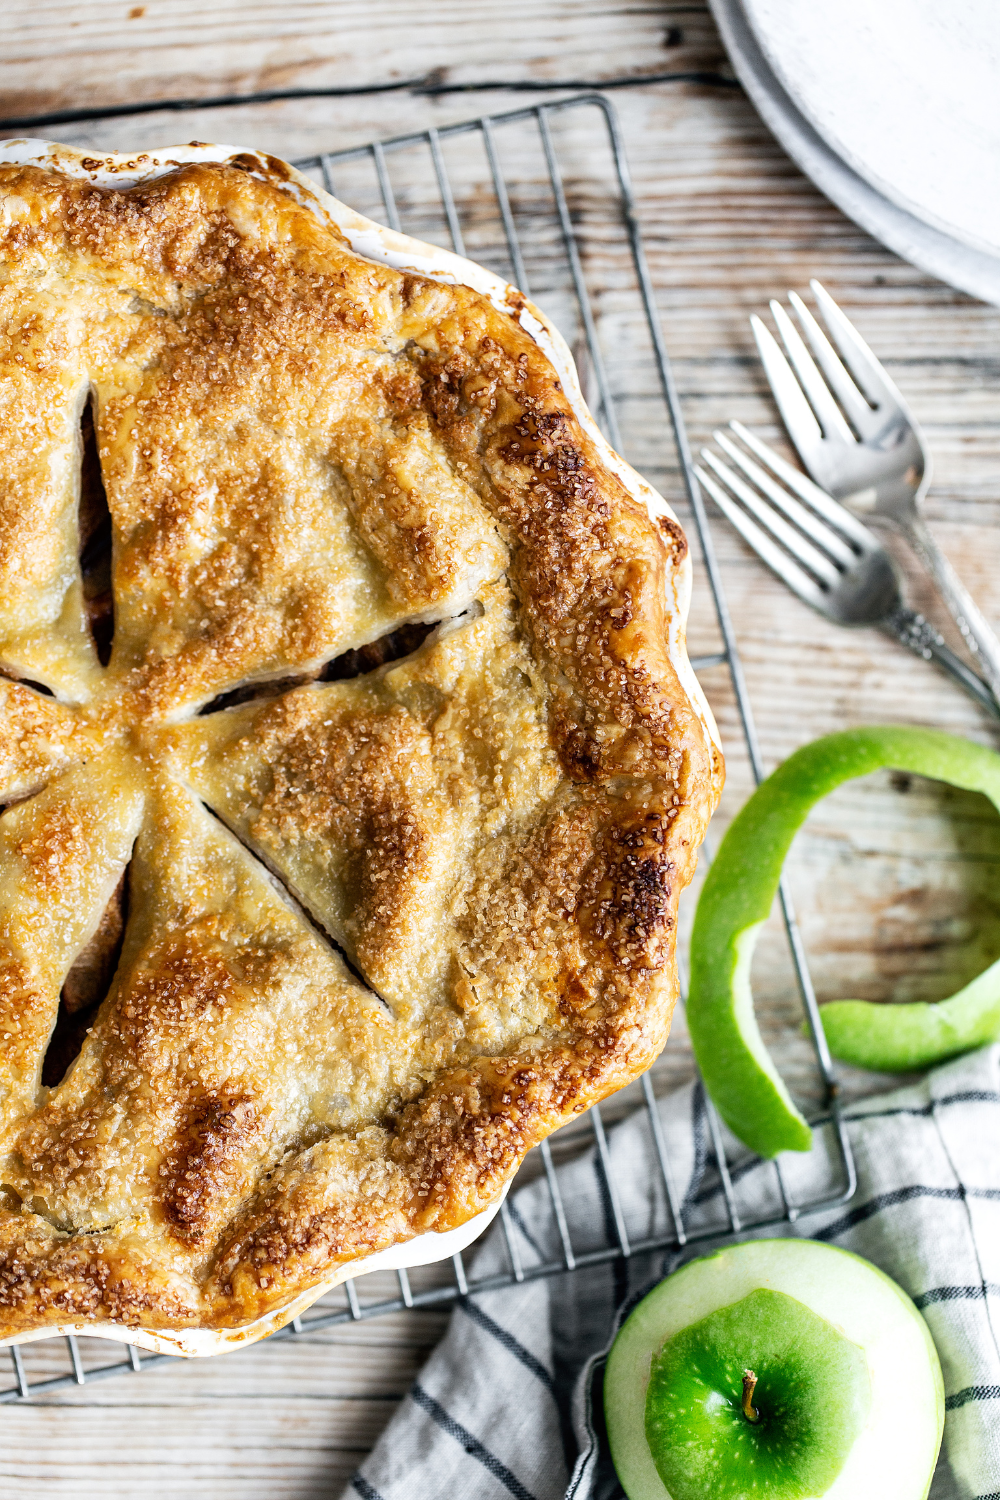
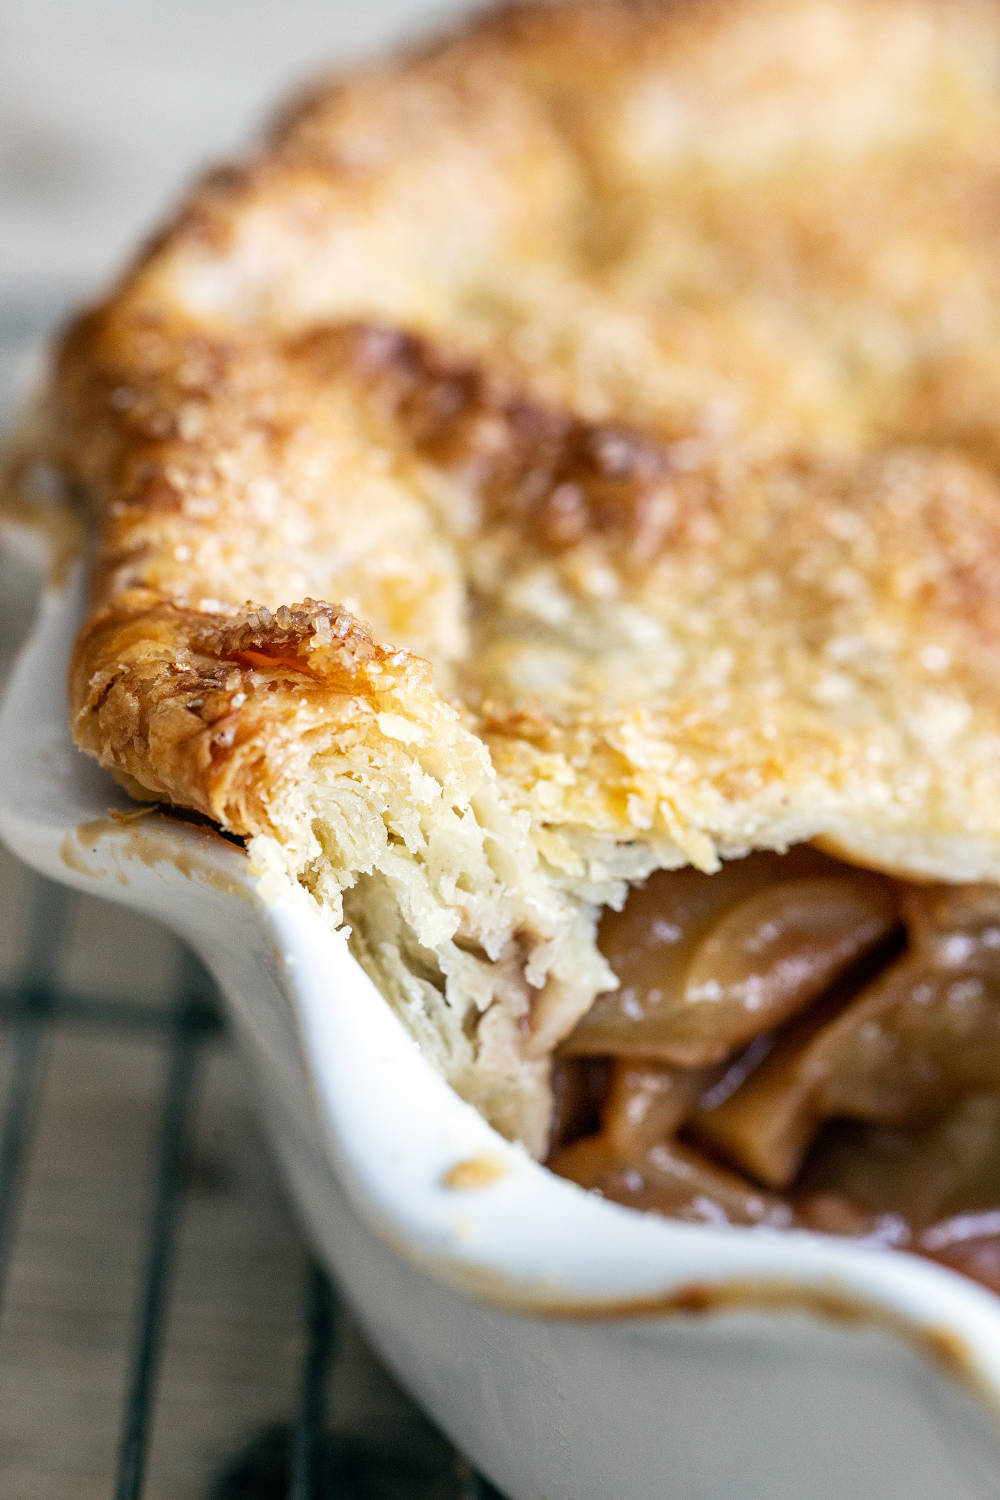
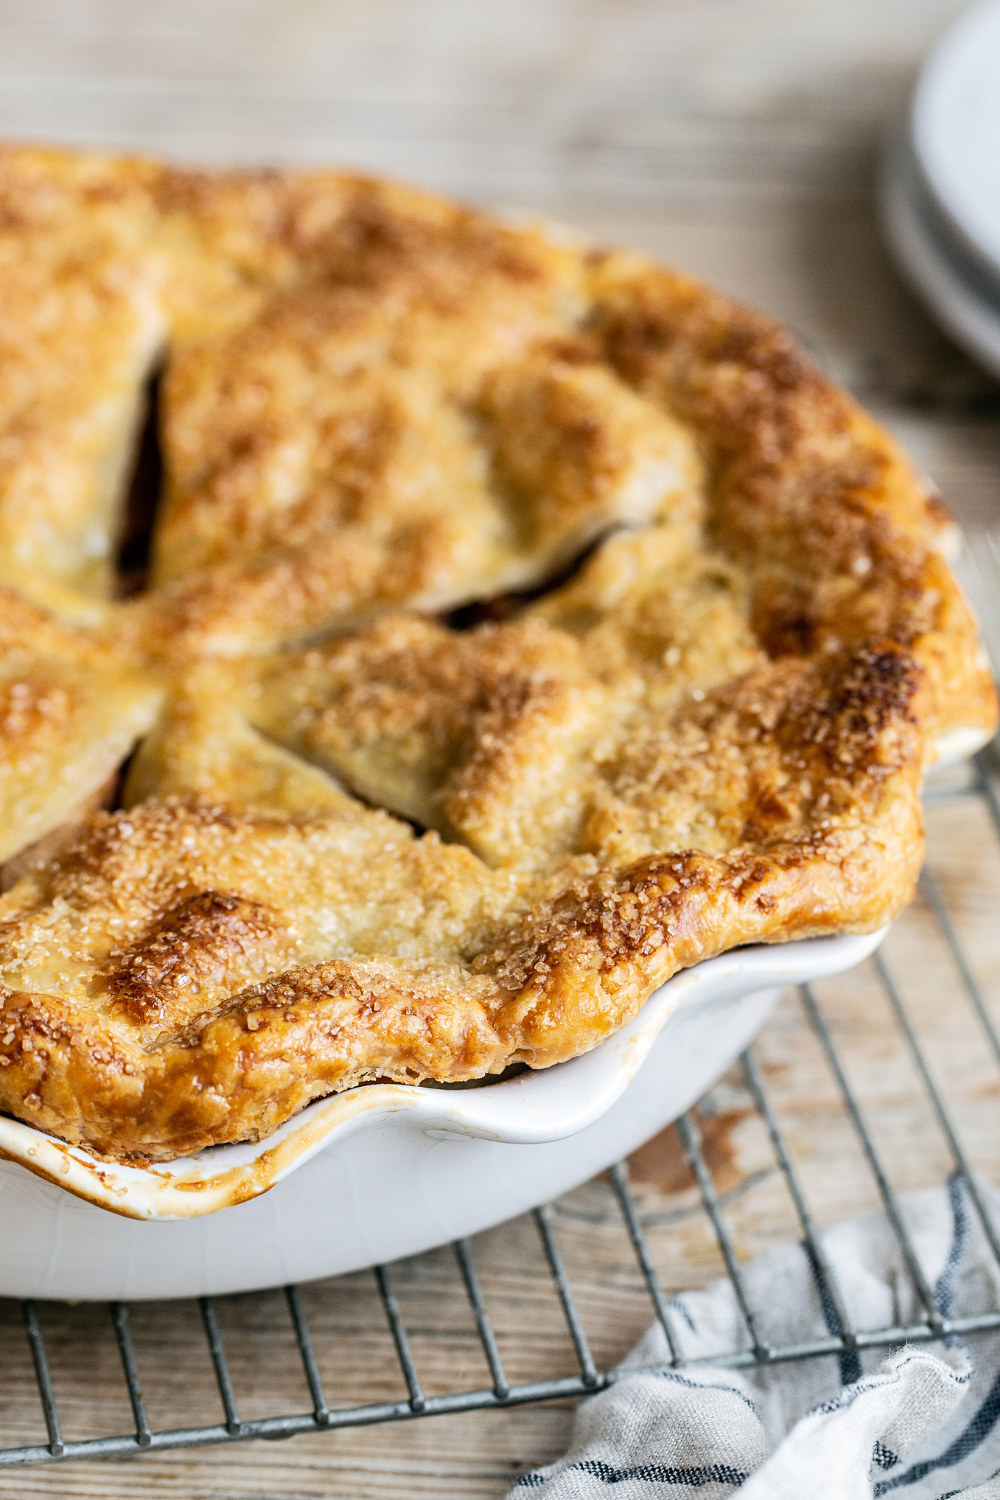
My classic apple pie has a tender, gooey, warm, spicy, tart, and sweet fresh apple filling, wrapped in a beautiful buttery and flaky homemade crust.
This is a traditional double-crust apple pie. I’ve listed a bunch of pie baking tips in the pink box below to guarantee your pie is a total success.
Although apple pie is pretty straightforward, it’s easy for things to come out not quite right. So whether your crust sometimes gets soggy, the filling is too sweet or kind of bland, or it becomes mushy – whatever your issue, I have you covered!
How to Make Perfect Apple Pie
Apple Pie Crust
- For this recipe, you’ll need a double batch of pie crust. You can use my Best Ever Pie Crust, or whichever crust recipe you know and love.
- When making pie I typically will prepare the dough in advance to save time. You can refrigerate your two disks of dough for up to 3 days before assembling the pie.
- I have a ton of pie tips in my recipe post, and you can also download my free Pie Crust Troubleshooting Guide.
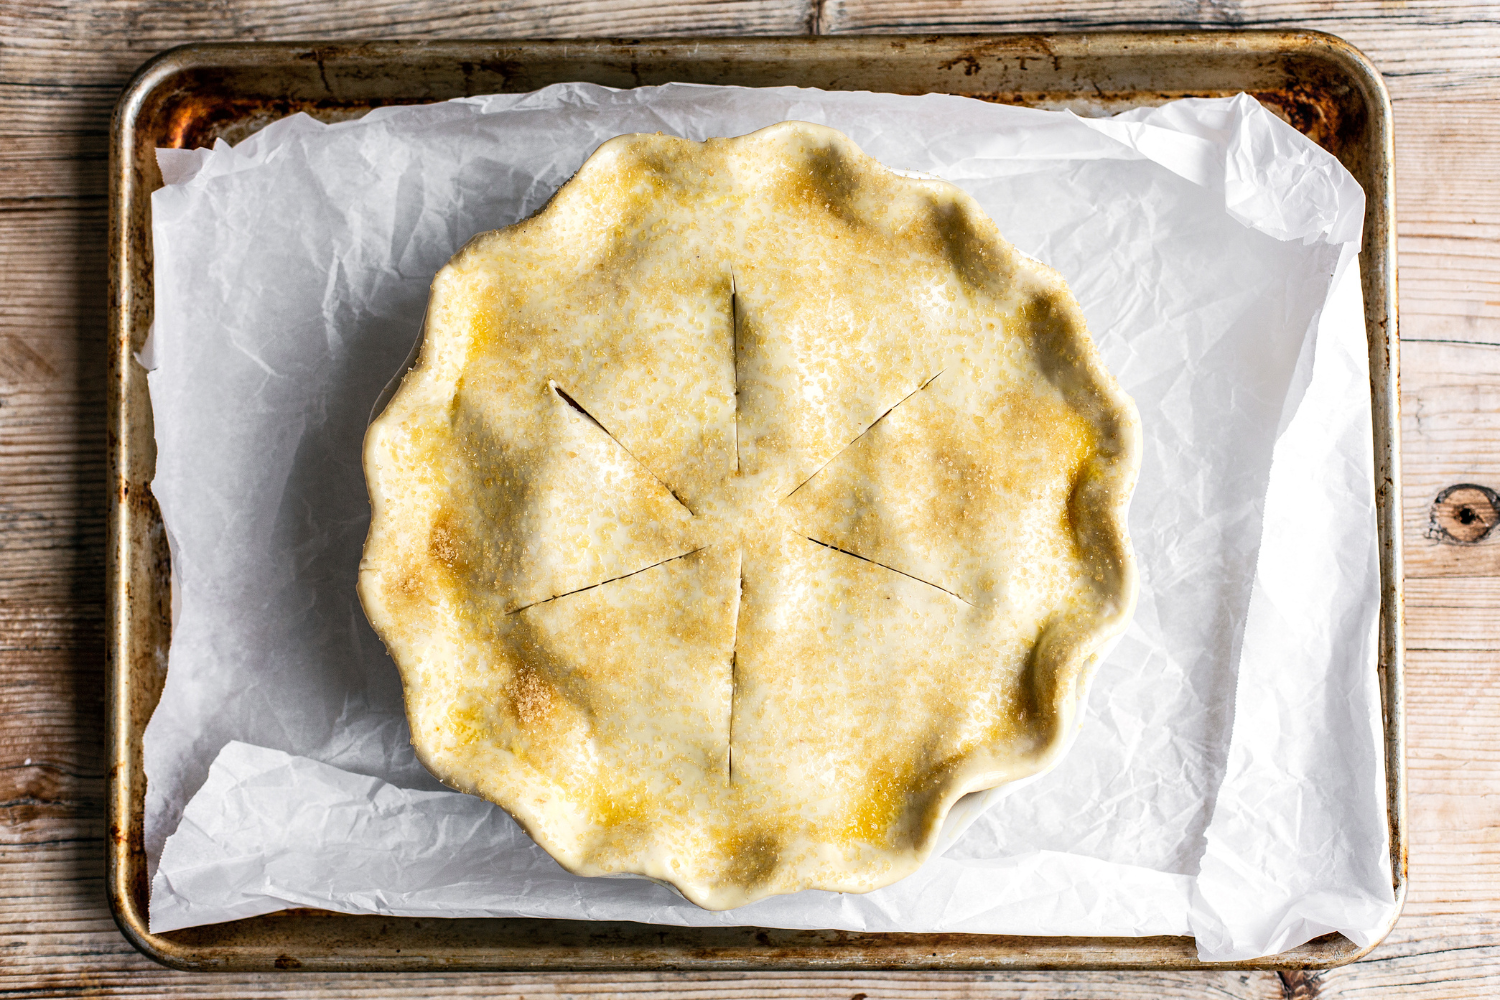
- Tip: Don’t forget to cut vents in your pie crust before baking to allow steam to escape! This will prevent mini pie filling explosions or the crust from ballooning up. Be sure to cut the vents after brushing on the egg wash.
Can I Use a Lattice Pie Crust Instead?
Sure! Lattice pies are handy for moisture-rich fillings like this apple one. There’s a lot of water content that turns into steam and will need to evaporate as it bakes. Lattice, by design, allows that steam to readily escape. I have an entire article that includes step-by-step photos and a video on How to Make a Lattice Pie Crust.
How to Prevent a Soggy Pie Crust
There’s nothing worse than soggy bottoms in apple pie! It’s all too easy for this to happen since the filling has so much moisture. Here are two tips:
- Bake your pie 30 minutes after filling and assembling. In the below recipe, you’ll see after you fill and assemble the pie, you refrigerate it for 30 minutes to relax the gluten. This prevents the crust from shrinking and ensures the butter is nice and cold for a flaky texture. If you keep it in the fridge for longer, the moisture from the filling will start to seep into the crust and create a soggy bottom.
- If soggy bottoms are a common problem, bake your pie on the lower rack of your oven. Even better, bake it on a rimmed sheet pan (to prevent spillage) on top of a baking stone, to ensure the bottom of your pie is well-browned.
What Type of Apples Should I Use for Apple Pie?
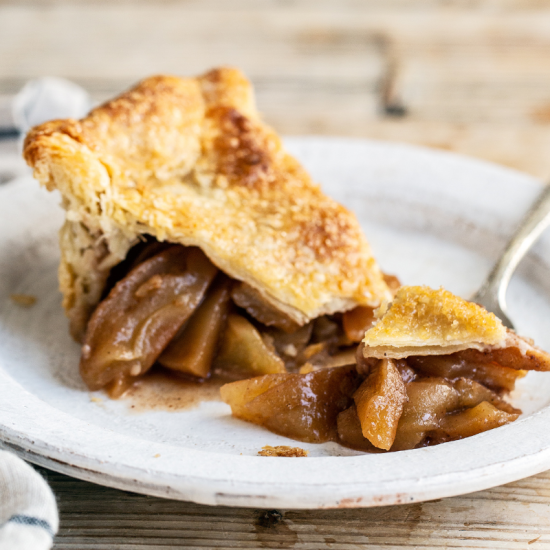
I love Granny Smith apples in this recipe because they won’t get mushy or mealy during baking and their tartness cuts the sugar in the filling perfectly. You can also use Braeburn, Pink Lady, McIntosh, Honeycrisp, or any mixture of your favorites.
Do I Need to Peel the Apples for Apple Pie?
I recommend peeling the apples because I don’t prefer the texture of apple skins once baked.
Tips for Apple Pie Filling
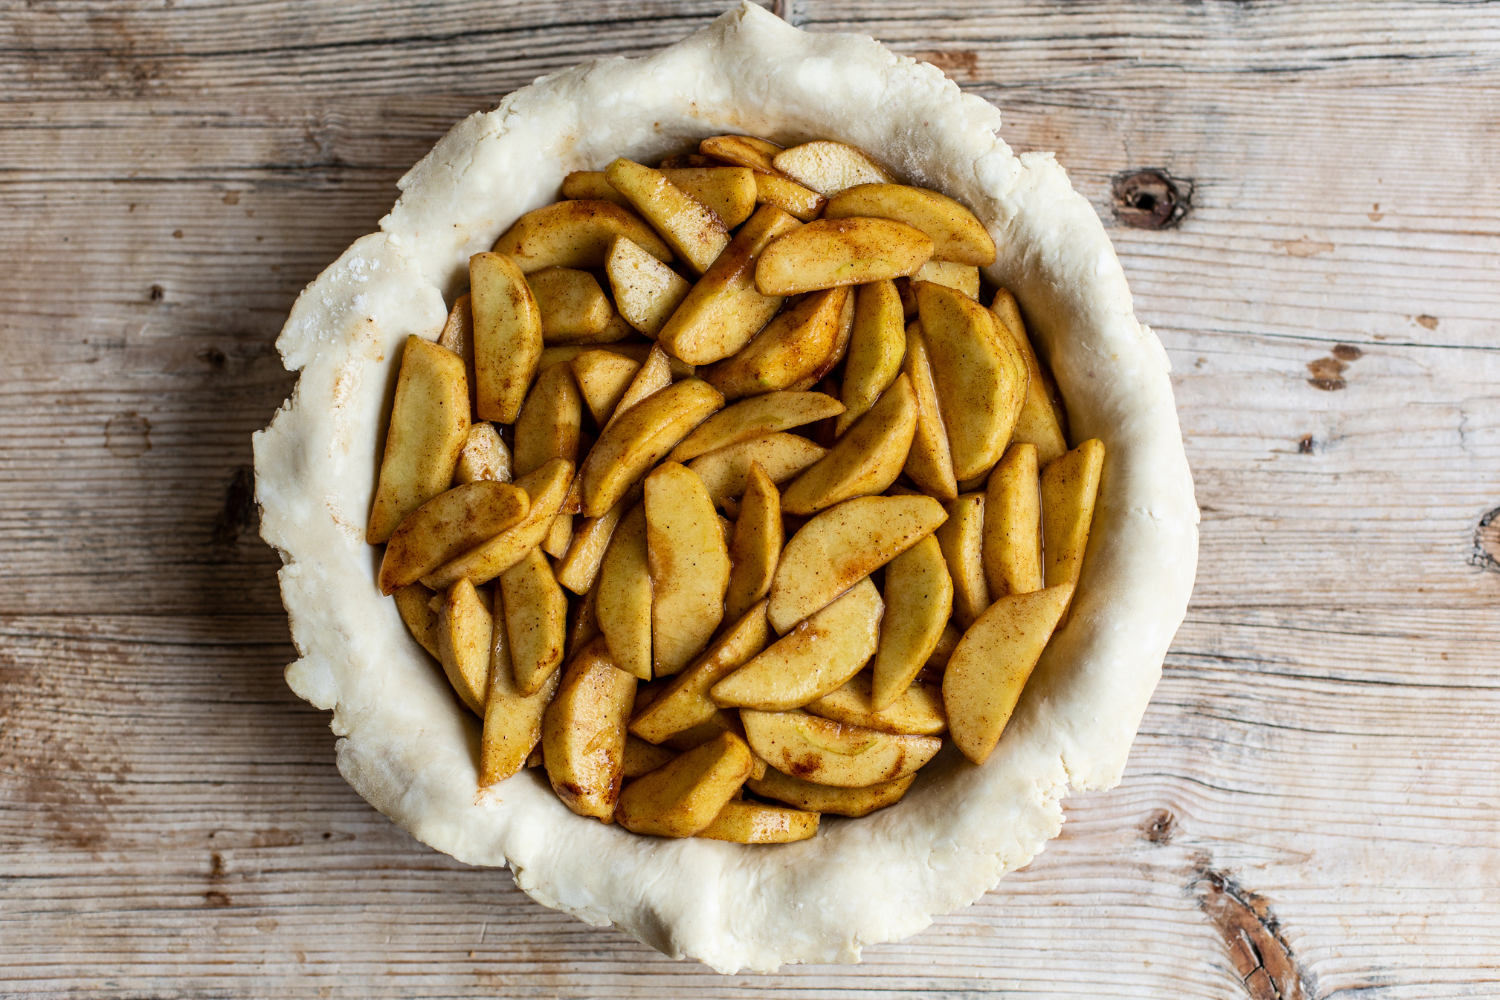
- Peel, core, and slice the apples into 1/4-inch to 1/2-inch slices and place in a large bowl. I usually prefer thicker pieces of apple so they don’t get mushy or mealy, but this does make for a “looser” filling texture, so feel free to slice thinner to your preference.
- However thinly you slice your apples, make sure the slices are consistent, to ensure even baking.
- Toss the apples immediately with the sugars, spices, and salt. If time permits, allow the apples to macerate for 30 minutes or up to 3 hours, tossing occasionally. Macerating the apples will intensify their flavor and prevent the filling from being watery and the crust from getting soggy. However, this step can also be skipped if you don’t have the time.
- This apple pie filling isn’t cooked before baking. I wanted the apples to shine in this recipe and maintain some tartness and texture. The filling is thickened with just a tablespoon of cornstarch. This prevents the filling from turning syrupy and mushy. However, if you prefer a thick filling, feel free to add another tablespoon of cornstarch.
How to Tell When Apple Pie is Done Baking
Bake until the crust is golden brown and the filling has an internal temperature of 195°F measured with a digital instant-read thermometer. This will take about 1 hour and 15 minutes, but this will depend on your pie pan and oven. Metal pans tend to cook faster than glass or ceramic – learn more about pie pans here.
How to Make Apple Pie Ahead of Time
Homemade pie dough can be formed into disks, wrapped in plastic, and refrigerated for up to 3 days or frozen for up to 2 months. The rolled-out crusts can also be covered and refrigerated overnight. If you need to prep this pie further in advance, see the freezing instructions below.
How to Store Apple Pie
The baked, cooled pie can be wrapped in foil and stored for up to 3 days at room temperature. Reheat in a 350°F for 5 to 10 minutes to refresh if desired.
Can You Freeze Apple Pie?
Yes! Apple pie freezes better unbaked. Assemble the pie fully, double wrap in plastic, and then freeze for up to 1 month. Let the pie partially thaw at room temperature for about 1 hour, then bake as directed by the recipe, adding about 10 minutes to the baking time.
More Pie Recipes:
More Pie Tips:
Filling:
-
3 ½
pounds
(1 ½ kg) apples from about 7 medium apples
(Granny smith)
-
2
tablespoons
fresh lemon juice
-
1/4
cup
(50 grams) granulated sugar
-
1/2
cup
(100 grams) light brown sugar
-
2
teaspoons
ground cinnamon
-
¼
teaspoon
ground nutmeg
-
¼
teaspoon
ginger
-
¼
teaspoon
ground cloves
-
1/8
teaspoon
fine salt
-
1
tablespoon
cornstarch
Egg wash:
-
1
large egg yolk
-
1
tablespoon
heavy cream or whole milk
-
Coarse sugar,
for sprinkling
Prepare the crust:
-
Roll the dough out on a generously floured work surface. Keep turning the dough after every roll to ensure it doesn’t stick to the counter and is of even thickness. Use your hands to cup the edges of the dough to keep it smooth and prevent cracks. Add additional flour to the dough, the counter, and your rolling pin as needed. Roll one piece of dough into about a 14-inch circle, depending on how deep your pie tin is. Roll the other piece of dough into a slightly smaller circle for the top crust. Cover the top crust dough with plastic wrap and return to the fridge.
-
Gently roll one sheet of dough up and around the rolling pin then unroll and drape over a 9-inch pie tin. Gently press into the pie tin. Do not stretch the dough. Place the pie crust-lined tin, covered, back in the fridge. Refrigerate at least 2 hours, or overnight.
Make the filling:
-
Peel, core, and slice the apples into ¼-inch to ½-inch slices and place in a large bowl. Toss with the lemon juice, sugars, spices, and salt. If time permits, allow the apples to macerate for 30 minutes or up to 3 hours, tossing occasionally.
-
Just before assembling, stir in the cornstarch. Don’t forget!
Assemble the pie:
-
Pour the apple mixture into the pie shell, flattening and adjusting to make it fit evenly. Brush the edges of the chilled pie shell lightly with water.
-
Drape the remaining sheet of dough over the filling. If the sheet is too cold, allow it to warm up slightly to become more pliable so you don’t break or puncture it. Pinch and seal both crusts together, then use scissors or a knife to trim the excess dough, leaving a 3/4-inch overhang, before tucking the edges under itself for a clean finish.
-
Wrap the dough in plastic and refrigerate for 30 minutes, no longer than 1 hour.
-
Meanwhile, preheat the oven to 400°F.
-
In a small bowl, whisk together the egg yolk and cream. Remove pie from fridge. Brush all over with egg wash. Sprinkle generously with sugar. Cut six vents in the top to allow steam to escape. Bake on a parchment-lined rimmed baking pan until golden brown and with an internal temperature of 195°F, about 1 hour and 15 minutes.
-
Cool at least 1 hour before serving. Store leftovers wrapped in foil for up to 3 days at room temperature. Reheat at 350°F for 5 to 10 minutes, if desired.
How to Make Apple Pie Ahead of Time
Homemade pie dough can be formed into disks, wrapped in plastic, and refrigerated for up to 3 days or frozen for up to 2 months. The rolled-out crusts can also be covered and refrigerated overnight. If you need to make your pie further ahead of time, see the freezing instructions below.
How to Freeze Apple Pie
Assemble the pie fully, double wrap in plastic, and then freeze for up to 1 month. Let the pie partially thaw at room temperature for about 1 hour, then bake as directed by the recipe, adding about 10 minutes to the baking time.
This post was originally published in 2010 and has been updated with recipe improvements, tips, and new photos. Photos by Ashley McLaughlin.


I made this wonderful pie today as well as a recipe of double batch pie crust, and a single pie crust. For the single pie, I baked immediately and it looks wonderful. For the double, I did refrigerate the dough over night, and rolling it out was a dream! It smells amazing! I posted 2 pictures on my Instagram stories, of before and after baking, tagging you. I opted for a lattice top and even braided a few of the strips!! Worked out perfectly, especially with your tutorial on how to make a lattice top. Pictures were all I needed, as they were easy to follow and understand. Thank you so much! Hope you like my pictures. My Instagram is https://www.instagram.com/sadies_bake_shop/.
Hi Paula! We saw your photos on Instagram and your pie looked incredible! So glad it worked SO well for you 🙂
Can I use this recipe but do a streusel topping instead?
Go for it! Please let us know how it goes 🙂
Love this apple pie! I use a family crust recipe but this filling is amazing – it’s the perfect spice mix to really make the apples shine! It also isn’t soupy or runny when you cut it, so it’s very leftovers friendly! I’d love to see Tessa do an ultimate challenge for best apples to use in a pie – Granny Smith is a classic but there are so many options!
So thrilled you enjoyed this pie recipe! Thanks so much for the kind comment 🙂
Am I able to braid the pie crust for this recipe?
That should work!
This recipe was amazing! It tastes just like a store-bought apple pie. I only used four apples since it was what I had on hand and they were enough to just fill my pie. Also, I used a glass pie dish and it did start to burn a little bit after about 50 min so I took it out before the recommended time and it came out great.
I’m not from America, and apple pies aren’t that common hear. When you fold the ‘lid’ of the pie under itself, what are you actaully doing. Are you folding it under the lid itself, or under the whole pie and re-crimping it.
I cannot tell you much I want to ask about substitutions! Ha! Great post yesterday by the way and I totally agree
I’m thinking that the second amount of flour in the pastry ingredients (3 tbsp flour) is for the apple filling. Is that correct?
I’m going to ask Mary’s question again. Your recipes and descriptions are usually so thorough and detailed!
No flour is listed in the ingredients but is included in the description of the filling. Can you tell us how much to add, please!
this looks amazing….can it be make a day or two ahead?
how much flour did you use in the filling?
this makes me think of being a kid when my mom used to make apple pie all the time. i loved it. i never really got into the habit of making it for myself though. that crust looks great.
There's no such thing as too late or too early for an apple pie 🙂 And this looks perfect!
gorgeous. totally worth the time and effort involved. 🙂
wow, difficult? what happened to “easy as pie”? lol
I'm with you… Apple pie is great at any time of the year. Perfect. Your pie looks wonderful.
Now you just KNOW when I saw that recipe title I had to stop and comment.
That recipe and those apples – all fantastic. So good. So delicious.