


Ingredients
For the crust:
- 24 (278 grams) Oreo cookies
- 4 tablespoons (57 grams) unsalted butter, melted
For the filling:
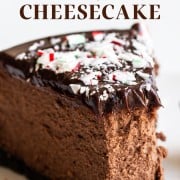
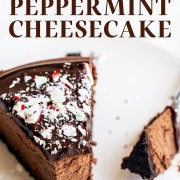
- 8 ounces (227 grams) semisweet chocolate, chopped
- 24 ounces (680 grams) full fat cream cheese, at room temperature
- 1 cup (200 grams) granulated sugar
- 1/2 cup heavy cream, at room temperature
- 1/4 cup (21 grams) unsweetened cocoa powder
- 4 large eggs plus 1 egg yolk, at room temperature
- 1 teaspoon peppermint extract
For the topping:
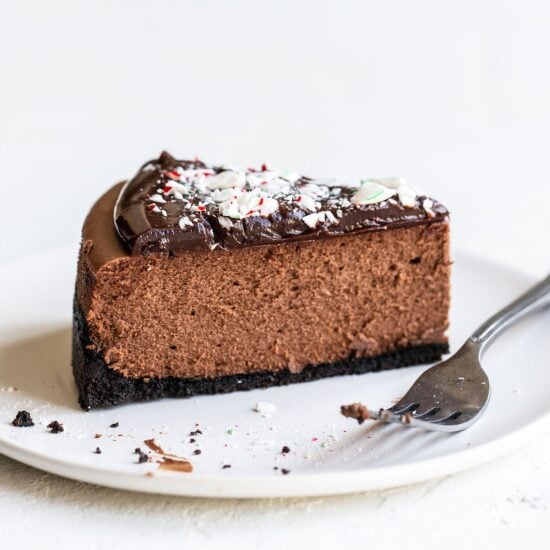
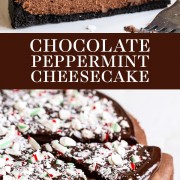
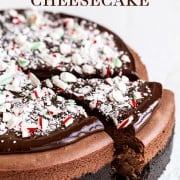
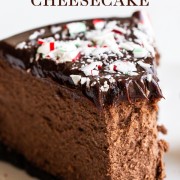
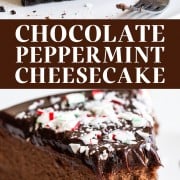
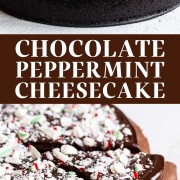
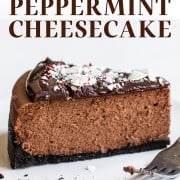
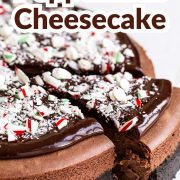
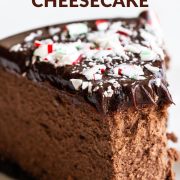
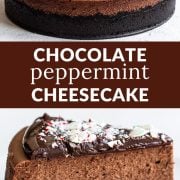
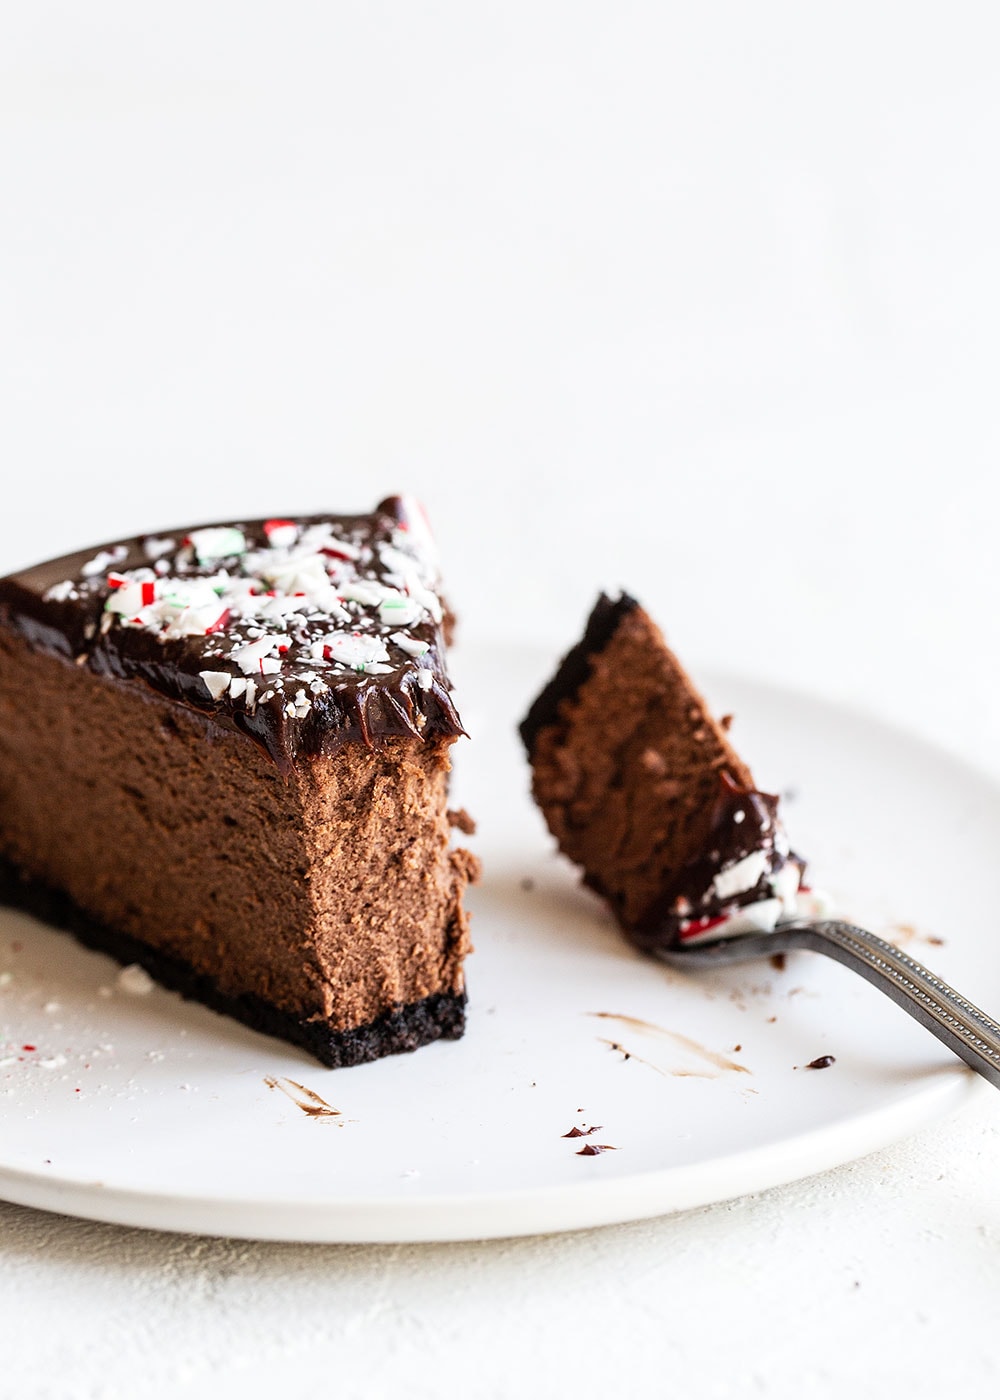
- 1 cup (170 grams) semisweet chocolate chips
- 1/2 cup heavy cream
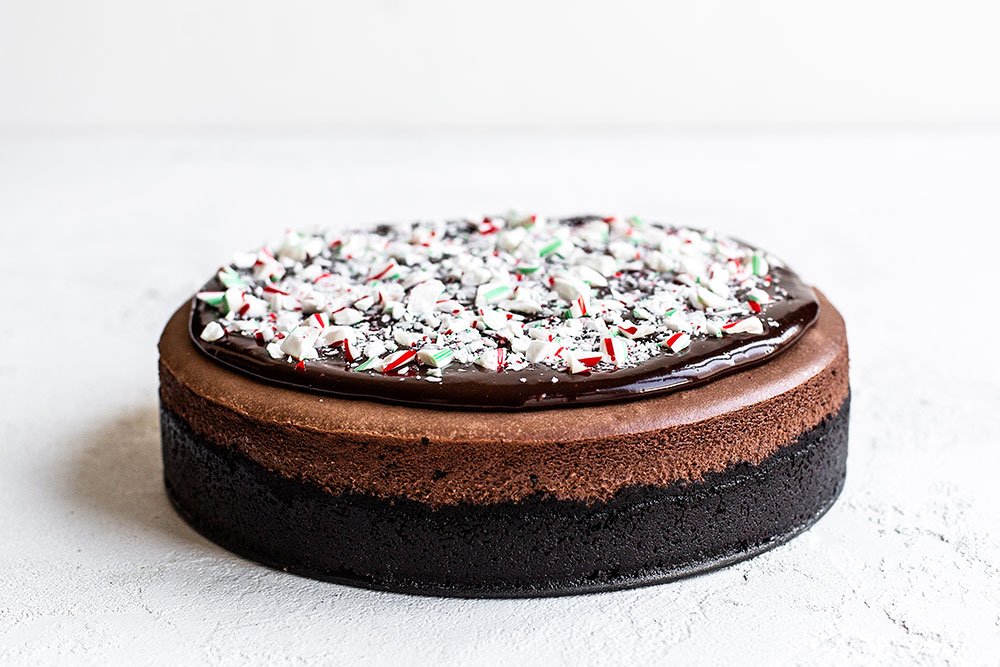
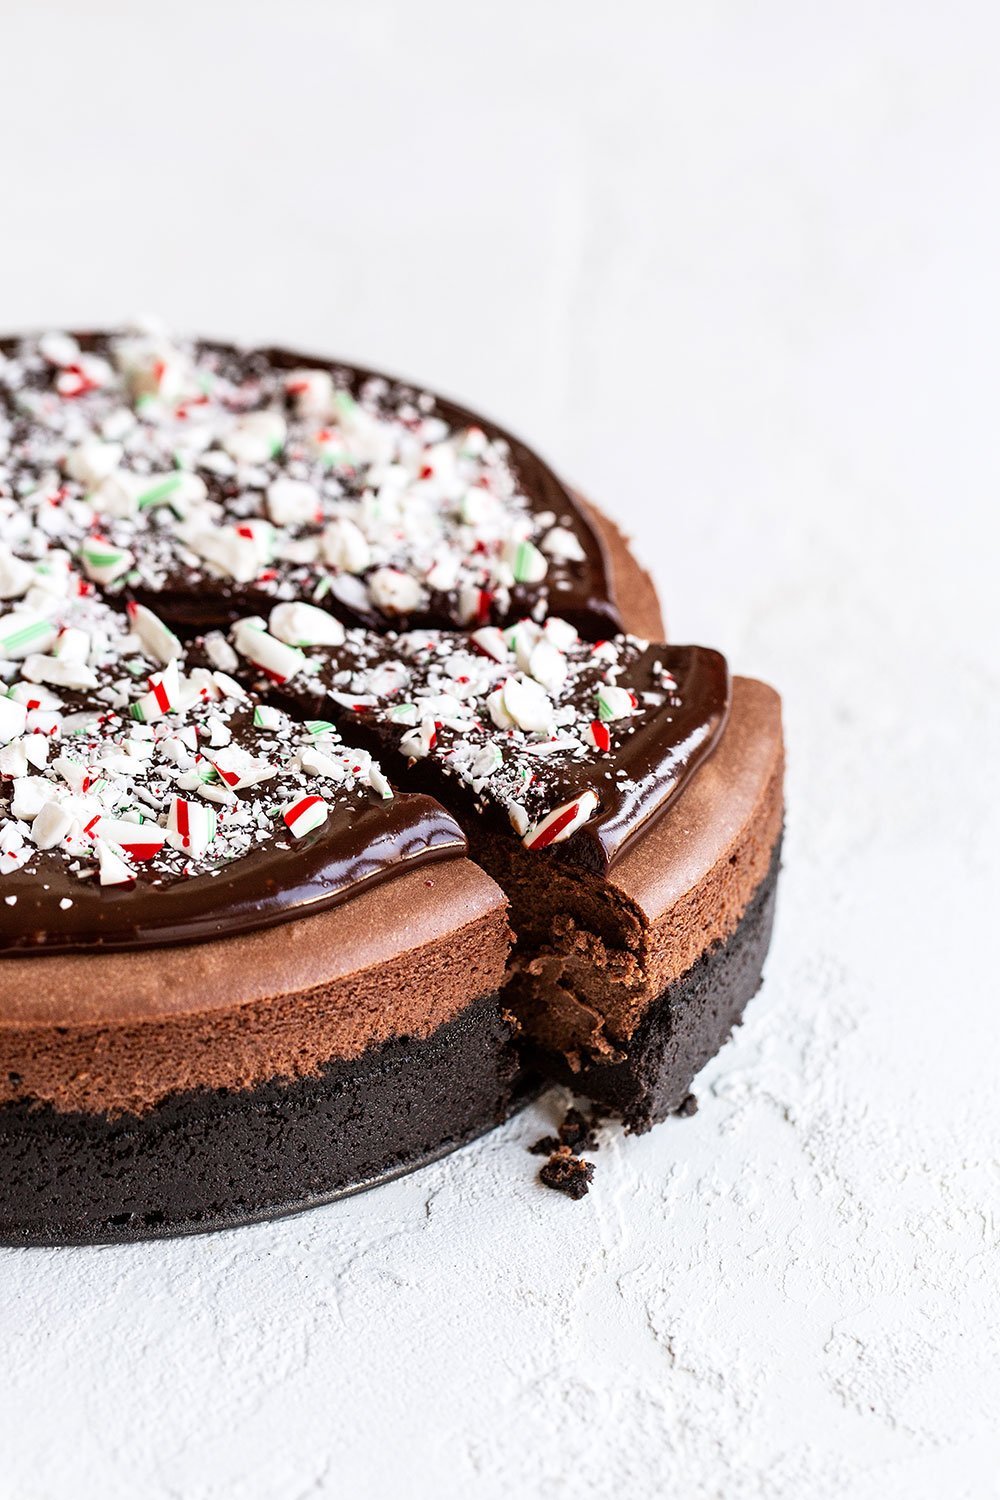
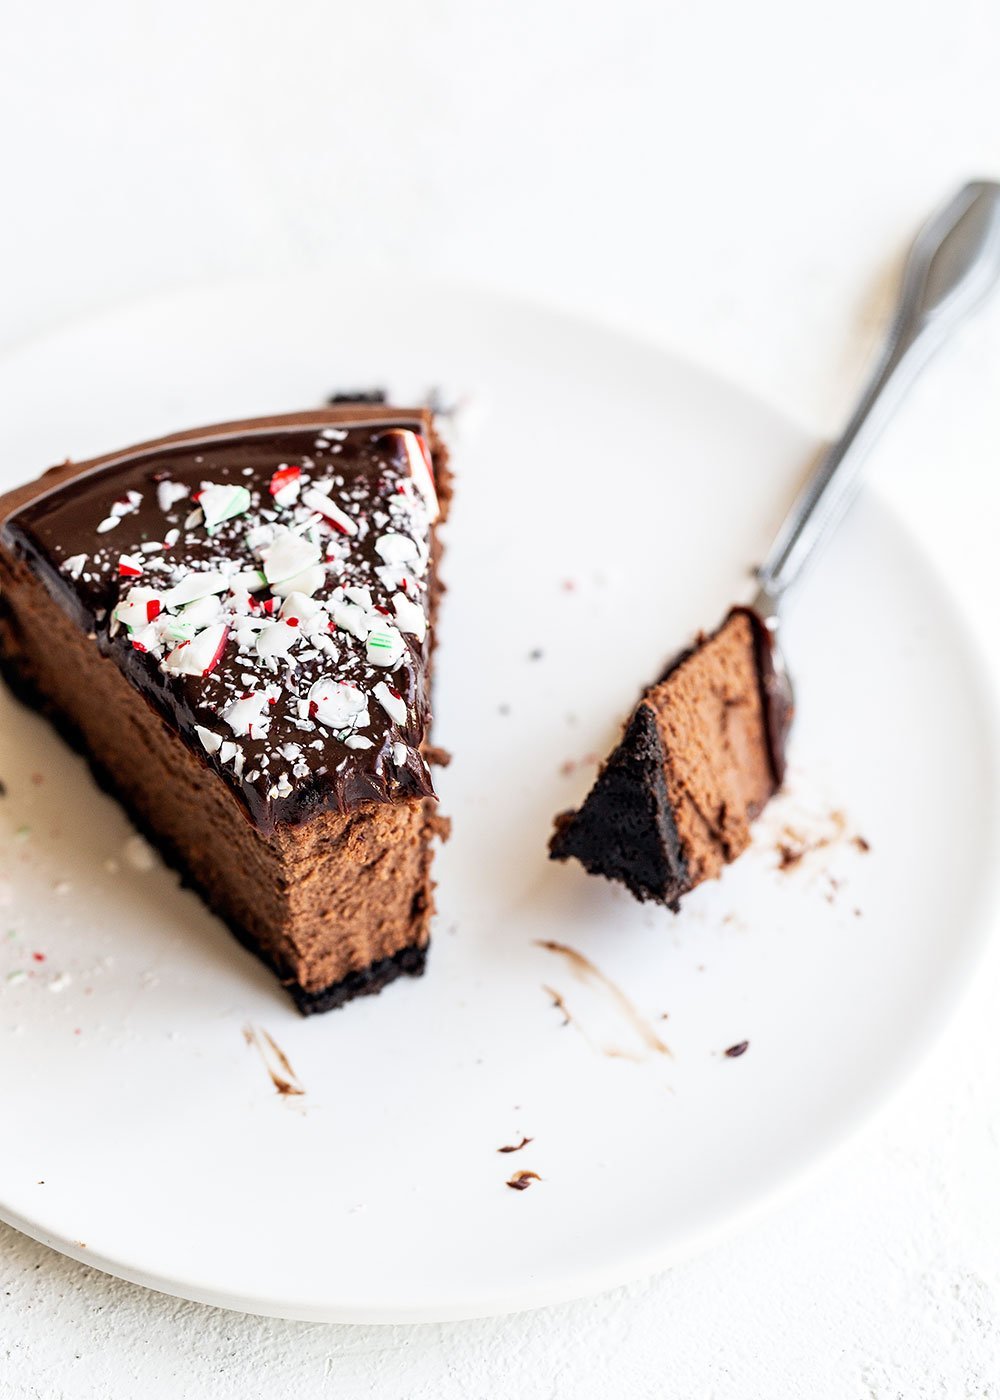
- Crushed candy canes
Directions
-
Preheat the oven to 325°F.
-
Prepare a 9-inch springform pan for a water bath. Place a large square of heavy-duty aluminum foil underneath the pan. Gently fold the edges up and around the pan. Repeat twice so there’s three sheets of foil to ensure a waterproof seal. Gently fold the top of the foil around the edge of the pan. Spray pan with nonstick cooking spray.
Make the crust:
-
In the bowl of a food processor, process the cookies until you have 1 cup finely ground crumbs. Add the butter and pulse until moistened. Press into the bottom and halfway up the sides of the pan.
-
Bake for 10 minutes, or until fragrant. Let cool slightly and maintain oven temperature while making the filling.
Make the filling:
-
In a microwave-safe bowl, microwave the chopped chocolate in 30-second bursts, stirring between bursts, until melted and smooth. Let cool.
-
In a large bowl, use an electric mixer to beat the cream cheese on medium speed until completely smooth and free of lumps, scraping down the bowl as needed. Add the sugar, cream, and cocoa powder and beat until well combined. Scrape down the sides of the bowl to make sure all cream cheese is being incorporated. Add the eggs and yolk, one at a time, beating just until smooth. Gradually beat in the peppermint extract and melted chocolate until just combined. Be careful not to overbeat.
-
Pour the batter into the cooled crust. Tap the pan against the counter to release any air bubbles. Place the pan in a larger roasting pan. Pour boiling water into the roasting pan until the water is about halfway up the sides of the cheesecake pan. Bake at 325°F for 1 hour to 1 hour 15 minutes, or until the top looks slightly dry but the middle is still wobbly like Jell-O. Err on the side of underbaking rather than overbaking.
-
Turn off the oven and crack the oven door open and allow to cool for 45 minutes. This will prevent cracks.
-
Remove the cheesecake from the oven to a wire rack to cool to room temperature.
-
Refrigerate until completely chilled, at least 4 hours. Release the cheesecake from the pan onto a cake stand or serving plate.
Make the topping:
-
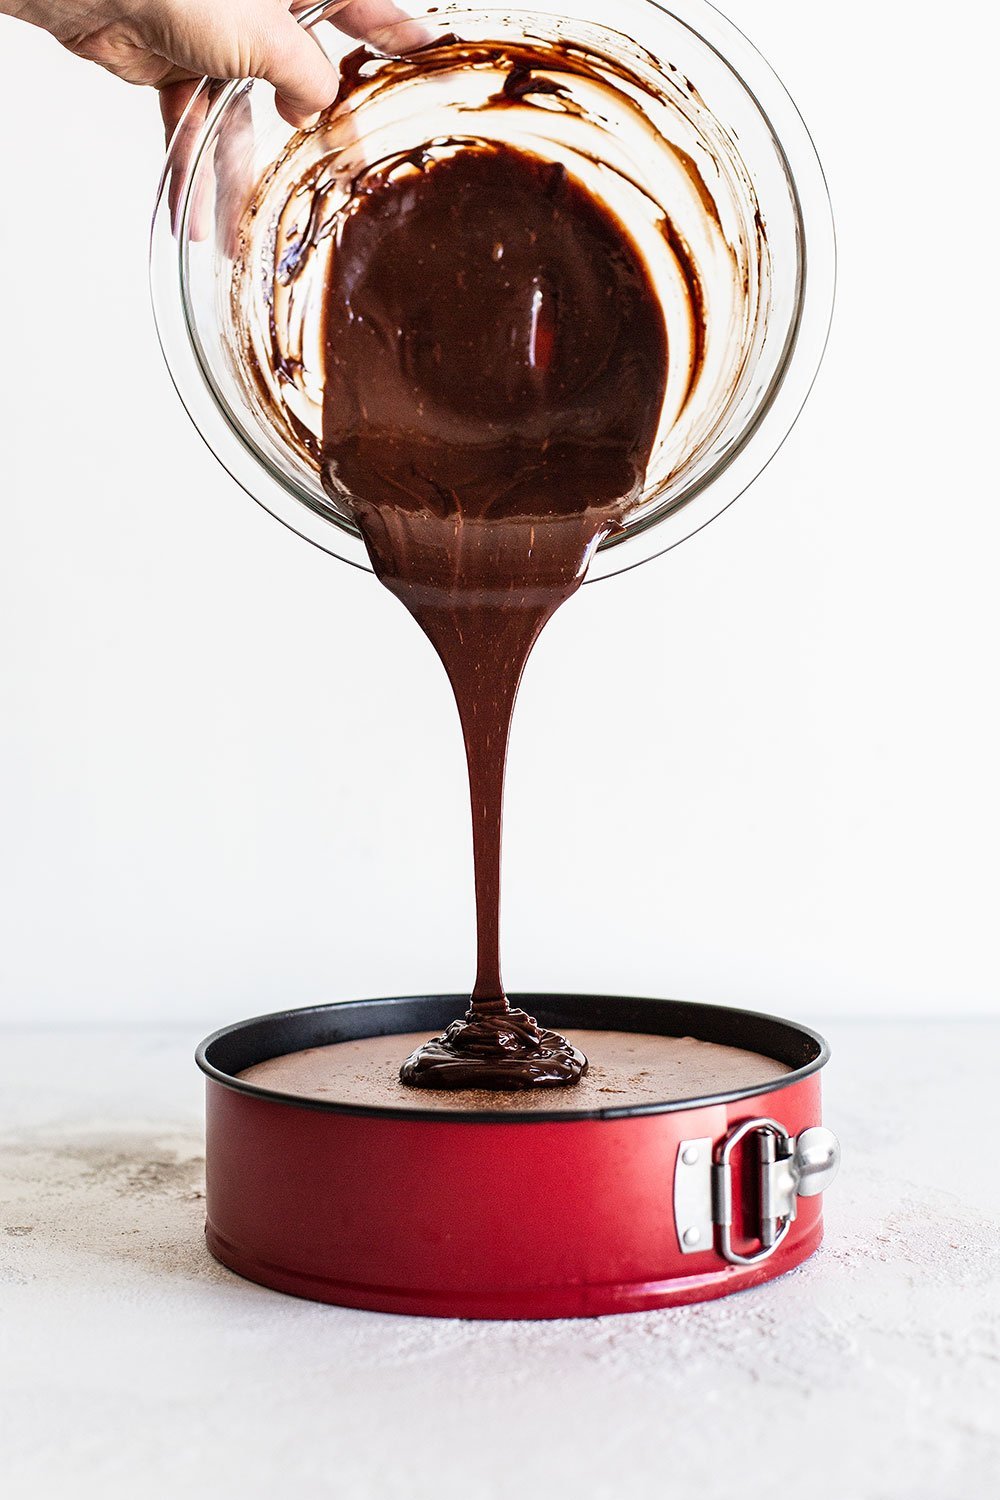
Place the chocolate chips in a medium heatproof bowl. In a small saucepan heat the cream just until simmering. Pour over the chocolate chips. Let sit for 3 minutes before stirring until the mixture is melted and smooth. If needed, allow to cool and thicken. Pour over the cheesecake.
-
Sprinkle with crushed candy canes. Serve or store in the fridge for up to 5 days.
Recipe Video
[adthrive-in-post-video-player video-id="G6rAzVen" upload-date="2021-01-04T23:45:29.000Z" name="How to Make A Water Bath for Cheesecake" description="Here's how to make a water bath for baking cheesecake! This is the number one key to perfectly smooth, luscious, and creamy cheesecake that bakes evenly and without cracks." player-type="default" override-embed="default"]


I just made this cheesecake and it was delicious! I used someone’s suggestion of crushed peppermint bark instead of candy canes and it was perfect. The only thing I think I goofed on was that I melted the chocolate for the topping in the microphone (oops, I guess I didn’t read the directions through on that) and then added the heated cream to it and stirred it in. What happened is when I put it on the cake, it looked like it separated a bit and there was an beigey look to the edges of the glaze. Did I overheat the cream, or did heating the chocolate first cause it to look “separated”?
Hi Beth! I’m so glad you enjoyed this cheesecake! It sounds like you probably overheated the cream and/or burned the chocolate. Unfortunately when cream gets too hot, several things can happen and you end up with a lumpy, dull and/or separated ganache. Burned chocolate will discolor or separate and have small burned bits through it. Carefully just bringing the cream to a simmer, then immediately removing from the heat and pouring over the intact chocolate, so it gently and evenly melts, should prevent this from happening next time!
I can’t find any peppermint extract at any of my local grocery stores 🙁 is there any other extract that will work for this recipe??
Hi Joanna! Any other flavor you like paired with chocolate will work just fine – or add vanilla instead and skip the additional flavor 🙂
I will be making this tomorrow for Christmas and This will be my first time attempting to make a cheesecake and I’m so nervous.
Hi Desiree! Aw, I’m sorry you were nervous! How did it go!? I’m sure it was delicious!
I made this and it turned out great! I used slow cooker lining bags. I double bagged it and didn’t use the aluminum foil.
Someone offered to pay me to make 3 of these after they tasted mine!! Absolutely delicious!! The water bath definitely did the trick. Thank you so much for sharing this!
Yay! That’s amazing, Tracie! So glad this recipe and method was such a hit for you 🙂
Could you replace the candy canes with peppermint bark bits?
Hi Alexis! Yes, you could definitely swap out the crushed candy cane decoration for chopped peppermint bark. Let us know what you think once you have given this cheesecake a try 🙂
This sounds yummy!! But… I don’t have a spring form pan and sadly there just aren’t enough people in my family for a whole cheese cake. Could a cut this recipe in half and bake it in a 9inch pie??
Hi Ericka! We haven’t tried cutting this recipe in half, so I can’t say for sure – but this recipe is written for a 9-inch springform, so you would need a smaller pan than a 9-inch pie pan if you were to attempt this. I would alternatively recommend making the whole cheesecake in the correct pan, and simply freezing any leftovers! Cheesecake freezes beautifully, and you can even freeze individually-wrapped slices, so you can enjoy single-serve desserts for the next two months! Tessa talks about how to do this, and many many more tips, in the Tip Box above the recipe 🙂
Came out perfect! Whole family loved it! Only two slices left.
Hooray! Thrilled to hear that 🙂
Delicious! The amount of peppermint is just right. Does not overpower at all. I will definitely be making this again!
So glad you enjoyed this cheesecake, Julie 🙂 Thanks for the comment!
Have you tried freezing this cheesecake? Wondering how it turns out.
Yup! Check out the pink tip box above the recipe for more details 🙂
OMG OMG OMG. I am a hobby baker making multiple things every week to give away, but this is one of the most delicious things I think I have ever made. So yummy. First time using a cheesecake bath. Worked like a charm (be sure your springform pan is in great condition with a tight seal). SO SO good.
So glad you enjoyed this cheesecake recipe!
This is truly the most decadent cheesecake ever!! It is so deliciously rich and such a crowd pleaser!! The combination of peppermint and chocolate is one of my all time favorites, and it is so well represented in this dessert. I made this for a gathering, and there wasn’t a crumb left! Seriously, these are the greatest, and using the water bath makes all the difference.
So glad you tried this cheesecake out!
The instructions were perfect! I don’t have a roasting pan, so I did the water bath in a large skillet. In reference to my previous question, I put the ganache on after the cheesecake cooled to room temperature. I didn’t put the candy cane pieces until it had set overnight and was out of the fridge. This was my first time baking a “real” cheesecake and it turned out amazing! No cracking and tasted delicious!
Do you wait until the cheesecake has been refrigerated for the 4 hours before adding the ganache? Or go ahead and do it, then chill?
Oh man… I messed up… was trying to half the recipe and then added full amount of cream. I haven’t added eggs yet. Any ideas how to salvage it?
Letting the melted chocolate cool while getting everything else mixed and ready made for hardening chocolate(I did stir it before mixing it in, it was stiffening up). Mixing it in with the cheesecake mix it went straight to the bottom of my mixer bowl and hardened up. Did the best I could to ‘fix’ it. Hope it turns out ok. For clarification should the melted chocolate be added in cooled or still warm so it actually mixes?
Can you used Peppermint Schnapps instead of extract? Just asking because I have that on hand and I am curious how it would compare to extract.
Have you ever used mint Oreos?
I haven’t, but I’m sure that would be tasty! Just be prepared for a strong peppermint flavor 🙂
I made this for a family Christmas dinner, and it was delicious! I used Hershey’s dark cocoa, which made for a richer chocolate color and flavor, Belgian semi-sweet chunks vs chopped/morsels, and I chopped candy cane Hershey kisses to sprinkle on top (vs candy canes-Andes mints would be tasty here too). My springform pan leaked, despite the foil cover, but it really only made the crust a little soggy. Still delicious! The texture and flavor to us was more like chocolate mousse pie, which was perfectly fine with us 🙂
Making this for christmas!! Is a water bath necessary? I have a spring pan. Using mint oreos because who doesn’t love mint?
This recipe was developed with a water bath to prevent cracks from forming. If you can’t be bothered, you can add a pan of water to the oven to add some steam but it won’t be 100% the same. You’ll also have to reduce the baking time if you don’t use a water bath.
First off, I love your website Tessa! Second, this recipe is da bomb .com!!! =)
I love chocolate and this hit my sweet craving at all levels. Thank you so much for everything that you do and sharing these amazing recipes.