

This post may contain affiliate links. Read our disclosure policy.


Lattice pie crusts used to intimidate me like crazy! They’re so beautiful, but when you’re in the middle of trying to prepare a lattice, it suddenly feels like you’re back in 10th grade math class and the teacher has just called your name to answer a question.
At least, that’s how it feels to me – unless I’m following step-by-step photos to make sense of all the weaving and layering of pie dough strips.
I’ve broken down the exact steps of how to make a lattice pie crust for any of your fruit pies. Believe me, if I can do it, you can too! You’ll impress yourself with how gorgeous your pies will bake up… not to mention your friends, family, in-laws, and maybe even your boss if you bring a pie to work!
So follow along with me, and let’s make a lattice pie crust together!
How to Make a Lattice Pie Crust
What You’ll Need to Make a Lattice Crust:
- Double batch of Pie Dough
- Flour, for sprinkling
- Rolling pin
- Ruler
- Pastry wheel, pizza cutter, or knife
- Baking tray or cutting board that fits in your fridge
What’s the Best Pie Dough Recipe for Lattice Crust?
My Best Ever Pie Crust recipe is ultra flaky, all-butter, and super easy to work with. It’s ideal for making a lattice crust.
What Kind of Pie Recipes Work with a Lattice Crust?
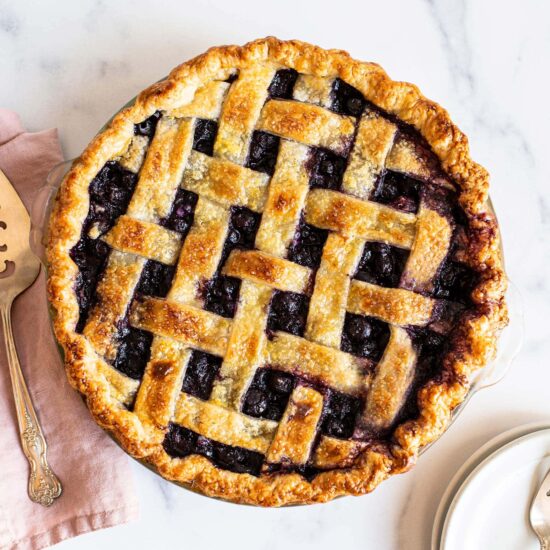
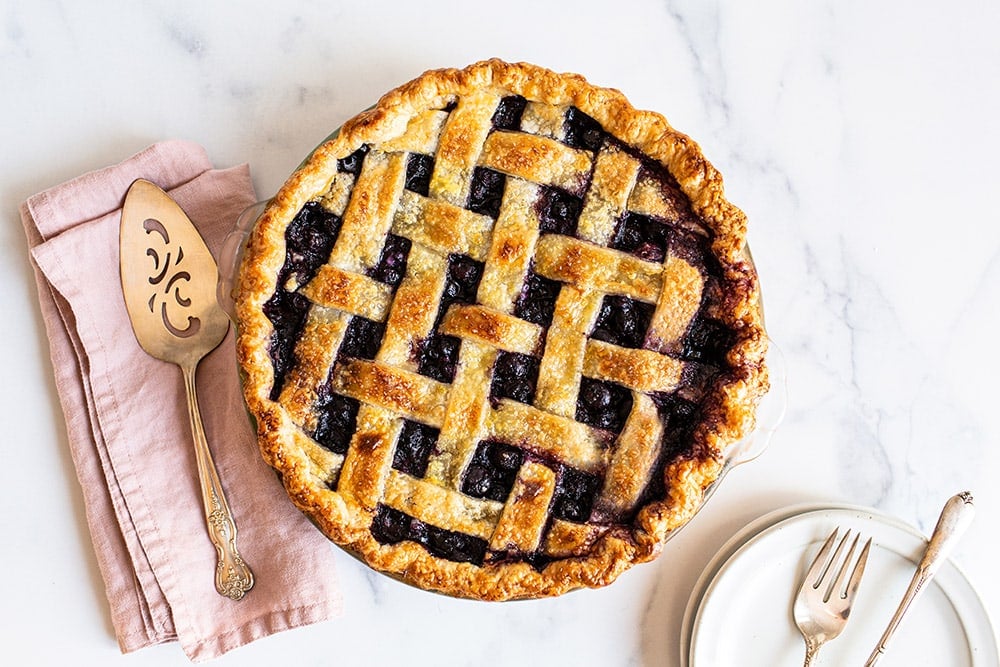
Any fruit pie will work wonderfully! My Blueberry Peach Pie, new Blueberry Pie recipe, or Apple Pie are perfect for a lattice crust.
Top 3 Tips for Making a Lattice Pie Crust:
- Make your pie dough the day before you plan to bake with your filling and allow the dough to chill, covered, overnight. This allows the gluten to rest so your pie dough rolls out easily without springing back.
- Keep the dough cold but malleable the entire time. It should be about 67°F. If at any point the butter in your crust even begins to look like it’s getting wet and melt-y, return it to the fridge. You can also place large ziploc bags of ice water on your countertop or worksurface for 10 minutes before rolling out your pie dough.
- Prevent your crust from burning by making an aluminum foil tent. This can come in handy during the last 20 minutes of the baking process. Simply cut a large piece of foil, fold the edges over, and carefully tent it over your pie in the oven. You can also place a large baking sheet on the rack directly above the pie to shield it from the heat.
Fun Ideas for Decorative Pie Dough Designs:
- Experiment with different widths of strips for your lattice. Traditional lattice involves 1-inch strips, but you can go for a more modern design with wider strips too!
- Use a decorative fluted pastry wheel to cut your lattice strips.
- Use mini cookie cutters to cut circles, leaves, stars, or whatever festive shape matches your pie and season. Use these either as a tile along the border of your pie or as a decorative accent.
How to Prepare a Lattice Pie Crust Video:
Steps for Preparing a Lattice Pie Crust:
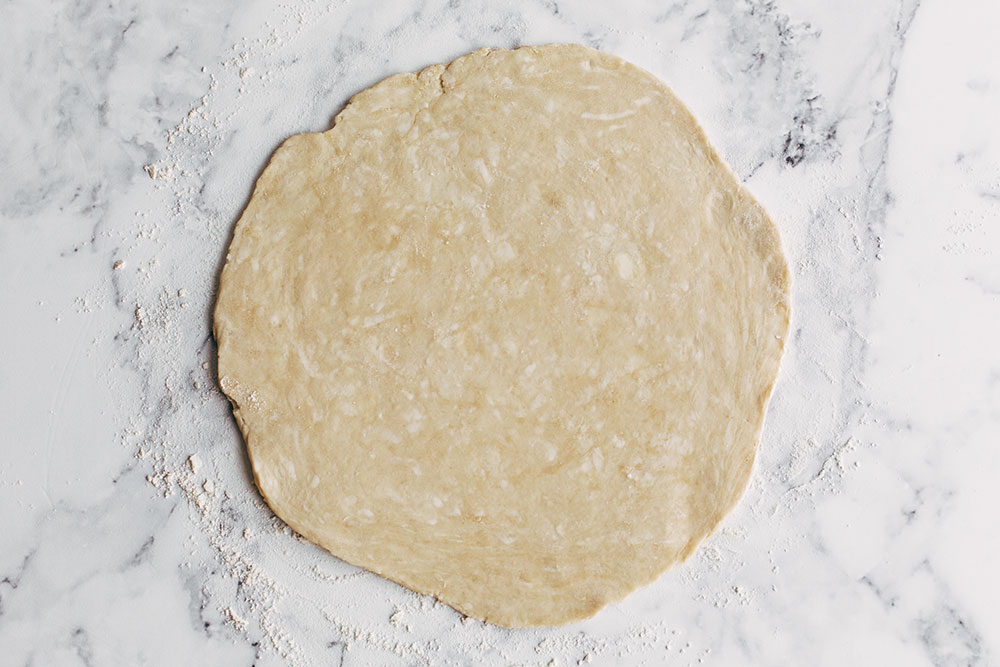
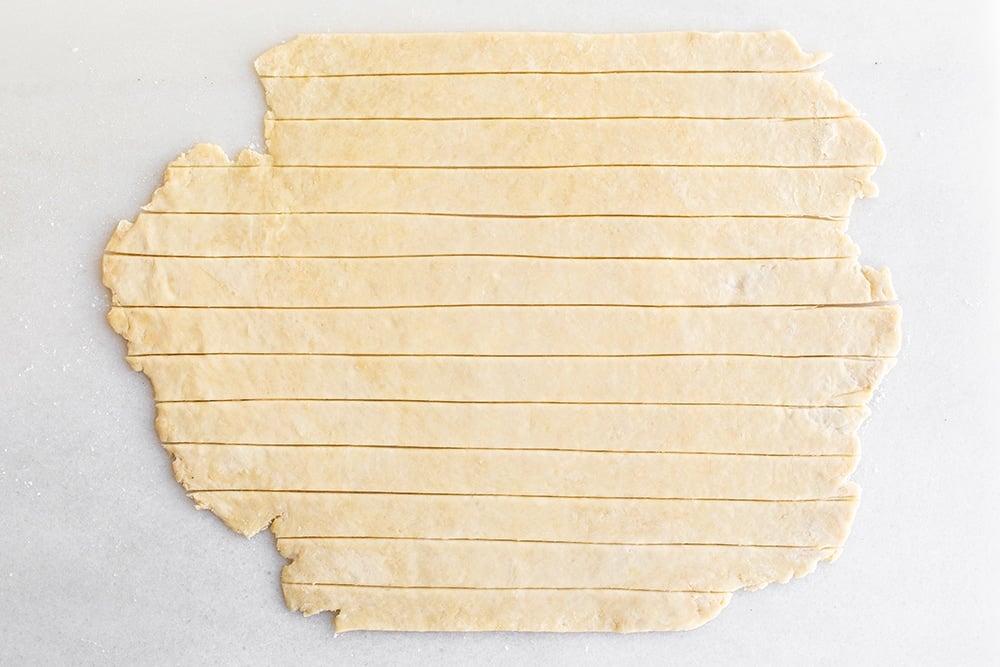
1. ROLL THE DOUGH OUT: After you’ve rolled out and shaped your bottom layer of pie dough into the pie pan, remove the other piece of dough from the fridge. Roll the dough out on a floured work surface. Keep turning the dough after every roll to ensure it doesn’t stick to the counter and is of even thickness.
Add additional flour to the dough, the counter, and your rolling pin as needed. Roll out into about a 13-inch circle with about an 1/8-inch thickness.
Don’t roll too thick, otherwise the overlapping parts of the lattice with two layers won’t cook through or become flaky.
2. CUT YOUR STRIPS: Using a pastry wheel or knife, cut 1-inch wide strips. If the dough becomes too warm to handle, transfer to a cutting board or baking sheet and refrigerate until firm again.
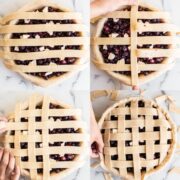
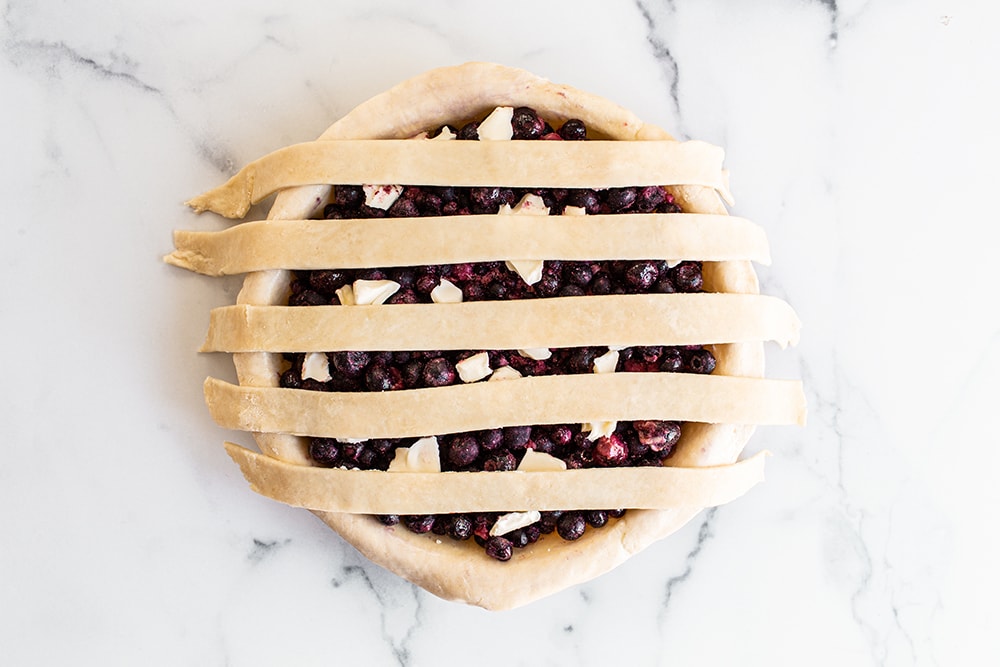
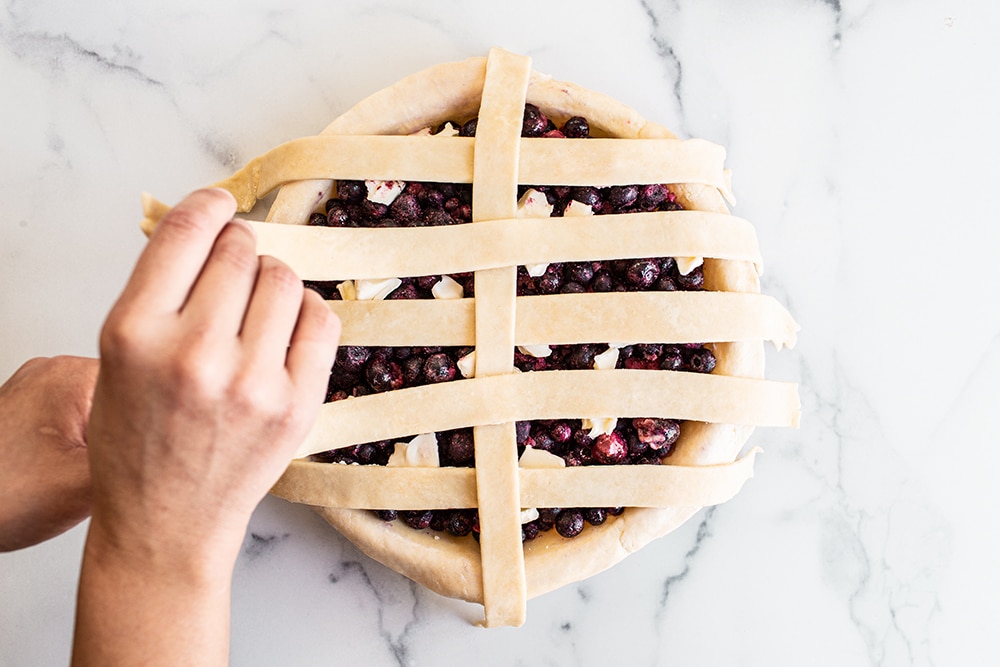
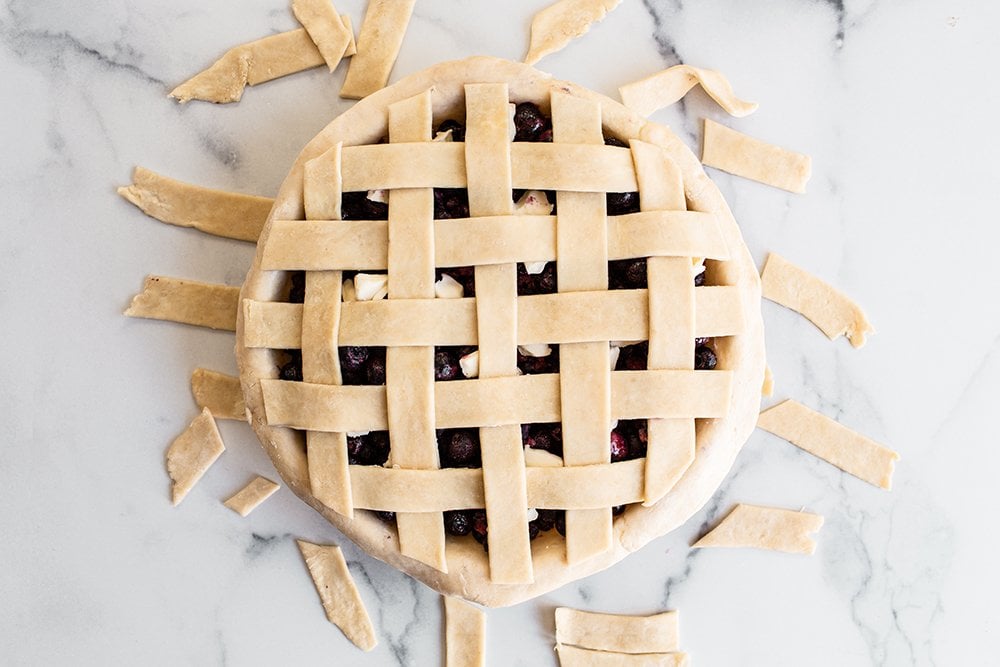
3. PLACE HALF YOUR STRIPS: Fill your bottom pie dough cavity with your pie filling. Place 5 to 6 strips of pie dough over the filling, spacing evenly.
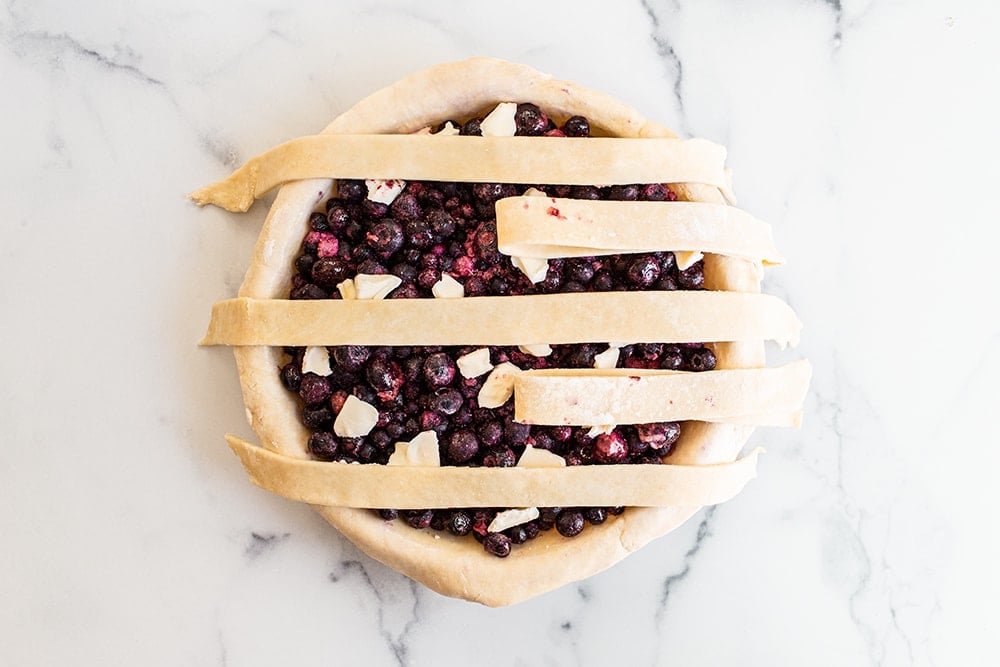
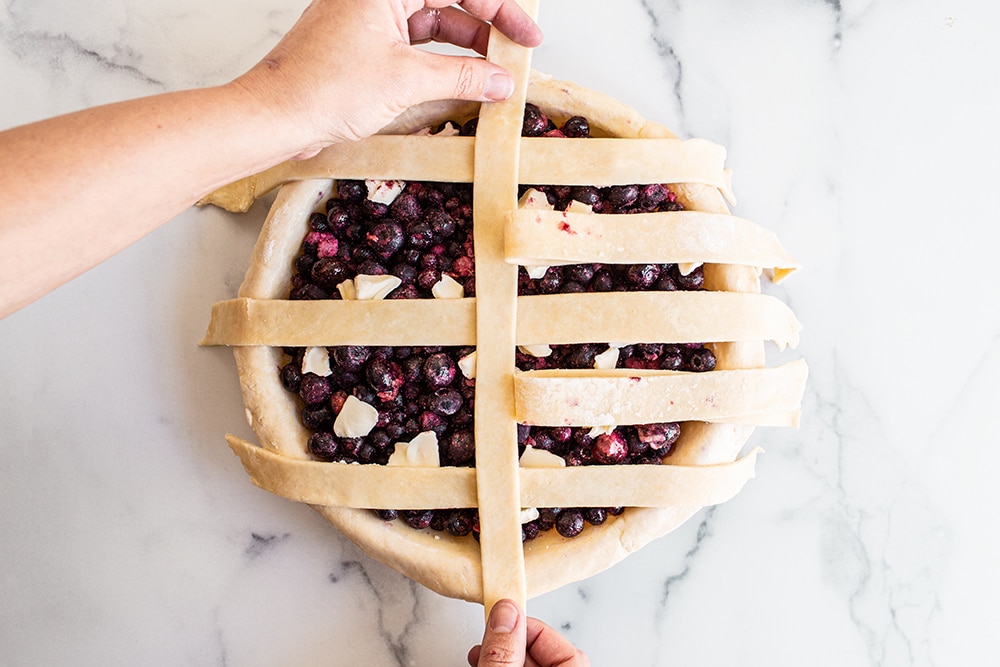
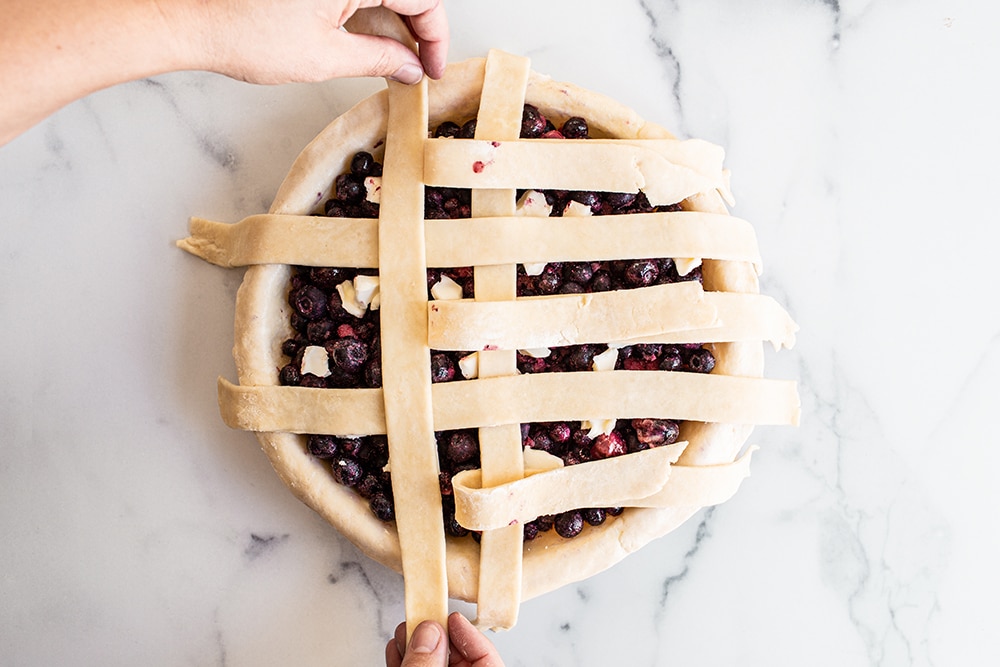
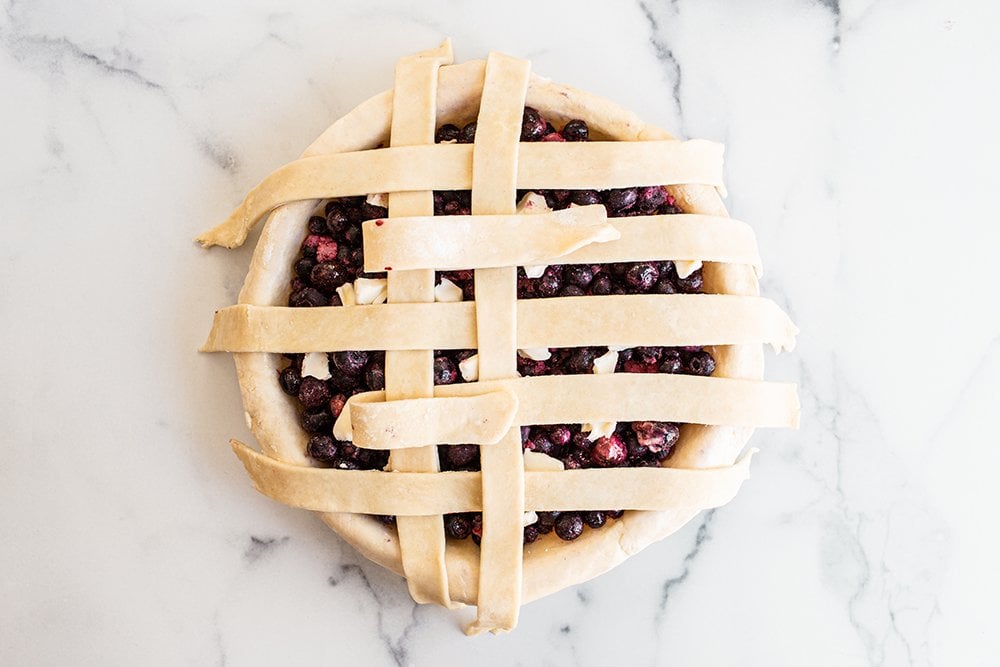
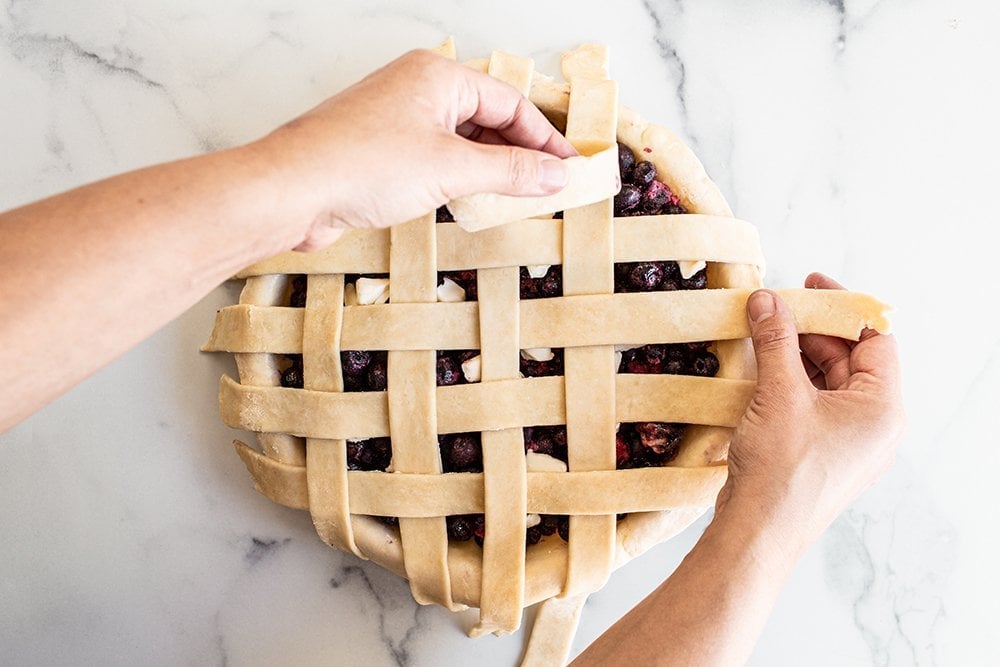
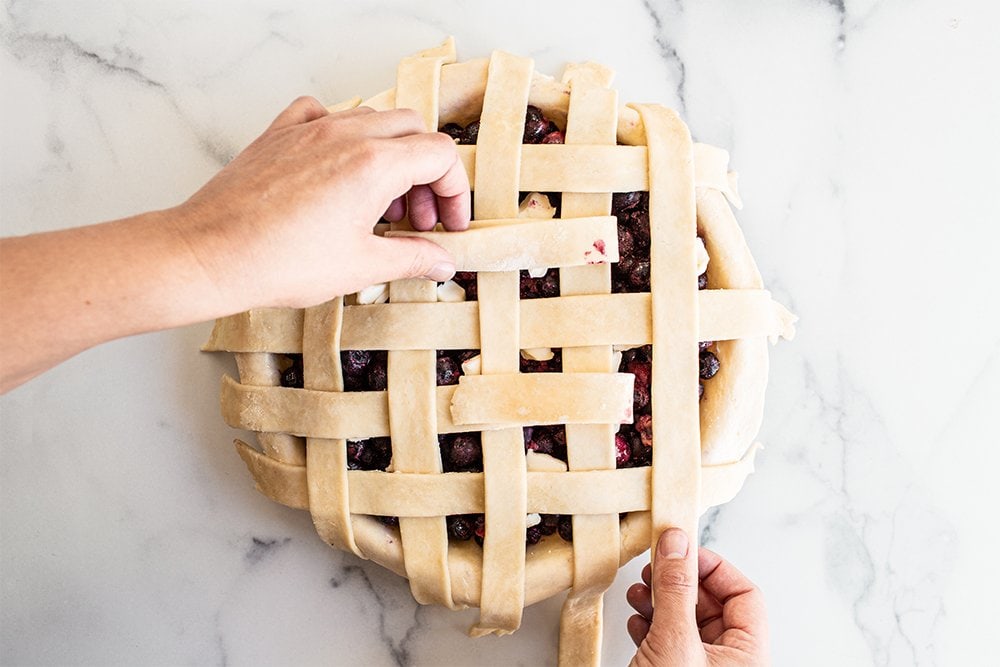
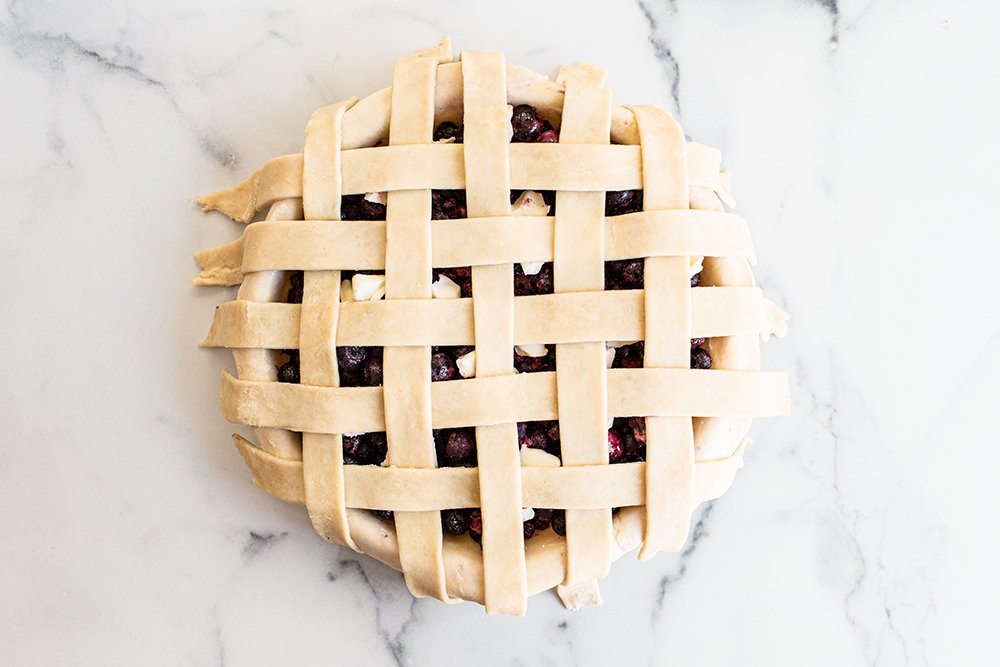
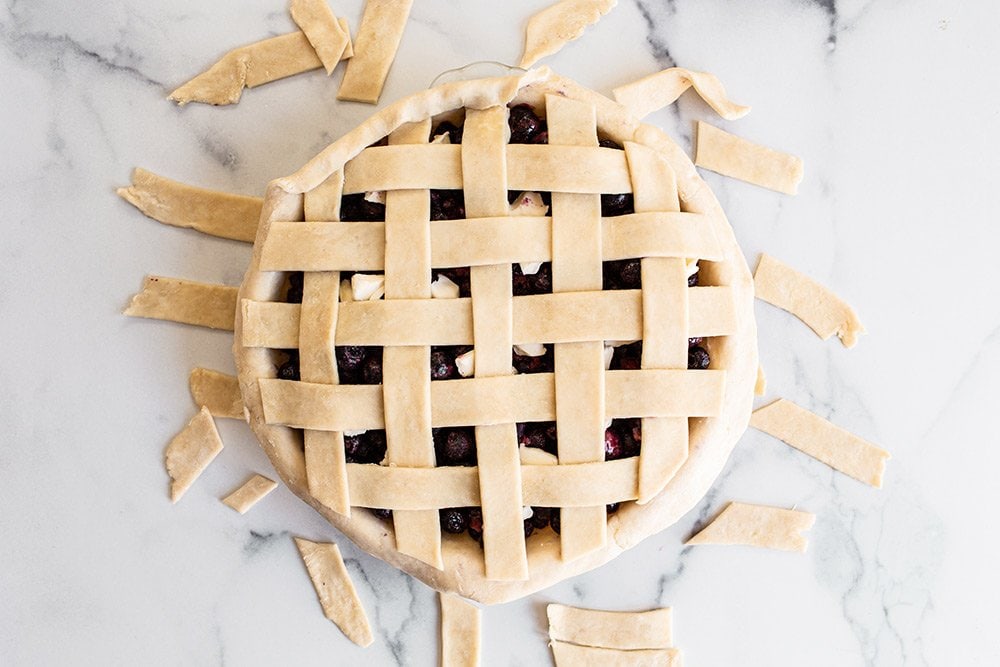
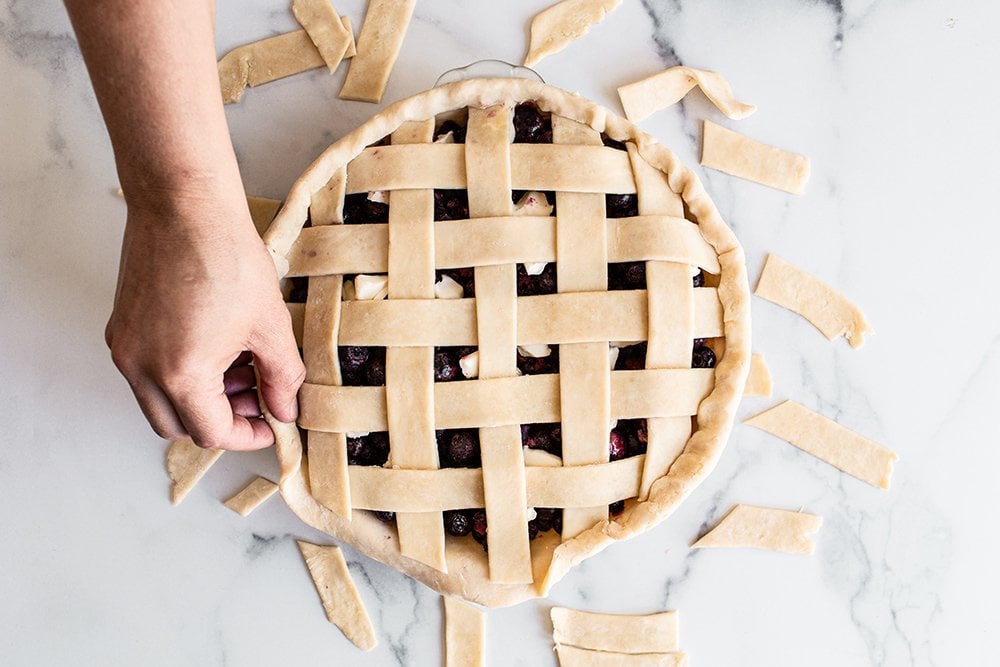
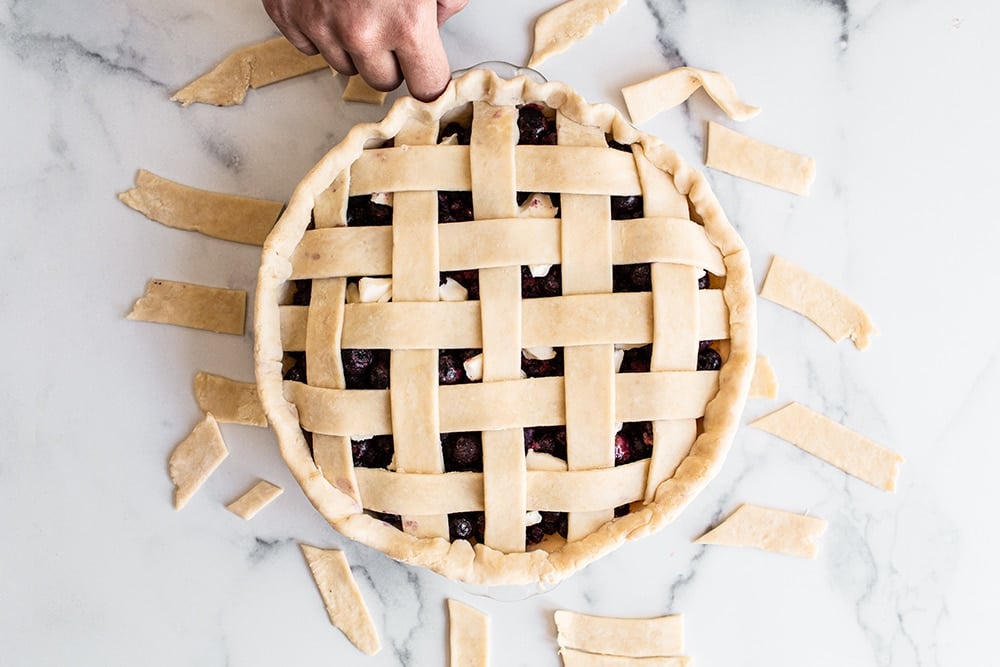
4. BEGIN THE LATTICE PATTERN: Fold back every other strip. Place a long strip of dough down the center going the opposite direction. Unfold the other strips back lengthwise and fold up the opposite strips. Place another strip down going the opposite direction. Repeat this weaving process until you have a lattice shape.
TIP: Don’t worry if the written directions don’t make much sense. Simply follow the step-by-step photos here or watch the video and just follow along!
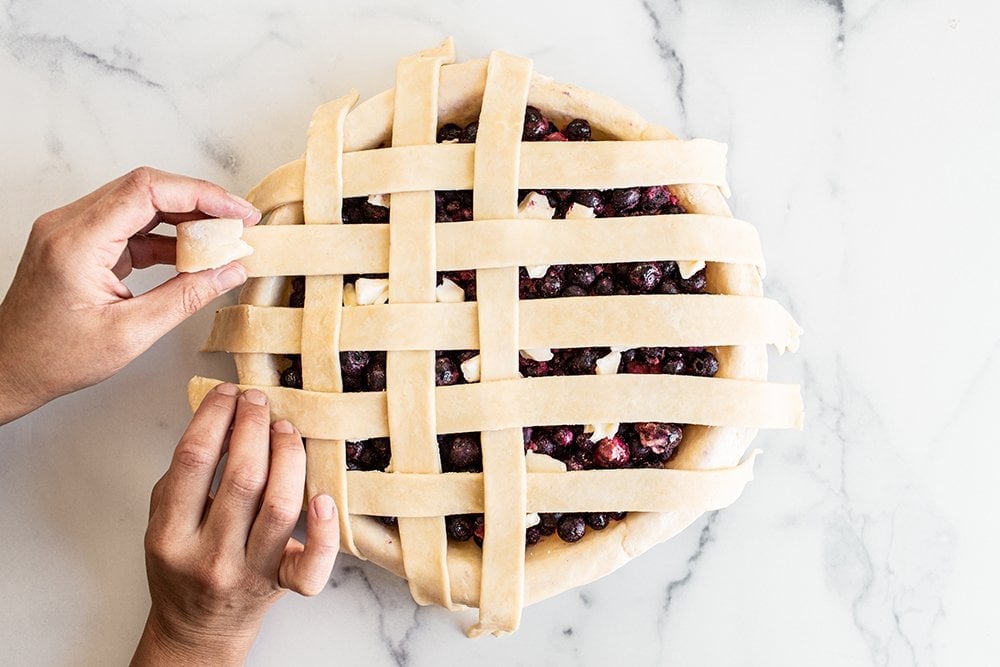
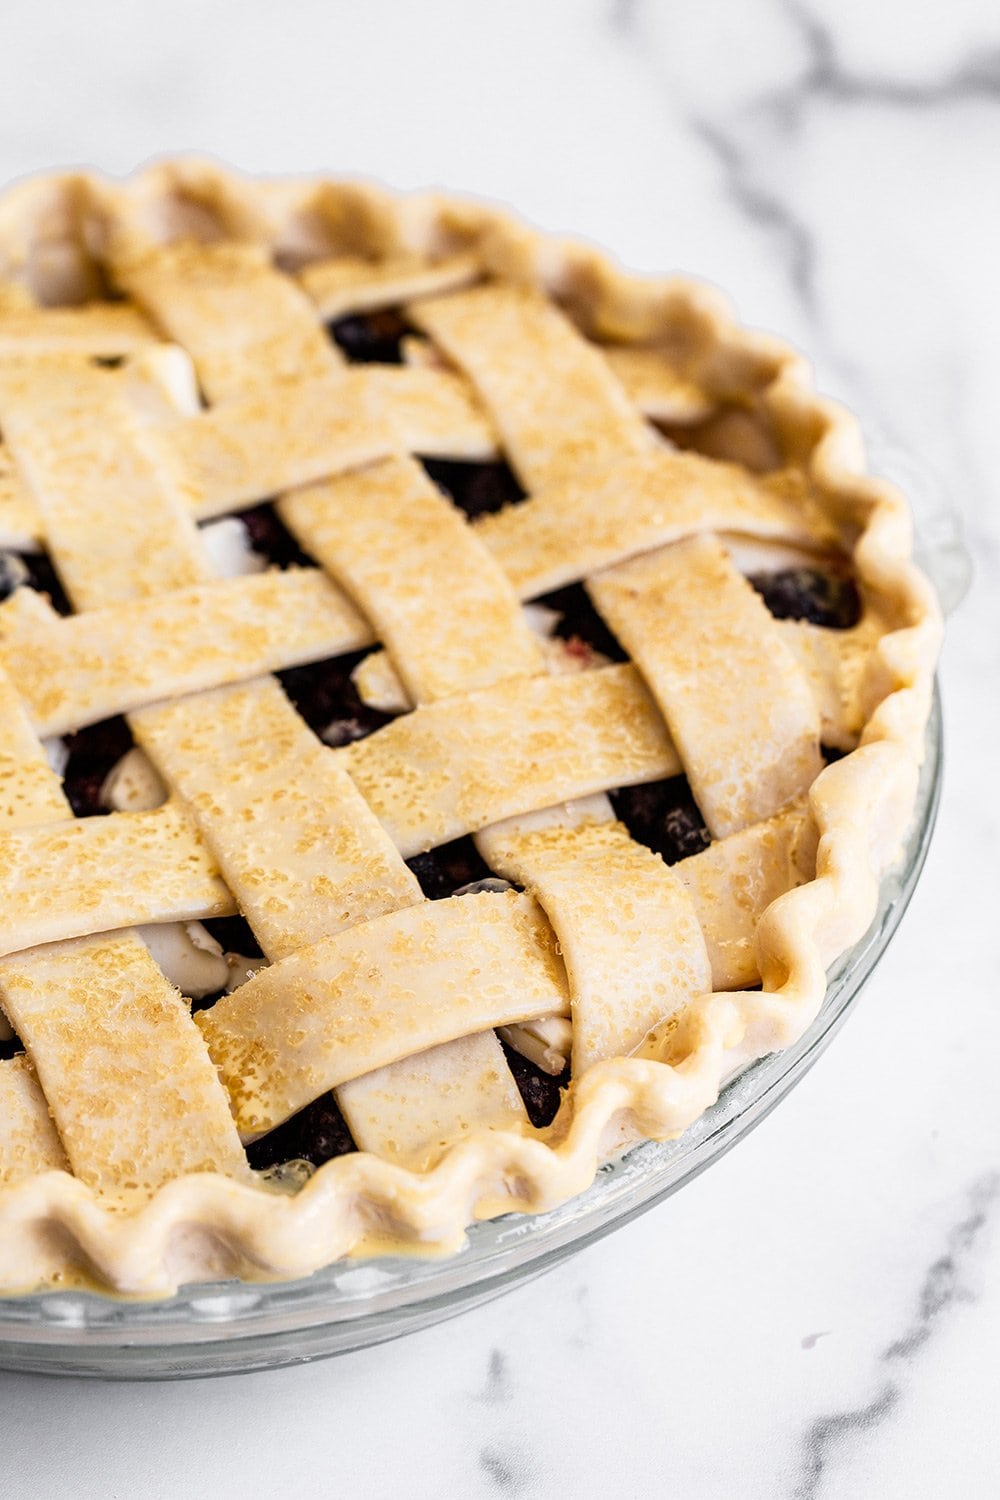
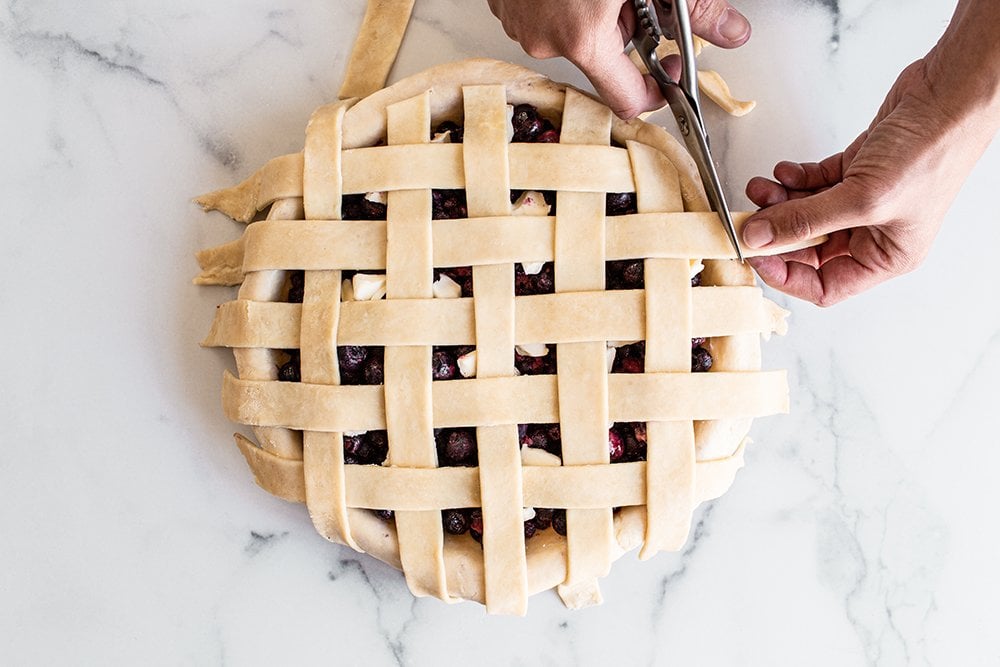
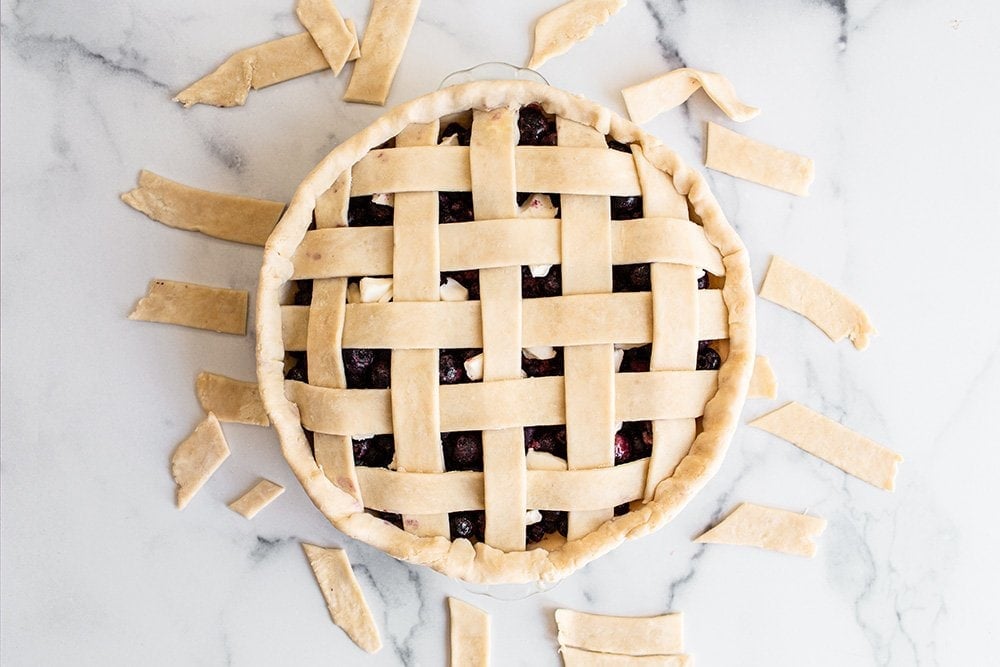
6. TRIM THE EDGES: Trim the lattice strips so they’re slightly less than flush with the bottom piece of dough. This is key so your border isn’t too thick or so heavy that it doesn’t cook through or it slumps over.
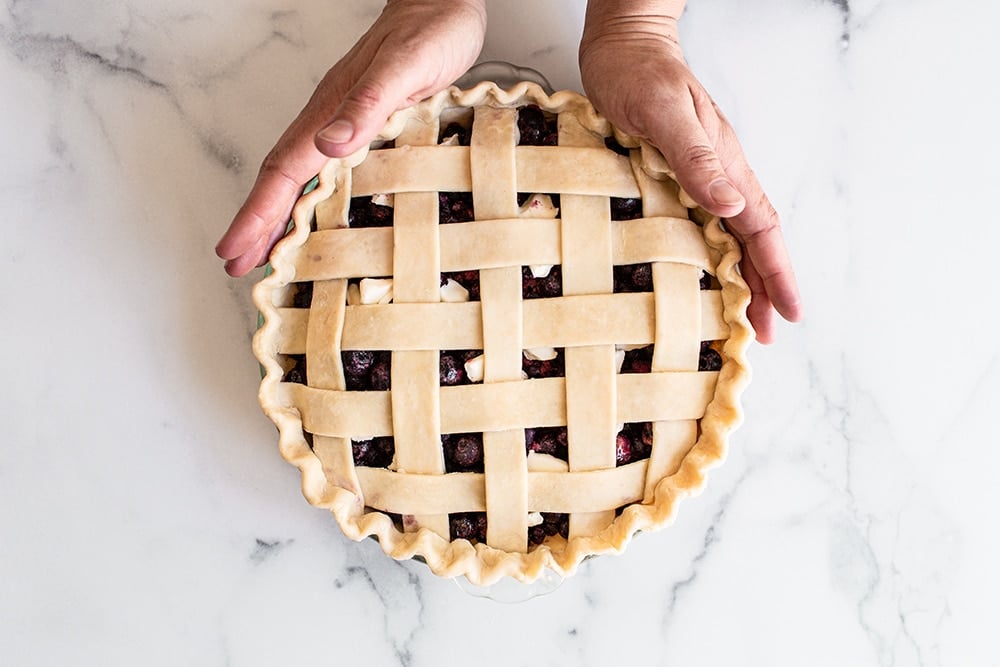
7. FINISH THE BORDER: Tuck the edges up and over to create a border, sealing everything together by pressing with your fingers. Use your thumb and forefinger on one hand along with the forefinger knuckle of your opposite hand to make a crimping pattern. Make the pattern more exaggerated than you think, it’ll loosen during the baking process. Transfer to the freezer for 15 to 30 minutes before baking as the recipe instructs.

Pie Recipes
More Pie Tips
Photos by Ashley McLaughlin.

Author: Tessa Arias
I share trusted baking recipes your friends will LOVE alongside insights into the science of sweets. I'm a professionally trained chef, cookbook author, and cookie queen. I love to write about all things sweet, carb-y, and homemade. I live in Phoenix, Arizona (hence the blog name!)
About Tessa...
I share trusted baking recipes your friends will LOVE alongside insights into the science of sweets. I'm a professionally trained chef, cookbook author, and cookie queen. I love to write about all things sweet, carb-y, and homemade. I live in Phoenix, Arizona (hence the blog name!)
Leave a Comment & Rating
Add a Review or Question
© Handle the Heat - handletheheat.com

As a trained chef and cookbook author, I share trusted baking recipes your friends & family will love alongside insights into the science of sweets. I help take the luck out of baking so you *always* have delicious results! Learn more here.

-
6 Crowd-Pleasing Thanksgiving Recipes


Order your Ultimate Cookie Handbook Hardcopy!

Join the Handle the Heat Community

Instead of digging through cookbooks and magazines and searching the internet for amazing recipes, subscribe to Handle the Heat to receive new recipe posts delivered straight to your email inbox. You’ll get all the latest recipes, videos, kitchen tips and tricks AND my *free* Cookie Customization Guide (because I am the Cookie Queen)!
Looking forward to cooking another of your delicious dishes for my next social outing, planned for 3 October, by when we hope we’ll be out of lockdown. I took one of your dishes to an outing with this group earlier this year and it was received rapturously.
Clever way of weaving, folding back some of the strips.
Thanks for commenting, Meredith! Be sure to tag us in your bake on Instagram (#handletheheat) so we can see your final result!
These look amazing! Love how juicy they look! Love the cookie method!
Thanks, Tessa
Thanks!
Thank you for taking the painstaking effort to provide the video. Seeing the process makes me more able to want to complete a lattice crust. I will try this on my next pie!
I’m so happy that helped! I’m a visual person as well, and sometimes directions can be slightly confusing when you’ve never made something before 🙂 Let me know how your first lattice pie crust goes! 🙂